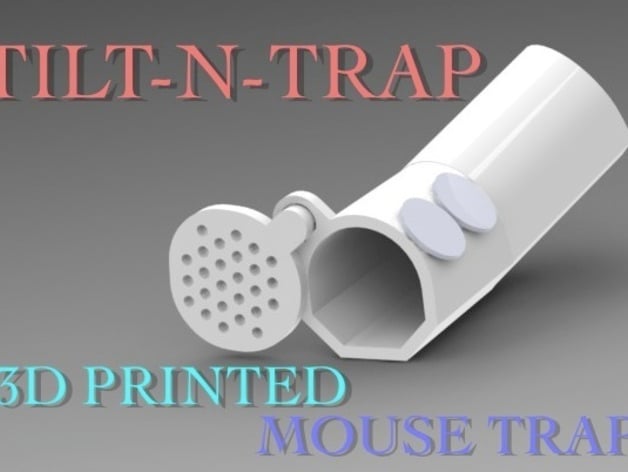
TILT-N-TRAP (MOUSE TRAP)
thingiverse
Let's catch the mouse! This 3D model, designed for any 3D printer, is easy to build with no overhangs. Just print all three parts and you're ready to go. If you don't have a 3D printer, partner up with someone who does and split the rewards. The mouse trap has been tested in SolidWorks and should work effectively. Please let me know if you build this so I can get your feedback for improvement. Updates: - On March 24, 2010, it worked successfully! Watch the YouTube video here. - On March 9, 2010, watch the Tilt-N-Trap in action on YouTube. - On March 4, 2010, thanks to erickphd and his students at Penn College of Technology, there are modifications to this model. If you've already printed it, don't attach the counterweight rail to the base; instead, tape two quarters to the right side of the Tilt-N-Trap for a more sensitive design (as tested with an average sensitivity of 27 grams). - On March 4, 2010, the first model has been printed. Check it out here. - On March 3, 2010, the 3D model was added to 3D Content Central. View a 3D model you can spin around and zoom in on by visiting this website using Internet Explorer (not compatible with Firefox). - On March 2, 2010, erickphd will make a model on March 3, 2010. More information coming soon. It will be printed on a Dimension uPrint machine. Build instructions: Tools needed: - 3D printer - Knife - Screwdriver - Loose change or weights - Glue (crazy glue) Steps: 1. Print all three parts (all units are in mm). 2. Clean up rough edges (ensure the base and door are smooth). 3. Glue mouse trap base to mouse trap top using crazy glue. 4. Add door to the front of the assembly. 5. Use a screwdriver to expand the hinge on the back of the door (you might need to add paper to keep it expanded). 6. Add peanut butter to the back upper right of the trap. 7. Lay the trap down with the mouse trap door open. 8. Tape one to two quarters to the right side of the model (check the picture for placement). The weight needed may vary based on your printer settings, material used, and other factors. 9. Testing: tape a quarter to the back of the model. If it triggers, you're set. If not, keep adding coins until it does trigger. 10. Remove the test quarter from the back of the model. 11. Place the trap(s) near walls where mice play (mice have poor vision, so they use their whiskers and run along walls). 12. Await your dinner!
With this file you will be able to print TILT-N-TRAP (MOUSE TRAP) with your 3D printer. Click on the button and save the file on your computer to work, edit or customize your design. You can also find more 3D designs for printers on TILT-N-TRAP (MOUSE TRAP).
