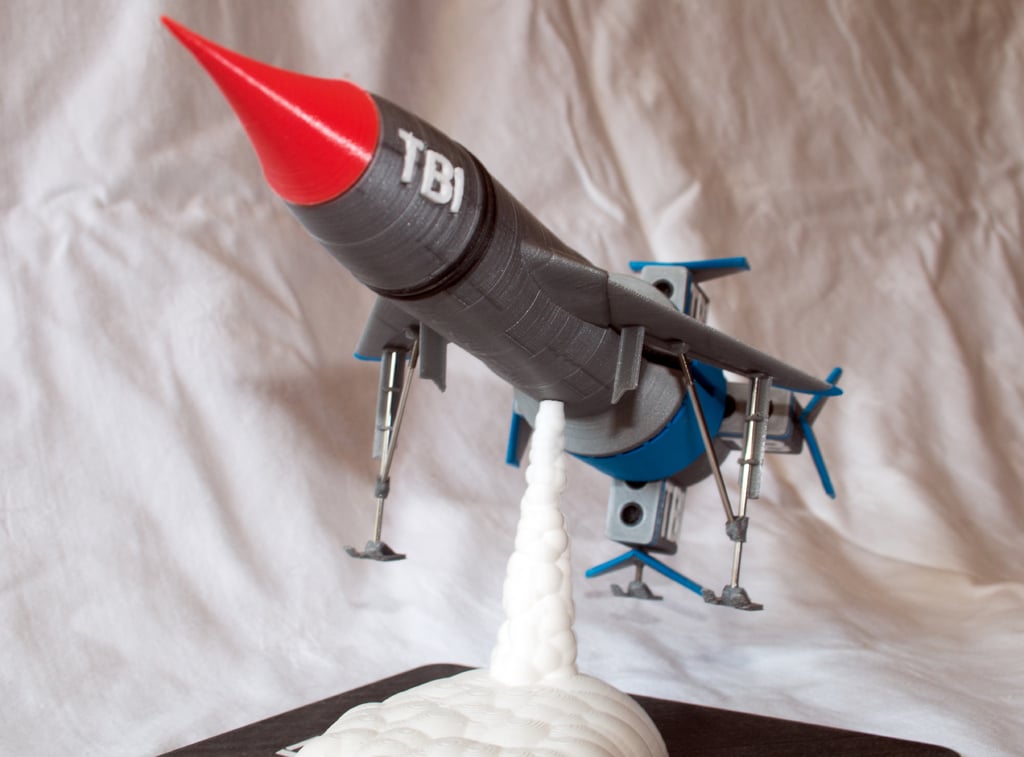
Thunderbird 1
thingiverse
First two requests: 1) Please print this design. 2) Then take a picture and create a "Make" to show us all how well it worked. Thanks! This design is very much inspired by Len Hickman's excellent Thunderbird 2 and 3 models, both of which I enjoyed printing and building. https://www.thingiverse.com/thing:440767 https://www.thingiverse.com/thing:406777 There was no similar multi-part model of TB1 that had the detail that I wanted, and my painting skills are such that I like everything to print in the right color, so I created my own. It prints in over 80 parts, but a lot of these are letters, so don't get worried! | Part | Colour | Support | Brim | Print | Notes | |-------------------|----------|---------|-------|-------|---------------------------------| | Body | Silver | No | No | 1 | | | Body_Clips | Black | No | No | 1 | | | Body_HText | White | No | No | 1 | | | Body_VText | White | No | No | 1 | | | Body_Thruster | Silver | No | No | 1 | | | Engine_Bottom | Silver | No | No | 1 | | | Engine_Blue | Sky Blue | No | No | 1 | | | Engine_Text | White | No | No | 1 | | | Exhaust_Cloud | Black | Yes | Yes | 2 | | | Skid | Silver | No | No | 3 | | See next section regards (*) items. ### Gear and Stand You have a few options regards whether to print landing gear and use stand. 1) No gear, no stand Print 4x "Winglet" all without "Inc Gear" and ditto 1x"Wings". Print "Body_Thruster" to fit into stand hole. The wings can be moved between launch and horizontal flight modes, and you need to use your throat, lips, and tongue to make the right noises as you switch. 2) Might want gear later Print 3x"Winglet" and 1x"Winglet_Inc_Gear". The one with the gear hole goes at the bottom! Print 1x"Wings_Inc_Gear" Print 1x"Covers" as these can be fixed into the cutouts under the wings with double-sided tape. Decide for yourself regards using stand or printing "Body_Thruster". 3) Want gear and stand! Print winglets and wings as per option (2) above. Print 1x"Covers_Inc_Gear", 2x "Gear_Mounts", and 3x"Skids" Assemble gear using 2mm bicycle spoke as shown in picture. Long section of spoke is 58mm and short 48mm, but you may need to tweak if it doesn't look right. Threaded end of spoke goes into short mount. This mount and the covers are then fixed to the cut out in the wing as shown (note that I've added more contact area in the parts I uploaded). You'll also need a very short length of spoke to attach the rear foot to the winglet. Adding more infill to engine and fueldrum also helps balance as it does tend to be nose heavy, and this is made worse if the rear foot extends too far from the body. Pretty much all printed parts will need chasing out with a 2mm drill to let the spokes push/screw in, and the gear is fiddly and delicate so use the stand! ### Feedback All feedback welcome, as are better designs for the exhaust cloud. Or maybe someone with great painting skills can make it look more like hot rocket exhaust and less like shaving foam! BTW, the "group shot" shows an unfinished small scale prototype, the 1st full size build that prompted a fair few changes to seams and text, a test nose to check these changes (printed in Thunderbird 2 green, yikes!), and my final one with landing gear. I slightly rushed my final one, and the "no gear" one actually looks better finish wise. Ah well.
With this file you will be able to print Thunderbird 1 with your 3D printer. Click on the button and save the file on your computer to work, edit or customize your design. You can also find more 3D designs for printers on Thunderbird 1 .
