Thinking Cleaner for iRobot Roomba 700 or 800
thingiverse
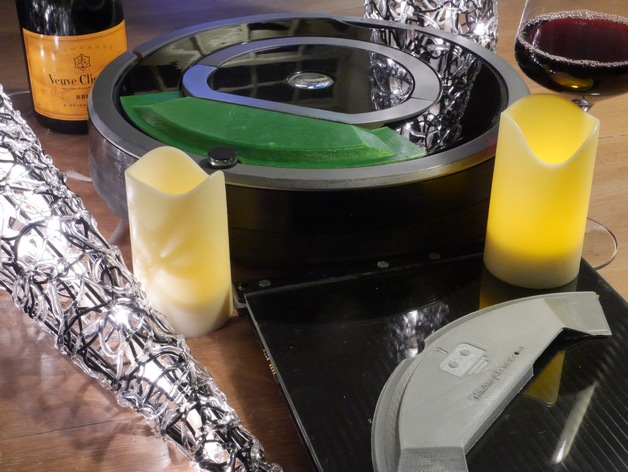
To get the Thinking Cleaner 500/600 to fit perfectly on a Roomba 700 or 800 series, you need to focus on a small but crucial detail. The heart of this process is the plastic faceplate where the PCB (Printed Circuit Board) is located. To do this, you will have to take out the PCB from its housing by carefully removing it from the faceplate, as this may void your warranty. You can look at our images which clearly show how to do this. Using a sharp knife, you can quickly and safely remove the rubber adhesive that held the board in place by cutting it around all four corners and down the center of the gap. Once this is done, you should be able to gently pull out the PCB. Next, print out the protective cap for your Roomba 700 or 800 using a 3D printer, making sure to fix it onto the vacuum with double-sided tape. Please note that the handle on these units varies slightly so adjustments will need to be made accordingly. For the best results when printing this design, you should place the object upside down and make use of support structures. On some printers like the Makerbot Replicator or FabTotum, you might have to turn your object in a particular direction in order for it to fit properly. Once you have successfully printed the protective cap, all that is left to do is use sandpaper to give it a smooth and polished finish. After that, simply watch our tutorial video (link: https://youtu.be/ztiTtWBcoXg) on how to properly install your printed cover on your Roomba.
With this file you will be able to print Thinking Cleaner for iRobot Roomba 700 or 800 with your 3D printer. Click on the button and save the file on your computer to work, edit or customize your design. You can also find more 3D designs for printers on Thinking Cleaner for iRobot Roomba 700 or 800.