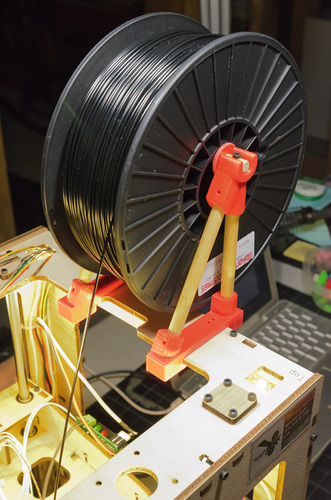
Thing-O-Matic Filament Spool Bracket
pinshape
Summary Yet another essential tool for any maker! No need for complicated filament guides - this innovative design lets you load your filament with ease on top of your Bot or benchtop. Instructions Print the parts, which are pre-mirrored for convenience. Cut three-eighths inch diameter dowels to precise lengths: two at 112 mm, two at 134 mm, and one at 114 mm. Drill out the dowel holes if needed and assemble the parts according to the design. If the dowels fit loosely, install screws in pilot holes for added security. Trim or sand the parts to achieve a snug fit on your Bot as shown. Drill small bolts or rods into the 114 mm axle ends to keep the top brackets in place and prevent the axle from spinning. This should be a loose fit so that you can easily lift it out for color changes. Drill out or trim the bushings for a precise fit on the axle. Position the bushings on the axle as shown, using small inner ones (two or four) to provide gentle friction and keep your spool from unwinding. The outer ones will keep the spool centered.
With this file you will be able to print Thing-O-Matic Filament Spool Bracket with your 3D printer. Click on the button and save the file on your computer to work, edit or customize your design. You can also find more 3D designs for printers on Thing-O-Matic Filament Spool Bracket.
