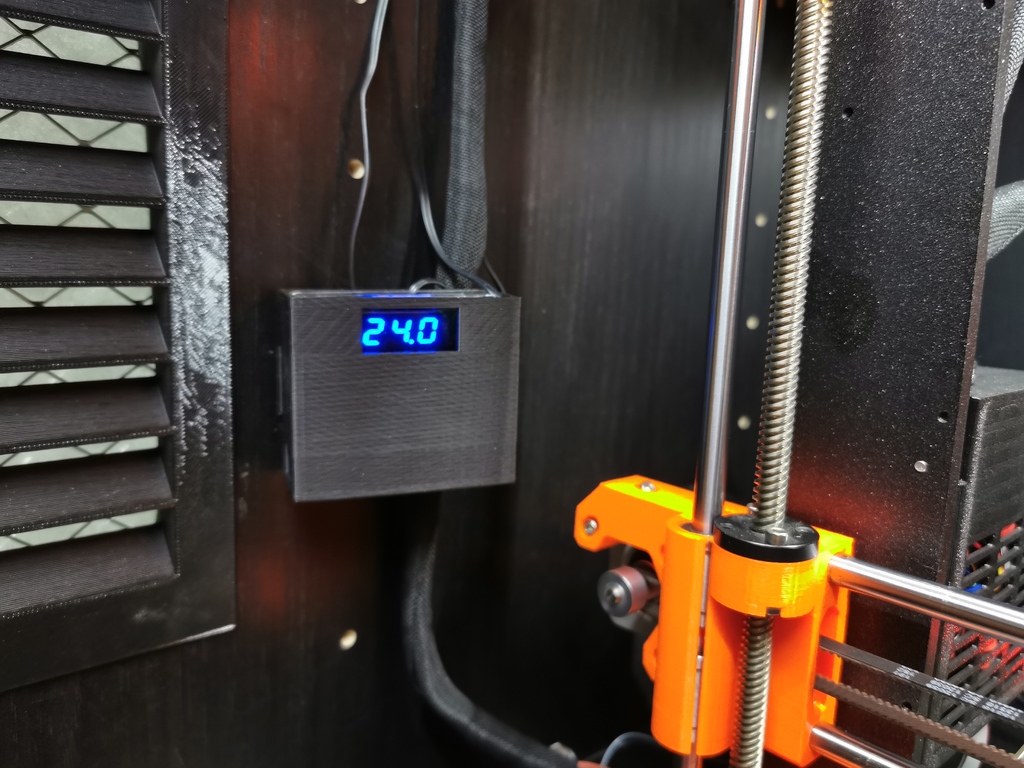
Thermostat for print enclosure (air extraction control)
prusaprinters
<p>English version below</p><p>Thermostats pour caisson 3D</p><p>Pourquoi un thermostat :</p><p>Un caisson pour les impressions 3D est très intéressant pour la qualité d’impression et “indispensable” pour certains filaments. Le souci c’est que durant de longue impression la température peut monter trop haut. Le thermostat va donc réguler la température du caisson pour qu'il ne soit ni trop froid ni trop chaud,</p><p>Fonctionnement :</p><p>Dans notre cas, la montée en température n’est pas un problème car les extrudeurs et les tapis chauffants émettent beaucoup de chaleur. C’est pourquoi nous allons utiliser un ou plusieurs ventilateurs pour extraire de l’air chaud du caisson quand c’est nécessaire. Ainsi nous pouvons maintenir le caisson dans une fourchette de température idéale.</p><p>Pour mon setup le thermostat et les ventilateurs sont en 24 V, car le système est directement relié à l'alimentation de l’imprimante (Prusa I3 MK3S+) qui est en 24 V. Dans le lien que je vous fournis pour l’achat du thermostat, différents modèles sont disponibles avec d'autres tensions (12 V, 5 V). A vous de vous renseigner sur la tension de votre alimentation.</p><p>Thermostat : <a href="https://www.aliexpress.com/item/1005002488284867.html?spm=a2g0o.9042311.0.0.27424c4dRL4SqT">https://www.aliexpress.com/item/1005002488284867.html?spm=a2g0o.9042311.0.0.27424c4dRL4SqT</a></p><p>Ventilateur 24 V : <a href="https://www.aliexpress.com/item/1267695738.html?spm=a2g0o.9042311.0.0.27424c4d8YZcOF">https://www.aliexpress.com/item/1267695738.html?spm=a2g0o.9042311.0.0.27424c4d8YZcOF</a></p><p>Les ventilateurs en 12 V sont beaucoup plus simple à trouver, La plupart des modèles pour PC sont compatibles.</p><figure class="image"><img src="https://media.prusaprinters.org/media/prints/131282/rich_content/e07a34ab-d126-4588-a9ad-2ed1c6fbe01c/img_20220207_105301.jpg#%7B%22uuid%22%3A%2208b81a4b-3584-4e9c-967e-f959ed67629d%22%2C%22w%22%3A3648%2C%22h%22%3A2736%7D"></figure><p>Couper l'extrémité des pins à l'arrière du circuit :<img src="https://media.prusaprinters.org/media/prints/131282/rich_content/75678d51-56b5-4f54-95b7-ccfc41c4d411/img_20220207_142543.jpg#%7B%22uuid%22%3A%22d9f101ac-85f1-4cfa-80d7-a70492dd737d%22%2C%22w%22%3A3648%2C%22h%22%3A2736%7D"></p><p>Connection :<img src="https://media.prusaprinters.org/media/prints/131282/rich_content/5e43f002-6392-4107-94b9-e24a21b3d85e/img_20220208.jpg#%7B%22uuid%22%3A%2235658b43-8c97-436b-a5c6-6f6224d43a47%22%2C%22w%22%3A952%2C%22h%22%3A1368%7D"></p><p>Programmation :</p><p>Une fois branché, pour pouvoir paramétrer il faut maintenir le bouton de gauche quelque secondes. Puis avec les boutons du milieu et de droite. Modifier le réglage avec la lettre “H” (heater) par “C” (cooling). Pour l’autre réglage je reste sur P0. Personnellement je règle le thermostat à 30 °C. Ce qui a pour effet que les ventilateurs d’extraction s'allument quand la température atteint 32 °C et ce coupe quand elle descend à 28°.</p><p>Astuce :</p><p>Les extratation doivent être en hauteur dans le caisson. Surtout ne pas être à proximité du bed et de la zone d'impression en générale, pour ne pas nuire aux plastiques qui sont sensibles au changement de température.</p><p>Vous pouvez aussi créer une entrée d’air à un emplacement stratégique et si possible filtrant. Ainsi qu’une extraction filtrée également et vers l’extérieur serait encore mieux.</p><p>BONNE IMPRESSION</p><p>English version</p><p>Thermostats for 3D housing</p><p>Why a thermostat:</p><p>A box for 3D prints is very interesting for the print quality and “essential” for certain filaments. The concern is that during long printing the temperature can rise too high. The thermostat will therefore regulate the temperature of the box so that it is neither too cold nor too hot,</p><p>Functioning :</p><p>In our case, the temperature rise is not a problem because the extruders and the heating mats emit a lot of heat. This is why we are going to use one or more fans to extract hot air from the box when necessary. Thus we can maintain the box in an ideal temperature range.</p><p>For my setup the thermostat and the fans are 24 V, because the system is directly connected to the printer power supply (Prusa I3 MK3S+) which is 24 V. In the link I provide for the purchase of the thermostat, different models are available with other voltages (12 V, 5 V). It's up to you to find out about the voltage of your power supply.</p><p>Thermostat: <a href="https://www.aliexpress.com/item/1005002488284867.html?spm=a2g0o.9042311.0.0.27424c4dRL4SqT">https://www.aliexpress.com/item/1005002488284867.html?spm=a2g0o.9042311.0.0.27424c4dRL4SqT</a></p><p>24 V fan: <a href="https://www.aliexpress.com/item/1267695738.html?spm=a2g0o.9042311.0.0.27424c4d8YZcOF">https://www.aliexpress.com/item/1267695738.html?spm=a2g0o.9042311.0.0.27424c4d8YZcOF</a></p><p>12 V fans are much easier to find. Most PC models are compatible.</p><figure class="image"><img src="https://media.prusaprinters.org/media/prints/131282/rich_content/4b3b70af-cf8b-4927-b535-736a25d238cb/img_20220207_105301.jpg#%7B%22uuid%22%3A%222bdcea76-0726-4c36-9b16-0dce80b237e2%22%2C%22w%22%3A3648%2C%22h%22%3A2736%7D"></figure><p>Cut the end of the pins at the back of the circuit : <img src="https://media.prusaprinters.org/media/prints/131282/rich_content/a88286c3-2e03-499e-b174-32144a0ee295/img_20220207_142543.jpg#%7B%22uuid%22%3A%2212487f66-f0f6-48d6-84c3-ef1a9d5a17c3%22%2C%22w%22%3A3648%2C%22h%22%3A2736%7D"></p><p>Connection : <img src="https://media.prusaprinters.org/media/prints/131282/rich_content/216859e5-f4bd-4c0a-8936-fa8383fc1b5a/img_20220208.jpg#%7B%22uuid%22%3A%22f30501dd-3128-4015-9405-1213545184e3%22%2C%22w%22%3A952%2C%22h%22%3A1368%7D"></p><p>Programming :</p><p>Once connected, to be able to configure it, you must hold the left button for a few seconds. Then with the middle and right button Modified the setting with the lettre “H” (heater) by “C” (cooling). For the other setting I stay on P0. Personally I set the thermostat at 30 °C. This has the effect that the exhaust fans turn on when the temperature reaches 32 °C and cuts when it drops to 28 °C.</p><p>Trick :</p><p>The extratations must be high up in the box. Above all, do not be near the bed and the printing area in general, so as not to harm the plastics which are sensitive to temperature changes.</p><p>You can also create an air inlet at a strategic location and if possible filter. As well as a filtered extraction also and towards the outside would be even better.</p><p>GOOD PRINT</p><h3>Print Settings</h3><p><strong>Printer Brand:</strong></p><p>Prusa</p><p><strong>Printer:</strong></p><p>i3 MK3 MMU 2</p><p><strong>Rafts:</strong></p><p>No</p><p><strong>Supports:</strong></p><p>No</p><p><strong>Resolution:</strong></p><p>0,2</p><p><strong>Infill:</strong></p><p>20%</p><p><strong>Filament:</strong> Tinmorry PLA</p><p>Black</p><p>Category: 3D Printer Accessories</p>
With this file you will be able to print Thermostat for print enclosure (air extraction control) with your 3D printer. Click on the button and save the file on your computer to work, edit or customize your design. You can also find more 3D designs for printers on Thermostat for print enclosure (air extraction control).
