Thermal Camera
prusaprinters
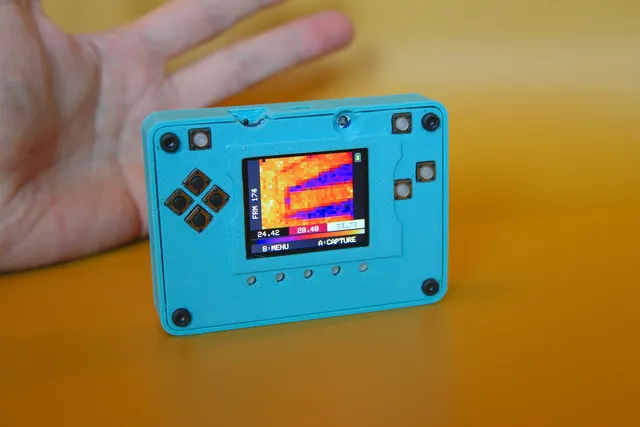
Minimalistic thermal camera using Adafruit hardwareExposes power switch, reset button, USB port, light sensor and NeoPixels from the PyBadge PCB. The two LEDs next to the USB port are however not visible, unless printed with transparent filament.Required hardware:Adafruit PyBadge Starter KitAdafruit MLX90640 IR Thermal Camera Breakout -55 Degree4-pin JST PH to JST SH Cable - STEMMA to QT / Qwiic - 200mm long4 x M3 screws, any length between 8 and 12mm ought to work4 x M2 screws, 4 to 5mm longNOTE: The 110 degree version of the thermal camera has a shorter lens, and will not fit this case without modificationsOptional hardware:4 x M2 hexagonal nutsI made some pockets for M2 nuts, but for me it worked well to just screw into the plastic.Recommended tools:Flat and round hobby filesPrint SettingsPrinter: Ender 3Rafts: NoSupports: YesResolution: 0.2mmInfill: 23%Filament: Add:North X-PLA WhiteNotes:The camera in the photos is actually printed with Polymaker PolyLite PETG Turquoise, but the prototype I printed in PLA turned out much better so that's what I recommend using.Post-process and assemblyThe face plate has a very snug fit over the PyBadge, use hobby files to make sure all corners are square, and enlarge holes if necessary.Before assembly, upload the thermal camera program to the PyBadge to verify which direction is up on the camera module. In my case the text on the PCB was upside down, but I don't know if this is universally true.(optionally) push the M2 nuts into the slots around the lens cutout.Place the MLX90640 module and secure it with M2 screws.Put the ResetPoker in the hole in the InteriorBody.Place the PyBadge onto its supports inside the shell.Place the FacePlate on top of the PyBadge and verify that screw holes, reset switch and USB port line up properly.Verify that the reset microswitch clicks when you press the reset button on the camera front. If there is no click, it's probably being held down continuously. File down the thicker side of the ResetPoker until this is no longer the case.Secure the case by screwing the M3 screws in the four corners
With this file you will be able to print Thermal Camera with your 3D printer. Click on the button and save the file on your computer to work, edit or customize your design. You can also find more 3D designs for printers on Thermal Camera.
