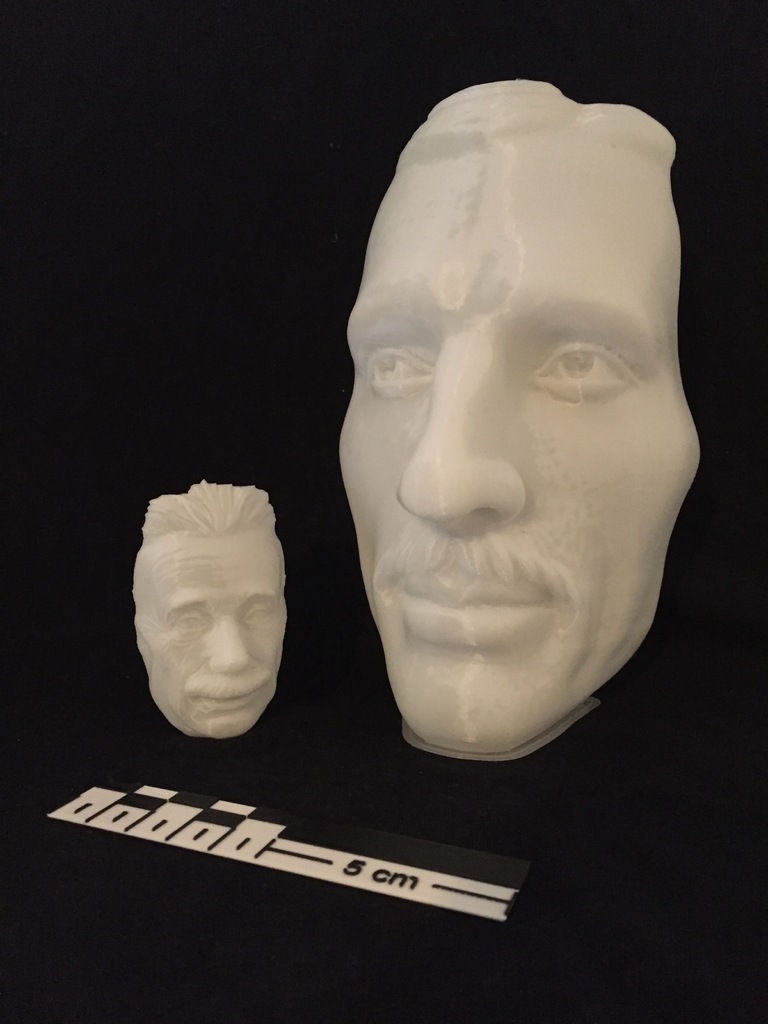
The Vase Face - Tesla / Einstein - Hollow Face Illusion
thingiverse
Hi there, first of all this is not a vase. At least not realy, or you could say it's a vase with zero volume. Actually it's my version of the hollow face illusion (see link) printed in vase mode, therefore I call it "The Vase Face". Check out the videos at: Tesla: https://youtu.be/MY9tw4UuWss Einstein: https://youtu.be/BlQJ5gTVvRo I've found the hollow face illsuion always fascinating, but I could only find a few versions of it online. They are always cut out of a whole block (see links below). At first I tried cutting a face out of a block, too, with a mediocre result (see the image with the grey Einstein). Than I thought why not print the walls as thin as possible and in vase mode to be fast. So I made the outer (or convex) face one layerline thick and the inner (concave) another line thick. In vase mode the printer can lay the outer and inner lines in a spiral by continuosly extruding two lines per layer and going back and forth on each layer. Further I think this could be a Method to print masks for cosplayers, without a need for supports, eyes and mouth should be easy to ut out with a hot scalpel. Maybe someone wants likes to print a Iron man mask or something similiar? ______________________________________________________________________ Remixes Nikola Tesla is remixed from the great "Bust of Nikola Tesla" by mushogenshin: https://www.thingiverse.com/thing:571784 Albert Einstein is a remixed from https://www.thingiverse.com/thing:4655016 which is a remix from the amazing bust by LSMiniatures: https://www.thingiverse.com/thing:966908 _____________________________________________________________________ Print Settings I've used Prusa Sclicer 2.2.0 (see pictures) Print Settings: Advanced -> Perimters AND external Perimeters: 0.4 mm. This is really import, this way you will have a line on the inside and on the outside on each layer. Layers: toggel the spiral vase checkbox on to print in vase mode Layerheigt: 0.1 mm First Layer: 0.2 mm (I had much better layer adhesion at 0.2 mm istead of 0.1 mm) I've tried different layer heights. Printing with 0.1 mm yields the best results. The higher your layer the steeper your overhangs and you get print errors mostly on the hair, and nose (and above the mustache). Also the surface quality is much better and therefore the illusion works better. Because this is printed in vase mode, the biggest model (Tesla) has around 18 cm height and takes only 8.5 hours to print at 0.1 mm layerheight. Einstein is the smallest and prints in 1.5 hours. Brim: Use a 5 ..10 mm Brim. I tried printing with and without, every now and then the print failed without a brim, but never with a brim. Also when you don't remove the brim it acts as a foot, so the model stands better (and I like how it looks). _______________________________________________________________________ Filament I've tried a regular white filament I usually use for Lithophanes. The illusion works with this filament, but I've found the effect to be much stronger if the filament is more translucent. Therefore I used a phosphorescent and green glowing white filament, which is more translucent then the regular white one. Both typer are made by "Das-Filament.de". Nice sideffect, your model glows green in the dark (like Tesla in the pictures). ____________________________________________________________________ Design You can make a Vase Face on your own, it is actually not that hard. The design was made completly in Meshmixer. Here's how: 1. Load a bust sculpture 2. In many cases you can reduce the meshcount by 50 % ... 80 %, you don't need a million vertices for this design aorund 100 000 ... 300 000 is fair enough. 3. Rotate the model so the head is tilted slighty backwards (2-5°). This way the overhang angle below the nose will be managable. 4. Plane cut. Cut the model horizontally right below the chin. 5. Make solid. Solidify the model, use at least a value of 200 for mesh density and solid accuracy. 6. Hollow. Hollow out the model with an offset (wall thickness) of 0.8 mm a solid accuracy and meshdensity of at least 200 ... 300. 7. Plane cut. Cut the model vertically (90°). I've found the effect works best when cutting at the temporals. If you cut around the ears, the effect is less impressive (at least in my tests it was). 8. Depending on the model and the haircut you may want to cut a bit of the Hair (horizontaly) on top and reduce the mesh count again. 9. Export as STL 10. sclice _______________________________________________________________________ My Findings: By printing several Versions of Vase Faces here's what I've found: - The illusion is higly dependent on your lightning situation. The shadows have to be "right" to make the illusion work. - The illsuion is stronger with translucent filament - The illsuon is stronger with 0.1 mm Layerheigt - The illsuion is stronger if you take pictures/ videos OR look at it with one eye. Yes, with one eye. I don't know why, this still puzles me. - For the bigger Vase Face you have to step away from the model, which makes the illusion stronger, too - The illusion is stronger when cutting the face at the temporals instead of behind the ears (compare Dracula and Tesla) - 0.25 mm Layerheigt caused big gaps in the face (overhang angles become really steep) - I was surprised how well the nose printed without supports and 0.1 mm layers _______________________________________________________________________ Links The hollow face illusion: https://en.wikipedia.org/wiki/Hollow-Face_illusion Hollow Face illsusions on Thinigiverse: https://www.thingiverse.com/thing:2569573 https://www.thingiverse.com/thing:1656654
With this file you will be able to print The Vase Face - Tesla / Einstein - Hollow Face Illusion with your 3D printer. Click on the button and save the file on your computer to work, edit or customize your design. You can also find more 3D designs for printers on The Vase Face - Tesla / Einstein - Hollow Face Illusion.
