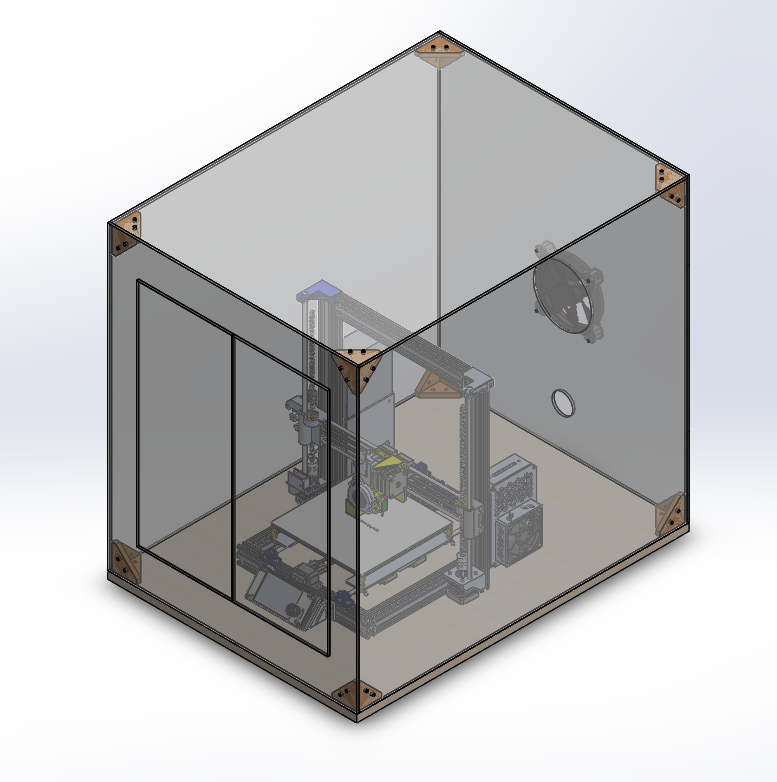
The Ultimate Enclosure For 3D Printer
thingiverse
****************THE ULTIMATE ENCLOSURE FOR 3D PRINTER**************** Hello everyone, I just finish to build for all of you the best, fits to all, good looking enclosure ever! I will write absolute EVERYTHING you need to know about this awesome DIY build. This maybe looking Complicated but let me tells you that this is the easiest build ever, No need for any knowledge. ****This enclosure fits 60X72.5X79cm printers.**** So... almost all of them out there..... (Fits Creality CR10 Smart Pro). MATERIAL NEEDED FOR THIS: * 60x80cm Wood plate (about 1.8cm thick will do). * All of the DXF. file laser cut from 5mm thick Perspex (just find a local laser cutting company and send them the files), PLEASE CUT THE "SIDE.DXF" 2 TIMES!! * 60 Bolts M5x20 * 60 Nuts M5 * 60 Washers M5 * 10 Small wood screw.. about 20mm length. * 8 3D Printing of "CORNER" - print those out of ABS (you can PLA but...) * (Optional) 140mm Fan - you have the placement on the back. * 4 Hinges, even 3D printed - https://www.thingiverse.com/thing:2187167 * 2 Handles - https://www.thingiverse.com/thing:4619895 ********SETUP******** Take all of the Perspex and bolt them together - use all of the "CORNER" items. * before install the doors on the front Perspex - make sure that you Premark the holes for the hinges... you can drill those holes with 3-5mm drills (drill that slowly slowly). after you have the full enclosure lift it and place it directly on the wood plate. * before lift the enclosure, put your printer on the wood - after placing the Perspex you will not be able to insert you printer. Well Your Done. send me a pic of your enclosure.... And just HAVE FUN.
With this file you will be able to print The Ultimate Enclosure For 3D Printer with your 3D printer. Click on the button and save the file on your computer to work, edit or customize your design. You can also find more 3D designs for printers on The Ultimate Enclosure For 3D Printer.
