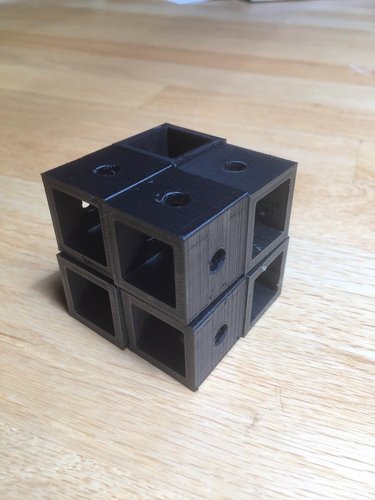
The Quasar Puzzle v2
pinshape
As the creator of an innovative twisty puzzle design, I drew inspiration from a building-block prototype that my friends and I hastily assembled on a rainy day at our middle-school's Rubik's Cube Club. Observing how even non-cubers at my school enthusiastically interacted with and manipulated what we had made, I took it upon myself to craft a version that wouldn't disintegrate in their hands, one that was both fun and functional. To achieve this, I constructed prototypes out of wood, clay, Legos, and any other materials I could find. I also experimented with resin casting and mold making, continually striving to perfect the mechanism. Four months have passed since then, and here I am in July, with what I believe is the final iteration of the Quasar Puzzle. Throughout this project, I acquired valuable knowledge about Solidworks. After developing dozens of designs that looked promising on paper but fell short in reality, I finally hit upon a facepalm-ingly simple design that employs 8 x 3/4" 6-32 machine screws and 8 x 6-32 hex nuts to connect 8 identical 3D-printed parts into a seamless puzzle. The finished product is truly impressive, and I am proud to claim it as my first original puzzle design. I will be adding stickers to this puzzle in the coming weeks.
With this file you will be able to print The Quasar Puzzle v2 with your 3D printer. Click on the button and save the file on your computer to work, edit or customize your design. You can also find more 3D designs for printers on The Quasar Puzzle v2.
