The Mosaic - Modulare Picture Frames
prusaprinters
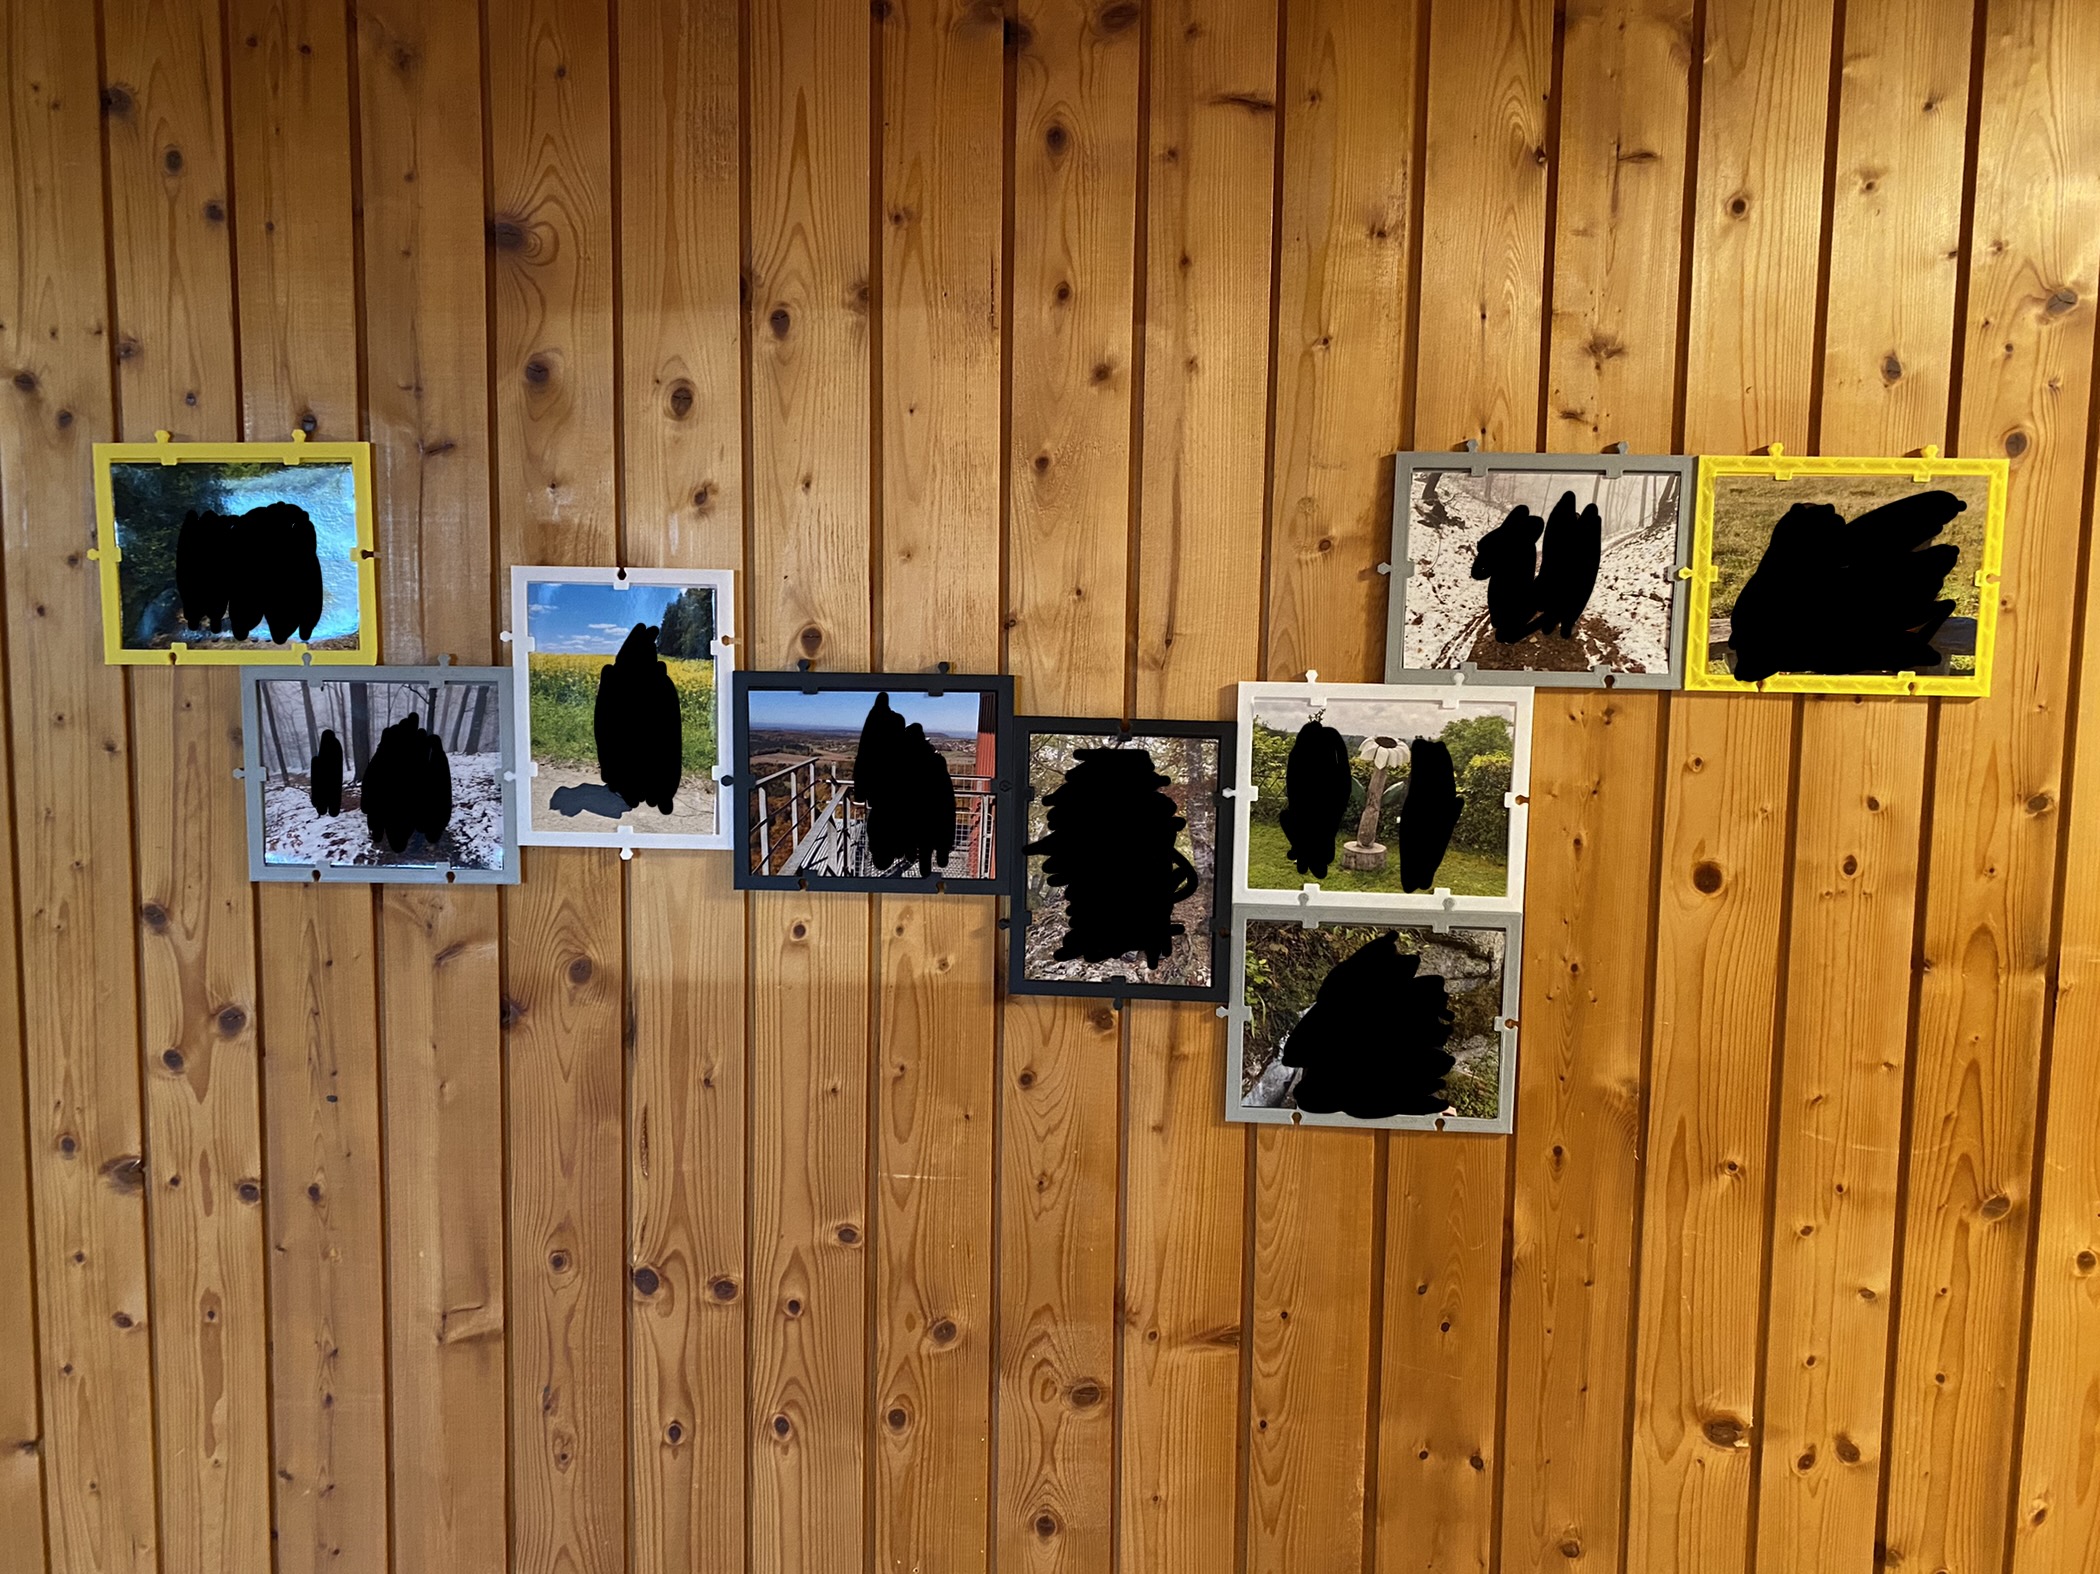
<p>I wanted to decorate the hallway in our flat with some pictures. But as I continuously take new ones, and I don't want to get out the hammer and nails every time, I designed this modular picture frames. <br>With this one you just need to secure one frame, on to which you can than attach more frames. As I did hang up some frames, I secured two to the wall with M3 Screws (the ones marked in red in the second photo). <br>This Frame can accept photos that have a dimension of 17 x 13cm. If you want to hang pictures bigger or smaller, you could of course up/downscale in the X/Y Direction according to your needs. <br>I also did expand my photo wall quite a bit, you can see that in the second set of pictures.<br><br>The pictures are held in place by 6 small tabs, so there's no need for glue or plexiglas. You just bend the picture a little bit to get them under the tabs, and thats it. I found it the easiest, to insert them from one of the smaller sides and then just slightly bend them. <br><br>I designed three different variations:<br>Frame 17x13 Wallmount - This frame is the one you attach to the wall and acts as a starting point for all other frames.<br>Frame 17x13 - Basically the same as Wallmount, but without the mounting holes and slightly thicker tabs. All in all it's the same thickness as the wall mounted one.<br>Frame 17x13 Thin - This one uses the same thiner tabs as the wall mounted one and over all is a little bit thiner then the other ones to conserve filament.</p>
With this file you will be able to print The Mosaic - Modulare Picture Frames with your 3D printer. Click on the button and save the file on your computer to work, edit or customize your design. You can also find more 3D designs for printers on The Mosaic - Modulare Picture Frames.