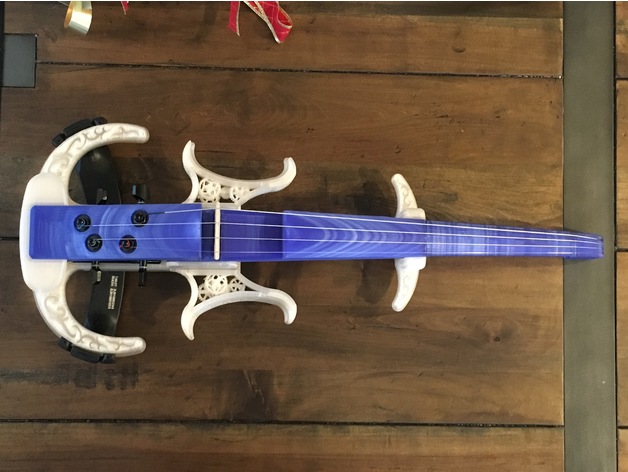
The Mina Violin (Electric)
thingiverse
I wanted to create an electric violin that combines classic style with modern technology. It's inspired by the curves of a Stradivarius and showcases what can be done with crystal PLA on a 3D printer. I'm excited to share it with you. My violins are now available assembled and customizable on Etsy, thanks to popular demand: https://www.etsy.com/listing/687390452/the-jax-dragon-violin This design uses a standard violin bridge, allowing for a traditional shoulder rest and a 3D printed chin rest (included and set up for screw-on brackets). As a steampunk enthusiast, I've added clockwork and filigree details. However, you can also use blank pieces to remix or opt for a clean look. The lower bout and waist of the violin are separate parts due to printing limitations on standard 8" printers. The waist pieces screw on (replaceable if broken) or can be left out altogether. You may need to print the lower bout at 45° to fit. I'm eager to see what you create! For display, check out my Electric Violin Wall Hanger: https://www.thingiverse.com/thing:2575603 The parts are interchangeable with my other violins: * The JAx Dragon (newest design): https://www.thingiverse.com/thing:3505364 * The Annelise Violin: https://www.thingiverse.com/thing:2285829 * The JAx 5 String: https://www.thingiverse.com/thing:2922325 A big thank you to Stepan Ignatovich for the inspiration and remix source. UPDATE (2017-2-23): I cleaned up the Body and Chin Rest files. UPDATE (2017-3-16): I tweaked the neck design, creating a new version with improved pickup wiring. The wire now goes on either side of the threaded rod, providing more space behind the pickup. Post-printing: To achieve the desired look without painting the PLA, I used a small exacto knife to clean up edges instead of sanding or filing exposed areas. Let me know if anything is missing! Printing: I recommend printing one piece at a time for better control. After several attempts, only three pieces required supports: the violin waist parts with clockwork and the chin rest. The neck had minimal supports, but they resulted in a unique print effect. General Materials: * Printed Parts (8pcs): your choice * Threaded Metal Rod M8 x 370mm * Violin Bridge: sanding and flattening required * Violin Pickup and Preamp: available on eBay or Amazon * Guitar Tuners (4pcs) * Shoulder Rest: standard type * Chin Rest Bracket: standard type * Violin Strings * Screws and Nuts: + M4 x 25mm socket cap - 9pcs + M4 x 15mm socket cap - 2pcs + M4 x 12mm socket cap - 2pcs + M4 x 50mm - 1pc (flat head or philips) + M4 x 40mm - 2pcs (flat head or philips) + M3 x 8mm - 4pcs (for tuning pegs) + M2 x 10mm - 4pcs * Nuts: + M4 - 16pcs + M3 Brass Wood Screw Inserts for the tuners - 4pcs Infill and Walls: I used a 20% infill with mixed wall thickness (4mm and 3mm) to ensure stability. However, this results in a heavier violin compared to acoustic or carbon fiber electric instruments. If you create one, please share your settings and outcome!
With this file you will be able to print The Mina Violin (Electric) with your 3D printer. Click on the button and save the file on your computer to work, edit or customize your design. You can also find more 3D designs for printers on The Mina Violin (Electric).
