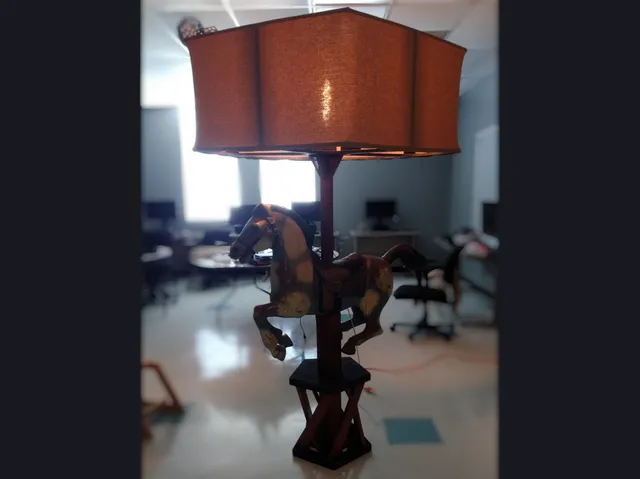
The Horse Lamp
prusaprinters
WARNING: HORSE NOT INCLUDEDPrefaceNo one in their right mind should attempt to replicate this project, especially without the horse. You could modify it to support other things in the middle or add more spacers and forgo the prominent visual feature. Tolerances are a bit tight, so be warned: if you cannot find plywood of the designated thickness, modify the model or save yourself the headache and give up, which I desperately craved when working on this. It's also absolutely massive. Please ensure you have space for it. The shade is nearly 1.2 m (4') wide, and the lamp as a whole measures almost 2 m (6.5'). It does not fit through most doorways except in pieces.MotivationMy mother found this plastic horse that likely came from a cheap carousel at a thrift store in Florida for ten dollars. She wanted it turned into a lamp. And so it was done by Mother's Day.Components18.3 mm plywood (sold as 3/4", 18.9 mm max) 1.5 m length x 48 mm diameter pipe (sold as 2", 49.1 mm max) 37 mm diameter light socket (https://www.amazon.com/dp/B01M5F3DA2; cord must be lengthened to approx. 2 m to reach the floor, even longer to reach an outlet) About 4 m length x about 500 mm width duck, canvas, or similar fabric (up to you as to how you secure it to the shade frame; I used a staple gun) Lightbulb (237 mm diameter max, 350 mm height max; larger than 109 mm diameter requires placement before shade top installation; likewise for bulbs taller than 321 mm) Plenty of filamentToolsFFF/FDM 3D printer with a minimum print volume of 170 mm length x 170 mm width x 210 mm height. The Mini/+ cannot cope with the height requirements. Parts can be further cut to fit within the Mini/+'s volume, but I do not own a Mini, so I cannot guide this. All parts were printed on MK3S/+ printers.CNC router with a minimum cut area of 1175 mm x 1120 mm (4' x 4')Optional Tools and SuppliesPaintbrushesSpray paintWood stainSandpaperStaple gunStaplesGlue (wood and cyanoacrylate)Sewing needleThreadPrinting and Cutting NotesDXFs prefaced with "P" indicate pocket cuts of depth 8.3 mm. Refer to the CAD model for designated pockets and through-holes.Routed pieces must have dog-bone or T-bone filets added to internal corners. Most CAM software have convenient tools for this, and the radii depend on the bit diameters used.3MFs prefaced with "S" indicate a support requirement (some can bridge effectively, but it depends on the printer, at your discretion).Parts are listed in order of position on the lamp.
With this file you will be able to print The Horse Lamp with your 3D printer. Click on the button and save the file on your computer to work, edit or customize your design. You can also find more 3D designs for printers on The Horse Lamp.
