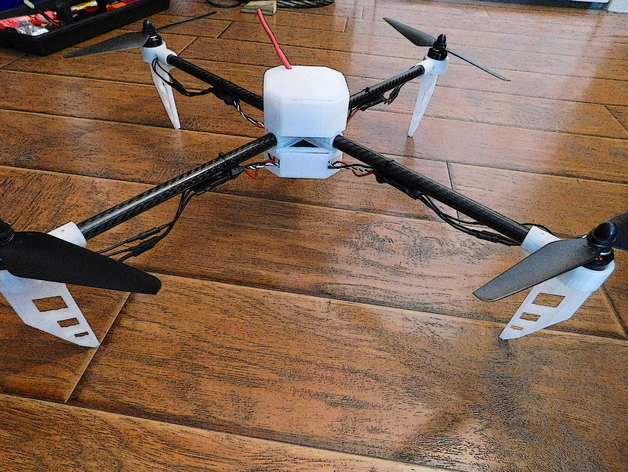
The Hawk - A Mostly 3d Printed Quadcopter
thingiverse
Notes and Changelog: 1/06/19: Added an updated motor mount that fits 250mm carbon fiber arms, allowing for larger blades. Modified the power distribution board mounting system to make it easier to connect the ESCs. Added a new version of the top cover with improved aerodynamics and reduced weight. Updated the printed parts list to include the new top cover and bottom cover. 1/05/19: Fixed a design flaw in the motor mounts that caused them to be prone to cracking under stress. Improved the stability of the quadcopter by adding additional mass to the main body. 12/20/18: Added a new version of the main body with improved aerodynamics and reduced weight. Updated the printed parts list to include the new main body. 12/15/18: Fixed a design flaw in the blade legs that caused them to be prone to breaking under stress. Improved the stability of the quadcopter by adding additional mass to the motor mounts. 12/10/18: Added a new version of the power distribution board with improved connections and reduced weight. Updated the printed parts list to include the new power distribution board. 11/25/18: Added a new version of the top cover with improved aerodynamics and reduced weight. Updated the printed parts list to include the new top cover. Total assembled weight (with the receiver case removed and without a battery) is 625g. The motor kit I used has a maximum airframe weight of 1.5kg (at 14.8v with the included 9.5" x 4.5" blades, max craft weight should be a little under 2kg with 10" x 5" carbon fiber blades), which should nearly a kilogram of free weight for attaching cameras or large batteries. This version uses a majority of 3d printed parts with some fairly cheap electronics and four 14mm OD x 220-250mm length carbon fiber tubes for arms. For PLA, print the main body and motor mounts at 25% - 35% fill density, all other components can be printed at 10% - 15% fill density. To assemble each motor mount, apply some two part plastic epoxy or strong superglue to both the top of each leg and the bottom center of each mount. Insert an m3 nut and an m3 bolt in their respective holes on the model (you may need needle nose pliers to insert the bolt from the inside), tighten them down and leave the assembly upside down until the epoxy/glue has cured. Once the body is assembled, secure the power distribution board to the bottom of the main body with either double sided tape or sip ties. Do the same on the top of the body with the flight controller and receiver. The UBEC can sit inbetween the top and bottom sections, or can be stuffed next to the flight controller. Attach the top cover first, then Insert the carbon fiber tubes, you can then snap on the bottom cover to complete the center of the body, add the motor mounts and assembly is complete. Because this is my first quadcopter, I opted for cheaper electronic components, but you can substitute most of the parts for equivalent units. As is, the total non-printed components came out to around $160. Links to the electronic parts I used and the carbon fiber tubes I used are listed below. Print Settings: Printer: Kossel Mini Rafts: Doesn't Matter Supports: Yes Resolution: 0.3mm for all parts, 0.2 or 0.25 for the main body Infill: 10% on canopy, legs and base, 25% on main body and motor mounts
With this file you will be able to print The Hawk - A Mostly 3d Printed Quadcopter with your 3D printer. Click on the button and save the file on your computer to work, edit or customize your design. You can also find more 3D designs for printers on The Hawk - A Mostly 3d Printed Quadcopter.
