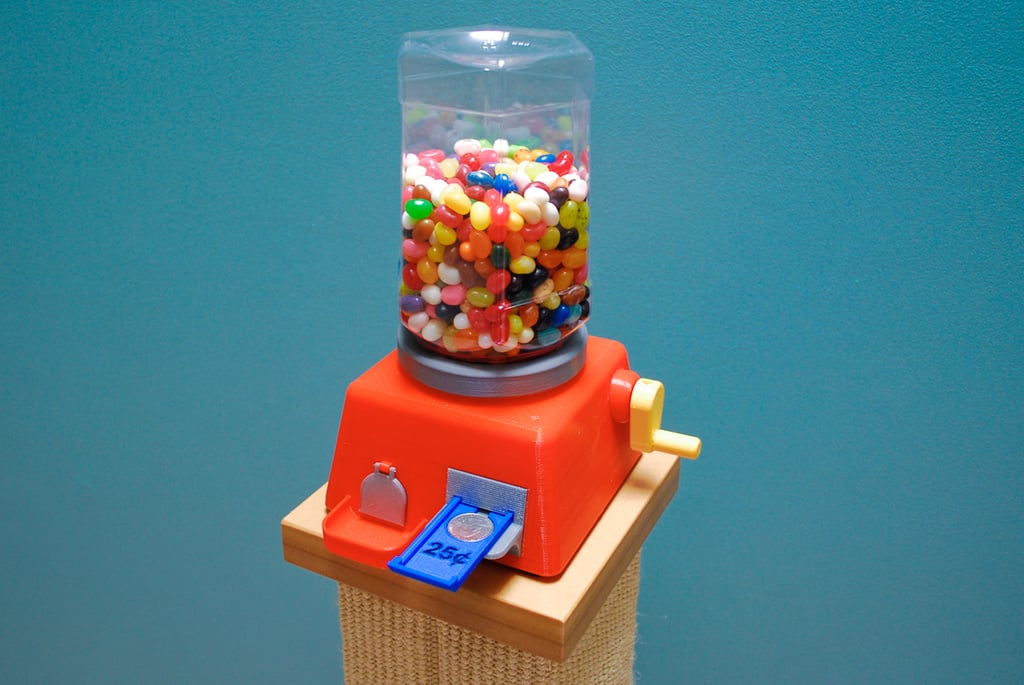
The Coin Slide Operated Jelly Bean Machine
thingiverse
This project started out as a simple experiment to test printing worm gears. I began designing a basic base to hold the gears, allowing me to test them, and snacking on jelly beans at the same time, when I thought "I should make a jelly bean dispenser using these." Then, halfway through, I thought "man this should be coin operated like some of those other 3D printed candy machines," and then "Maybe it should be different though" so I decided to design and incorporate a coin slide operated mechanism. Well after all that, this snowballed into the "Coin Slide Operated Jelly Bean Machine." I designed and printed this over two years ago, so I don't exactly remember my thought process while designing it, but it was a fun project. This machine is a bit complex, with several parts that need to be assembled in order for it to work properly. To assemble the machine, start by inserting the Coin_Slide into the Slide_Block and screwing a 2-56 x 3/8" button head screw into the single larger hole in the bottom of the Slide_Block. Then, screw a 6-32" x 3/8" socket head cap screw into the Gear_Stop. Next, insert a smaller spring into the hole that is inside the rear of that square hole in the Slide_Block and compress it while inserting it into the Gear_Stop. Make sure the bottom spring stays upright. After inserting the Gear_Stop, secure it with a 4-40 x 1/2" flat head screw though the side of the Slide_Block. Check to make sure the Gear_Stop moves up and down while still wiggling front to back. The other square hole in the top of the Slide_Block is for the Gear_Teeth_Stop, which is designed to use a 2/56 socket head cap screw to keep the Main_Gear from turning until you pull the Coin_slide back out. However, this part tends to jam everything up, so I do not use it. Next, insert the Lock_Block and secure with a 4-40 x 5/8" socket head screw. Test the operation with and without a quarter. With a quarter in the Coin_Slide, the screw in the top of the Gear_Stop should fully retract and be just below the top of the Slide_Block when the Coin_Slide is fully pressed in. Once you have the machine assembled, place a quarter into the Coin slide and push it all the way forward to retract the Gear Stop. Insert the Coin Slide Assembly into the Base and align the holes and secure with (2) 6-32 x 1/2" flat head screws. Pull the Coil Slide out then turn the Handle until it locks in place. If it does not lock, you need to remove the Coin Slide Assembly and adjust the screw in the top of the Gear Stop. Repeat the process until you find the sweet spot that will lock the handle. Never force the handle once it locks. Retest the operation a few times to make sure everything is working correctly. Keep in mind without the Gear_Teeth_Stop, you can continue to turn the handle as long as you want if the Coin Slide is left pressed in. The Door_Hinge can be super glued to the base and the Door_Flap attached with a pin made out of something like a sewing pin. Turn the Base upside down to screw on the Jar full of delicious jelly beans. To keep people honest, the Coin_Box can be secured with a 4-40 x 1/4" Flat head screw and the Jar Lock can be secured with a 4-40 x 1/2" button head screw and nut. Enjoy...... and reap the profits.
With this file you will be able to print The Coin Slide Operated Jelly Bean Machine with your 3D printer. Click on the button and save the file on your computer to work, edit or customize your design. You can also find more 3D designs for printers on The Coin Slide Operated Jelly Bean Machine.
