The Beest - A Strandbeest Walker
thingiverse
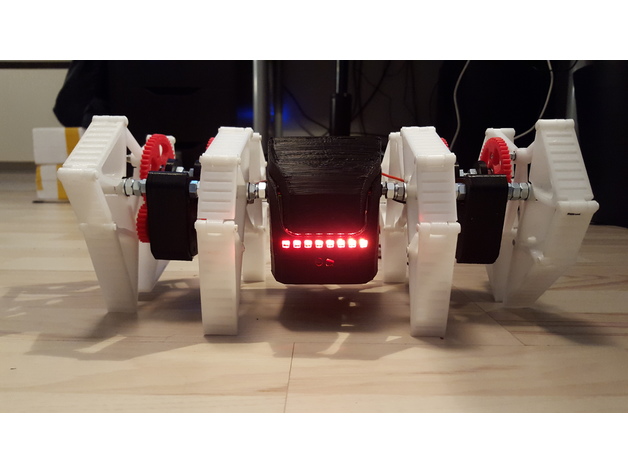
A 3D printed robotic walker with the Theo Jansen Strandbeest linkage embodies innovative design and functionality. After completing the Sphero Strandbeest, I desired to build a new smaller version with motors and remote control capabilities. The Sphero Strandbeest was only able to walk in a straight line, making it challenging to modify it into something more versatile. I decided to leave it intact and focus on this new project. I began by setting up accurate measurements for the Theo Jansen linkage in Inventor software. Using the Sphero Strandbeest model as a starting point, I determined the crucial leg measurement ratio necessary for a smooth walk. Next, I precisely modeled the motor to exact dimensions. The build process involves several steps. Legs To minimize the number of parts, I designed the legs with support material in mind. This requires downloading the zip file containing the support material (modeled in Inventor) if you want to print without support on your printer or adding the support material in your slicer software. Step 1: Requirements and Print Quantity You will need: 3mm filament (or M3 bolts and nuts) Scissors or pliers for cleaning up parts M3 and M6 drill bits Drill Print the following quantity of parts: 8 pcs - Arm large 8 pcs - Arm medium 8 pcs - Arm mini 8 pcs - Arm small 4 pcs - Major tri R 4 pcs - Major tri L 4 pcs - Minor tri R 4 pcs - Minor tri L Step 2: Removing Support Material and Drilling Holes Remove all support material from the printed parts, clean them up, and drill out all the holes. Use M3 drill bits for small holes and M6 drill bits for larger holes. Step 3: Assembling Each Leg Module Assemble each leg module consisting of six parts. I used 3mm filament to secure the joints by cutting it to suitable lengths, heating the end with a lighter, and pressing it gently with the side of the lighter to form a rivet. Ensure that the large and medium arms face outwards. Create eight sets of leg modules, using left and right parts on the same modules to achieve a fillet on the outside. Motor Frames You will need: 2 x M6 threaded rods (approximately 315-320mm) Per motor mount: 36 x M6 nuts 12 x M6 locknuts 4 x M6 ball bearings 16 x M3 nuts 4 x M3 locknuts 4 x M3 x 25-30mm pan head screws 2 geared motors with dual shaft Wire Soldering iron Print the following quantity of parts: 4 pcs - Spur gear large 4 pcs - Spur gear small 2 pcs - Minor frame part 1 2 pcs - Minor frame part 2 Clean up the printed parts, drill out the holes, and solder wires onto the geared motor. Feed the wires through the lower hole on the frame. Add nuts to the motor mount as shown in the image below. Attach a M3 bolt to each large gear and four nuts. Install ball bearings on all big gears, ensuring that when fitting the small gears to the motors, the bolts on the large gears are opposite of each other. If you experience clearance issues with the gears, drill out the top hole for the large gear using a M7 drill bit and tighten it slightly higher up. Main Base The main body was not satisfactory, but you can use the temporary one as a template to create your own. I plan to upload a new design when I have more time to develop this project further. Videos
With this file you will be able to print The Beest - A Strandbeest Walker with your 3D printer. Click on the button and save the file on your computer to work, edit or customize your design. You can also find more 3D designs for printers on The Beest - A Strandbeest Walker.