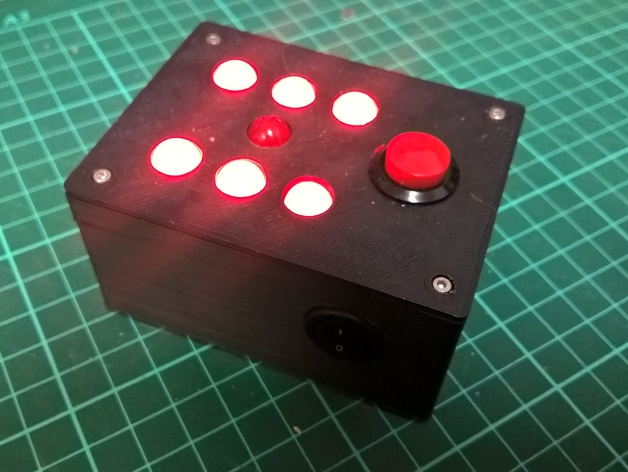
The ARDice - electronic dice based on Arduino
thingiverse
This is a fun electronic game dice project based on Arduino. I came across various schematics with discrete components or IOs more than twenty years ago, but this one with Arduino is easy and simple to make. Features: Random number generation (1-6), the result is displayed on LEDs in a regular 6-sided dice style. Makes nice sound and animation when button is pressed. Silent mode - press the button during startup to mute all sounds. Sleep mode - activates after a period of inactivity. Print Settings Printer Brand: Printer: Prusa i3 Rafts: No Supports: No Resolution: Standard Infill: 20 % Electronics Parts needed 7x 10 mm LED, any color 7x 330 ohm resistor 1x momentary pushbutton 1x on/off rocker switch 1x universal PCB 30x70 mm 1x Arduino Nano or basically any Arduino. 1x piezo buzzer STL headers and pins 1x leads for 9 V battery 1x 9 V battery 4x M2.5 screws Connections The electronics is actually pretty simple. It uses 9 digital I/O pins on the Arduino: Pins D2-D8 to control LEDs Pin D9 to connect the roll button Pin D10 to connect the piezo buzzer See the 123D Circuits project or the following schematics: Breadboard view Schematic view Steps to make Step 1 Print the ARD_top.stl part first, so you can start to work on LEDs, while printing the ARD_bottom.stl part, which is bigger. Step 2 Push the LEDs into the sockets. The part is designed to hide most of the body, leaving just the curved tip visible. You can use CA glue (superglue) or hot glue to fix them, but the friction itself should be good enough. Solder all the cathodes (shorter leads on LEDs) together and solder a wire to them. Step 3 Solder one 330 ohm resistor to cathode on one end and a length of wire on the other end. Step 4 Take 8 STL pins and solder the wires to the pins. First pin is ground (the cathodes), pins 2-8 are the LEDS in the order specified in the image below (when seen from top). You can also solder directly to PCB, if you don't want to test on breadboard. Use tape or heat shrink to isolate the leads. LED numbering Step 5 Connect the STL pins to pins GND, D2-D8 of the Arduino. Connect the button between pin D9 and GND. Connect the buzzer between pin D10 and GND. You can use solderless breadboard or prototyping PCB, as you like. Test setup on breadboard (resistors are hidden under heat-shrink) Step 6 Load the TestHardware.ino sketch to Arduino and run it. If you wired the pins correctly, the device should beep and then wait for button press. After a button press, the LEDs 1-7 should light one by one in the sequence given above and with each one shortly "click". If you passed this test, you're ready to move on to more complex code. The TestNumbers.ino sketch contains definition of number symbols. The definition is specified in binary form, as a number, where each bit corresponds to single LED. The most significant bit is ignored (is always 0 in this case), because we have only 7 LEDs, thus need only 7 bits. The for loop in the showNumber function sets the state of each LED according to the definition of number symbol. Number symbol test Functional dice - first version The ArDice_V1.ino sketch is basic functional dice. Upon pressing a button, it will display animation of random numbers, finally settling on the definitive value. We initialize random number generator by reading noise on unconnected analog pin A0. That's not the best possible solution and we should not use it for example for cryptographic purposes, but it's good enough for a game dice. Add sleep mode with breathing The ArDice_V2.ino sketch extends the previous version by adding timeout (30 seconds) after which the dice will 'sleep'. It will turn off the LEDs and only use the center one (LED 4, connected to pin D5) to 'breath', glow with limited and varying intensity (using PWM) to indicate the project is alive. Add silent mode The ArDice_V3.ino sketch is the final version. It extends the previous version by adding ability to turn off all sounds. To mute all sounds, press the button while turning on the dice
With this file you will be able to print The ARDice - electronic dice based on Arduino with your 3D printer. Click on the button and save the file on your computer to work, edit or customize your design. You can also find more 3D designs for printers on The ARDice - electronic dice based on Arduino.
