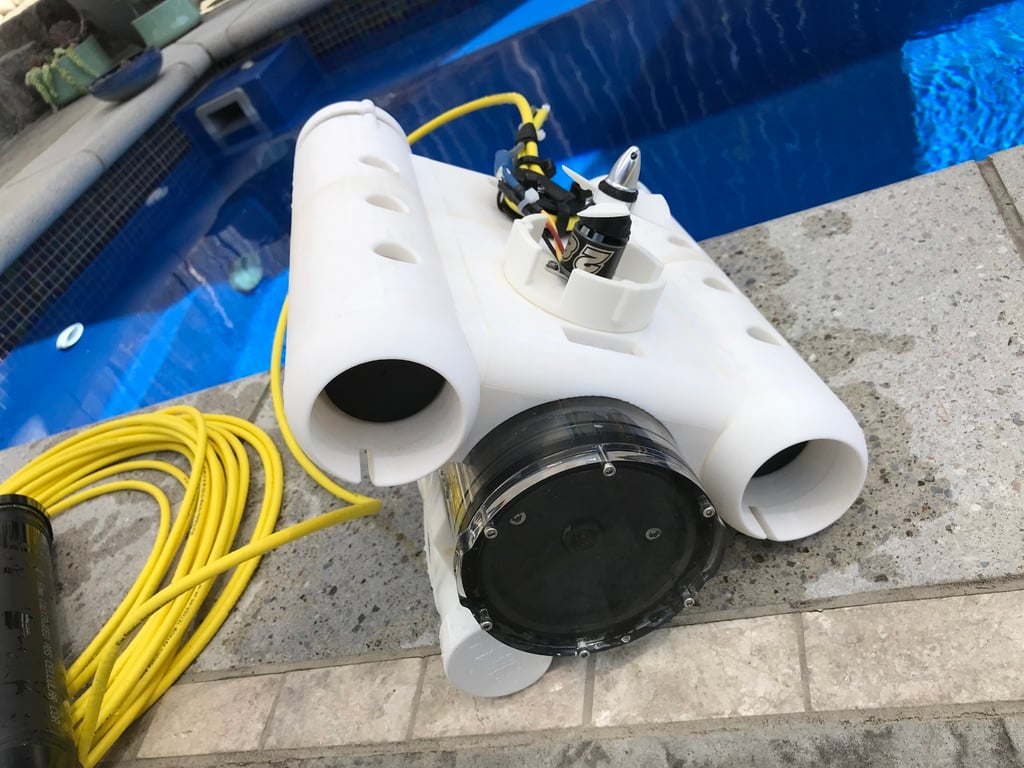
The "Albie" 3D Printed ROV
thingiverse
This is a 3D designed and printed ROV that uses basic equipment and the simplest control system I could devise. Many current ROVs on the market have complex control systems requiring ethernet connectivity to get all functions running smoothly. This one is much simpler, albeit less capable depending on what you are planning to do with it. For swimming around and looking at the underwater world, this is sufficient, and fun! FYI: The watertight enclosure I built leaked... so after building several with different designs, all leaked slowly, I decided to buy an enclosure and penetrators from bluerobotics.com. That was a good decision. I spent more on unusable prototypes than what it cost me to just buy an enclosure. I recommend it especially since you'll be buying their tether also! It's honestly an amazing tether totally worth the money! RC Control Link: The control system uses a basic RC transmitter and receiver (FrSky Taranis w/X8R receiver). The reason for this setup is that the X8R has S.BUS capability built-in, meaning that the receiver can pass up to 16 channels directly to the ROV using only a single signal wire and a ground wire. So two wires, sixteen channels! All without ethernet or other fancy features. What it does need is an S.BUS to PWM converter in the ROV to decode the signals to servo signals for the ESCs to use. That's a $15 part at hobbyking.com. Note: Any S.BUS tx/rx pair would do just fine. You could also probably use a ppm rx also, but I did not test it as S.BUS was already available. My tether is 20m long, no signal loss is detected over this length. Great connection! The reason for the RF buoy is really just so that no tether comes back up to the boat, meaning that the 20m length will give the ROV close to that in depth, with no limit (within say 1km of the boat) in the horizontal direction. Cheaper AND more capable. Motor Control: Three brushless motors are used and as they can be run underwater without any modification, they are very simple to operate. The props are the ones available on thingiverse.com at the link below. I also used the same motor. Cheap! https://www.thingiverse.com/thing:682420 (3) brushless ESCs are used (Spider 30A Opto) and they have had their firmware changed to be able to have forward and reverse operation. See Google for how to do that. I forget how I accomplished this, but remember that it wasn't hard. Video Link: In the RF buoy, in addition to the X8R RC receiver there is a standard TS351 Boscam video transmitter. Since we already have 12v and ground coming up from the ROV in the tether, and a third line taking the S.BUS communication, we have one left in the tether. This is the line that the video signal uses. One single wire takes the video from the Runcam FPV camera mounted in the ROV to the surface, and then it's broadcasted to the boat using the TS351. Put your FPV goggles on and so explore!
With this file you will be able to print The "Albie" 3D Printed ROV with your 3D printer. Click on the button and save the file on your computer to work, edit or customize your design. You can also find more 3D designs for printers on The "Albie" 3D Printed ROV.
