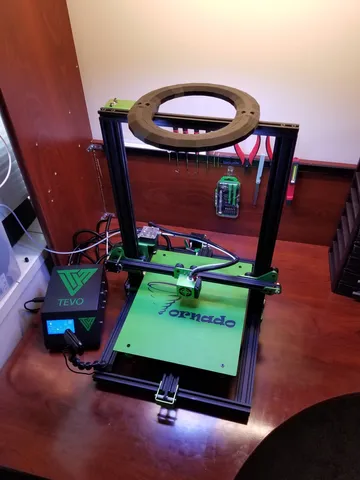
Tevo Tornado Octoprint Controlled LED Light Bar
prusaprinters
LED light bar for the Tevo Tornado. Designed to be controlled by gcode commands. I have uploaded STL files to build a full or half configuration of the light. To build the light you will need a soldering kit! and have basic knowledge of electrical wiring. I attached a picture of a basic electrical circuit you will need to build/assemble to power/control the light. I used the custom control plugin for octoprint to make a quick access on/off button (https://plugins.octoprint.org/plugins/customControl/) G-code Terminal Commands: (On - M42P69S255) & (Off - M42P69S0) Supplies you will need: LED light strip i used (https://www.amazon.com/gp/product/B00HSF66JO/ref=oh_aui_detailpage_o00_s00?ie=UTF8&psc=1) 24v to 12v converter - i used (https://www.amazon.com/gp/product/B01LY4RANA/ref=oh_aui_detailpage_o00_s01?ie=UTF8&psc=1) Mosfit - i used (RFP30N06LE) Wire - i used (#22 gauge solid, insulated copper wire) the rail clamp is threaded to work with the screw i designed. it will be very snug at first when you put the screws in. i recommend screwing them on and off a few times to break-in the threads. For the Full version you need to print: 2 - light bar 2 - full top bracket 2 - full rail clamp 4 - screw For the Half version you need to print: 2 - light bar 2 - half top bracket 1 - Left Rail Clamp 1 - Right Rail Clamp 4 - screw Updates: 09 NOV 2019 - added upgraded designs Print Settings Printer: Tevo Tornado Resolution: .15 Infill: 20% Electrical First thing you will need to do is unplug your machine and open up the control box. Be careful not to pull hard on any wires, you don't want to damage anything. Unplug the 2 big black cables that are connected to the screen and set them to the side the will get in your way, locate the A15 pins. locate the 24 Volt power remove 2 bolts on heated bed power control box and move it to the side. you will be reposining it for this light mod. install 24v to 12v converter box (I used a hot glue gun) attach 4 wires to 24v to 12v converter box drill hole to reposition heated bed power control box attach heated bed power control box wire circuit like in wiring diagram put mosfit in box if you want (i filled mine with hot glue to insulate wires) attach mosfit to side of box (i put mine by one of the fans) reconnect screen cables put control box back together your done! Category: 3D Printer Accessories
With this file you will be able to print Tevo Tornado Octoprint Controlled LED Light Bar with your 3D printer. Click on the button and save the file on your computer to work, edit or customize your design. You can also find more 3D designs for printers on Tevo Tornado Octoprint Controlled LED Light Bar.
