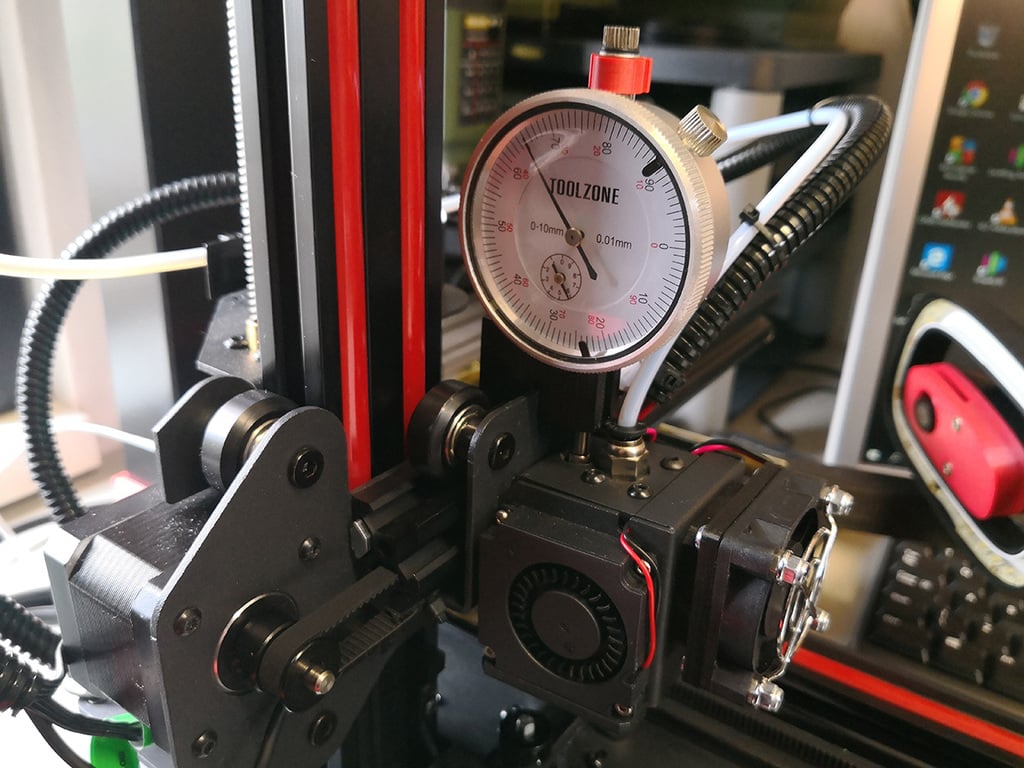
Tevo Michelangelo Dial Indicator Mount
thingiverse
Here's a dial indicator holder for the Tevo Michelangelo. Leveling the bed of the Tevo Michelangelo can be a challenge sometimes, especially when trying to achieve all corners at the same height. If you have a dial indicator on hand, this mount will make it much easier. To level the bed, follow your usual procedure and then check back with the dial indicator to see if all corners are at the same height. There's no space to mount the dial indicator for an accurate reading, so a small modification is needed. Drill a hole just behind the Bowden tube entry, positioning the needle of the dial indicator as close as possible to the nozzle. The dial indicator should be mounted on the left side of the printer. When I created the first version with the front-facing design, the PTFE tube kept touching the dial indicator, causing inaccurate readings when moving to the right side of the bed. When placing the dial indicator, ensure that the needle is not lower than the nozzle to avoid damaging your dial indicator. A small half-round object can be used to keep the needle high at the top of the dial indicator. You can leave this mount/holder on the printer permanently. Normal-sized dial indicators require an extension to reach the bed, which you can purchase cheaply from various online retailers. Check the specifications to ensure that your 10mm and 0.01mm resolution dial indicator requires a 50mm extension. Here's a demonstration video showing how it works: https://www.youtube.com/watch?v=0ADJCdECoxY Please note that if you damage your printer while drilling or using this mount, I won't be held responsible.
With this file you will be able to print Tevo Michelangelo Dial Indicator Mount with your 3D printer. Click on the button and save the file on your computer to work, edit or customize your design. You can also find more 3D designs for printers on Tevo Michelangelo Dial Indicator Mount.
