Test with preprinted support for PETG models with overhang
prusaprinters
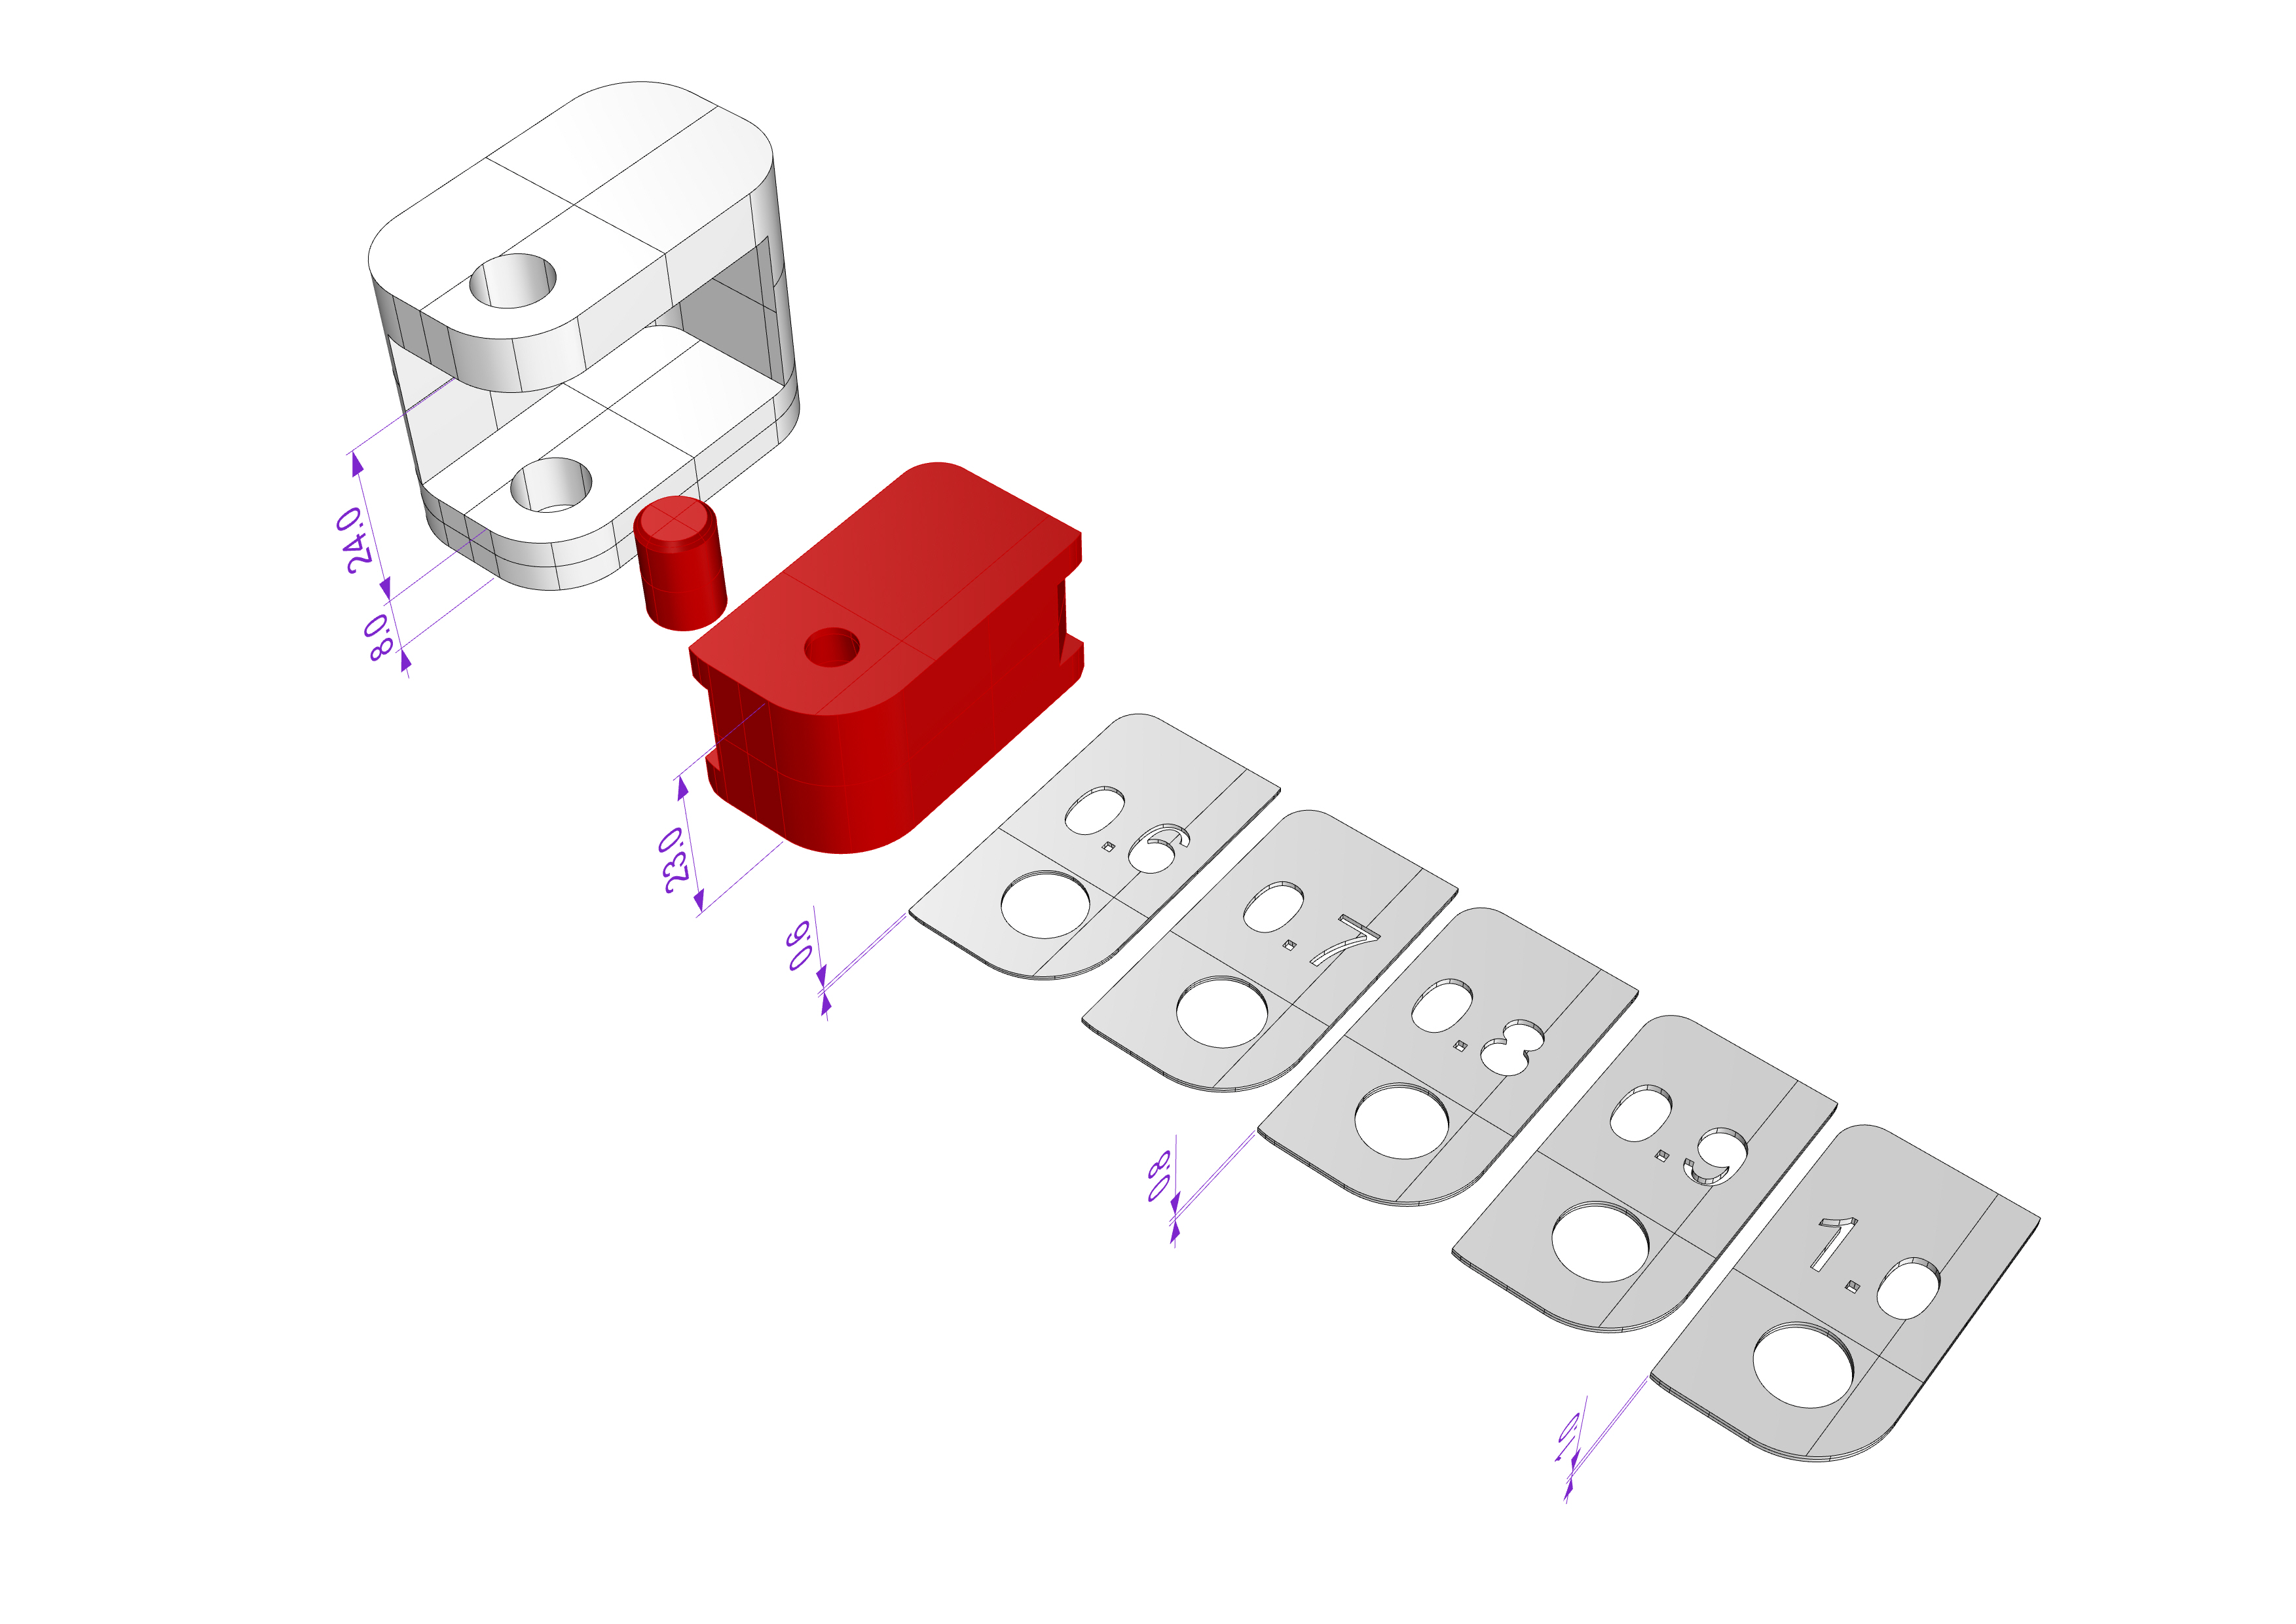
<p>I needed to print mechanical parts of PETG with an overhang. I was not satisfied about the standard support option. The printed support of PETG is difficult to remove and resulted in a sagged 'roof' and surfaces that needed too much grinding.</p> <p>So I tested succesfully the use of preprinted-support (PLA and PETG). The trick is to use spacers and glue.</p> <h3>Print instructions</h3><p>-Print the support with 1 mm less height of PLA or PETG.<br/> -Print some extra spacers. For this test I needed the 0.8 mm spacer. Use the Height Range Modifier in Prusa slicer to tune the layer height to fit the height of the spacers. (For example I print with a standard layer height of 0.3 mm and a first layer height of 0.2 mm. To get a height of 0.7 mm, I change the layer height to 0.2 mm from a height of 0.5 mm till 0.7 mm).<br/> -Put glue on the top of the pre-printed support, so the PETG will stick on it. I used two layers with drying in between.<br/> -Set the settings for the PETG print with Support Material/ Contact Z Distance on 0 (soluble).<br/> -Use Support Blockers or Support-from-build-plate-only so no support is printed under the overhang.<br/> -Print the PETG model with overhang with a stop (color change) at the first layer of the overhang.<br/> -Optional: Use the Height Range Modifier in Prusa slicer to tune the layer height near the 'inner surfaces' to fit the height of your design. (For example I print with a standard layer height of 0.3 mm and a first layer height of 0.2 mm. To get a height of 10 mm, I change the layer height to 0.2 mm from a height of 9.8 mm till 10.0 mm).<br/> -Optional: set the print speed of the 'overhang layer' to 20 mm/s and set the layer height the same as the 'first layer height'.<br/> -Use the pauze/stop to insert the spacers and the preprinted PLA support. Play with spacers height untill the top of the PETG and the preprinted support is leveled/flush. Use preprinted spacers and pieces of paper.<br/> -(<strong>Wish for prusa slicer:</strong> can a option be added to park the extruder behind the print? And can the Y axis be blocked during a pauze of the print?)<br/> -Secure the preprinted support with tape.<br/> -continue the print.<br/> -place the finished print in water to resolve the glue. Leave it quit a few hours to let the glue get soaked.</p> <p>My test print was a succes.</p> <p><strong>The benefits are:</strong></p> <ol> <li>The quality of all the surfaces is smooth.</li> <li>The height between the overhang is closer to the designed height and at least not less, so:</li> <li>no more grinding needed, so less work, but also less change for heat-deformation during grinding.</li> <li>Pre printed support can be re-used. So this saves support material and time to print supports in case of a series. But when PLA is soaked in water, needed to resolve the glue, it will deform. </li> <li>No PVA-HT needed, so no duo-nozzle-printer needed.</li> </ol> <p>See this discussion on the forum too:<br/> <a href="https://forum.prusaprinters.org/forum/original-prusa-i3-mk3s-mk3-how-do-i-print-this-printing-help/insert-a-pla-printed-part-during-the-print-to-function-as-support-material-for-petg/#post-254284">https://forum.prusaprinters.org/forum/original-prusa-i3-mk3s-mk3-how-do-i-print-this-printing-help/insert-a-pla-printed-part-during-the-print-to-function-as-support-material-for-petg/#post-254284</a></p>
With this file you will be able to print Test with preprinted support for PETG models with overhang with your 3D printer. Click on the button and save the file on your computer to work, edit or customize your design. You can also find more 3D designs for printers on Test with preprinted support for PETG models with overhang.