Tesla Urban Supercharger (WIP)
myminifactory
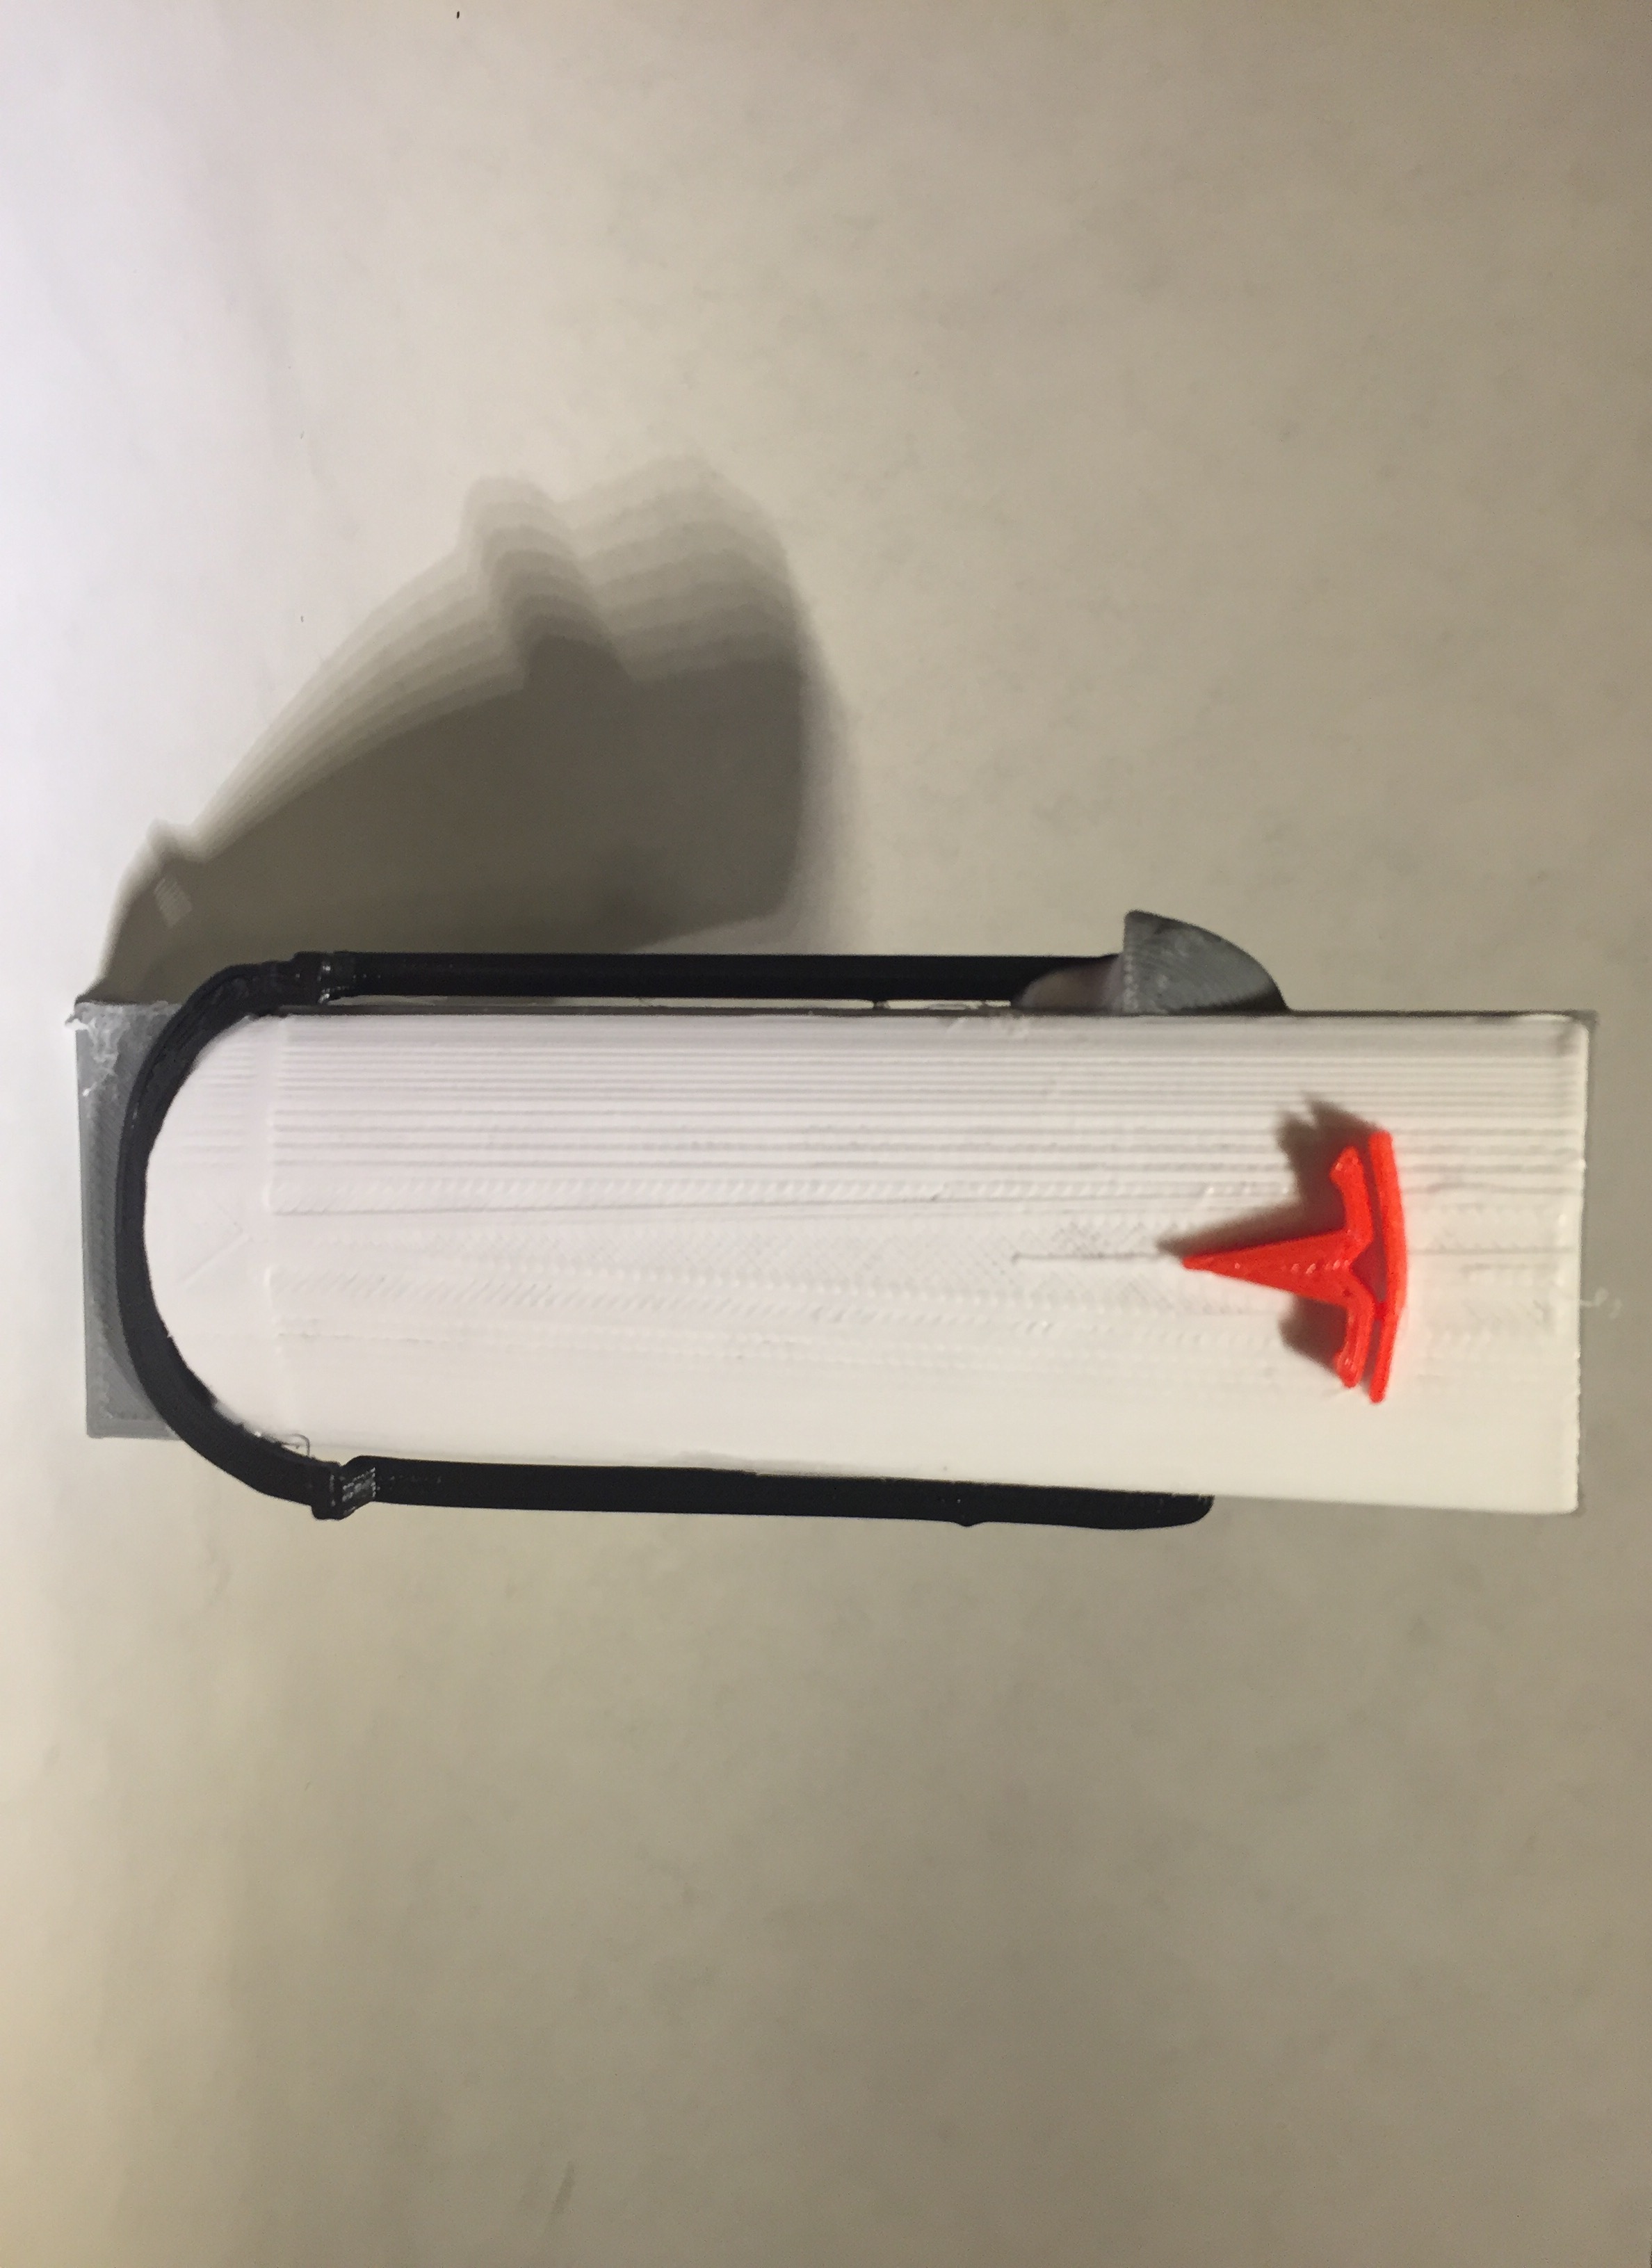
Warning: This is a Work in Progress. If You Print This, Be Prepared to Use Sandpaper to Smooth Out the Sides Where the Semi-Circle is Located at the Bottom and Also the Cable May Need Some Sanding to Look Right! Tesla has started installing these new urban superchargers so that people can charge their vehicles even if they don't have a home charger instead of using regular superchargers. This model is not a scale model or a perfect replica, but I think it looks cool on my shelf next to my regular supercharger that I printed. FDM printers do leave the model looking a little funny, but it's passable and from far away, it looks great. What to Print: * 2x Sides (White for the Real Look) * 1x The Middle (Gray for the Real Look) * 2x Tesla Logos (Red) * 1x Cable (Black) (WITH SUPPORTS) How to Get the Parts Ready for Assembly: 1. Sand the sides, especially at the bottom where the semi-circle is located, to make it smooth. 2. Sand the cable. 3. Sand any other parts you wish to get the look you are going for. This will be improved as I get better at modeling. I just did basic shapes and didn't have time or the want to make them line up because I knew it would be easier just to sand it. Assembly: 1. Glue the Tesla logo in the holes on the sides (it might not fit, I used a toothpick to put glue around the sides of the logo as you hold it down). 2. Get the cable and glue it in place at any points you wish. 3. Glue the sides to the middle, lining it up at the top to leave space at the bottom like it is in the real thing. 4. Let it dry!
With this file you will be able to print Tesla Urban Supercharger (WIP) with your 3D printer. Click on the button and save the file on your computer to work, edit or customize your design. You can also find more 3D designs for printers on Tesla Urban Supercharger (WIP).