Tesla model S radar mount
thingiverse
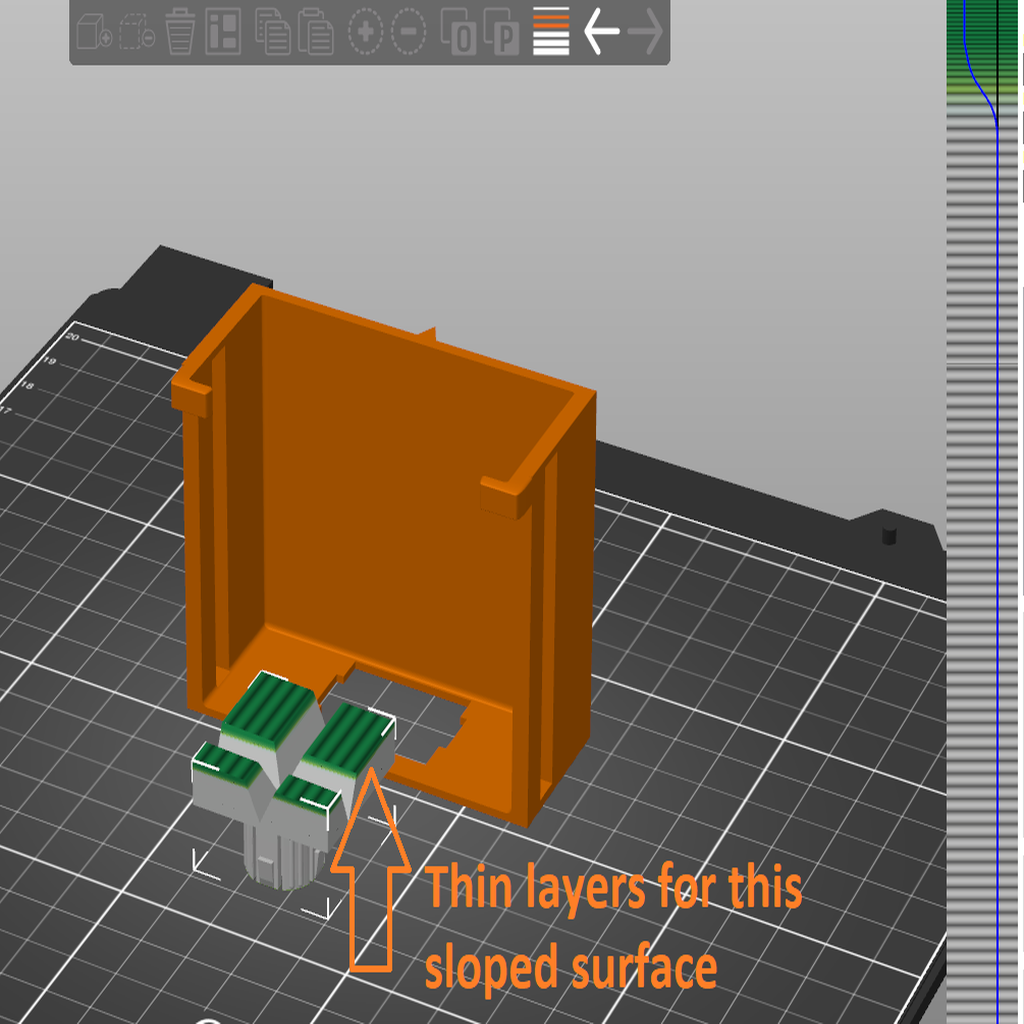
This installs a radar unit in a pre-autopilot Tesla Model S (2013) for use with OpenPilot. I'm using a radar unit salvaged from a newer Tesla. For hardware and software details, see https://tinkla.us/index.php/Tesla_Bosch_Radar. Use at your own risk! This is plastic, and plastic can break easily. Print in 100% infill. The parts print in two pieces: a bracket (black in my photo) and a peg (green in my photo). Both need supports to stay secure. I printed the peg in the orientation shown so that the barbs would be sharp, but the reverse orientation might work too. The top of the peg has a 1.3 degree slope, so I used the Prusa Slicer 'height ranges' option to print very thin layers there. Glue the peg to the back of the bracket using epoxy. Place the radar in the bracket and attach it to the peg. The peg clips into an empty socket in the metal behind the nose cone on the driver's side. See pictures for details. Use a high-temperature filament like ABS or PETG since you don't want this to melt in hot weather conditions. You can power the radar from the frunk fuse box. Here's a modified fuse box lid to make this easier: https://www.thingiverse.com/thing:4099229
With this file you will be able to print Tesla model S radar mount with your 3D printer. Click on the button and save the file on your computer to work, edit or customize your design. You can also find more 3D designs for printers on Tesla model S radar mount.