Tesla Model 3 Console Tray with integrated USB Hub + J1772 Slot
prusaprinters
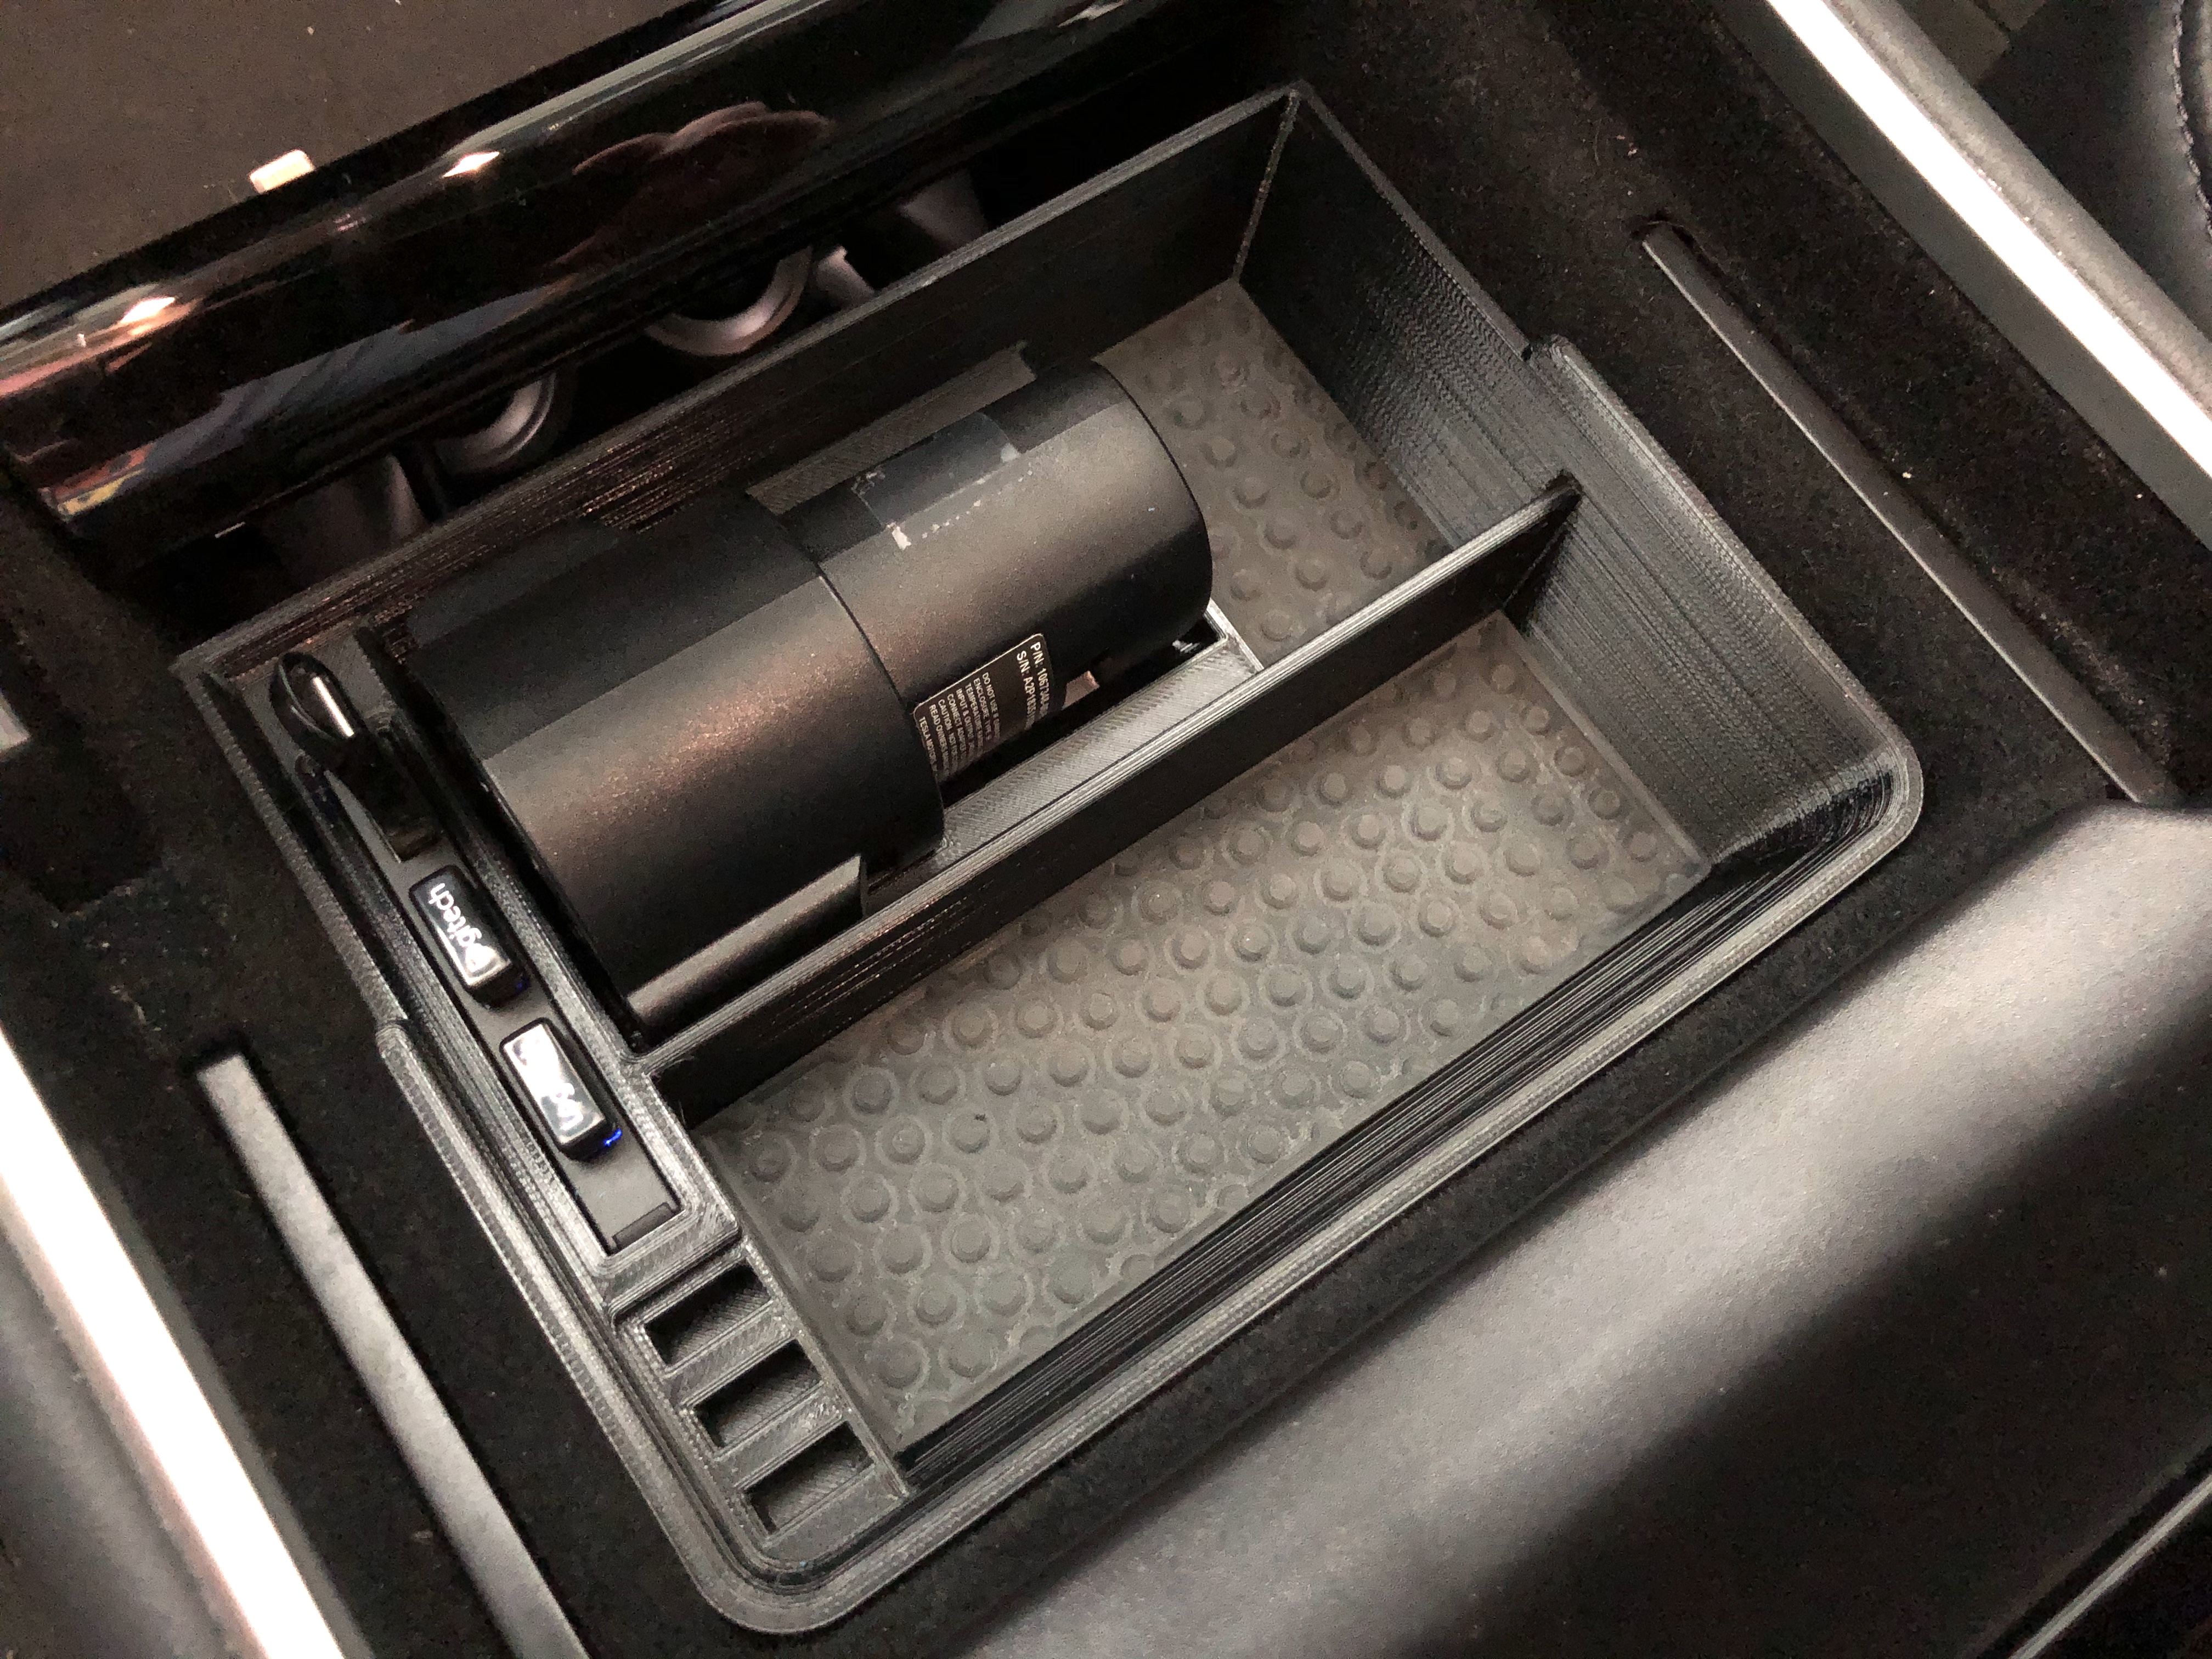
<p>OK, so this is a remix of my own model here: <a href="https://www.prusaprinters.org/prints/5805-tesla-model-3-tray-wj1772-storage-slot">https://www.prusaprinters.org/prints/5805-tesla-model-3-tray-wj1772-storage-slot</a>. I've integrated a USB Hub into the tray. This essentially adds 3 more USB ports, which is perfect for me to have 2 working phone chargers (as the car comes with) but also room for my Sentry Mode/Music storage media + 2 Logitech Controllers for Tesla in-car gaming!</p> <p>The USB Hub to use with this model is the "USB Hub, RSHTECH 4 Port USB 3.0 Ultra Slim Aluminum Data Hub Portable USB Splitter" found here: <a href="https://www.amazon.com/gp/product/B07RM322YY/">https://www.amazon.com/gp/product/B07RM322YY/</a>. You will also want a short male to female USB extension cable. You won't need more than about 10 inches (25cm), so get the shortest one you can find at least that long.</p> <p>I designed this model so that the above USB hub slides into an opening in the back of the tray. The source USB lead comes down out of a small opening on the bottom. The USB hub has a front-facing USB port which the normal phone charger can plug right into and the hub's source USB lead can be plugged into the car with a short USB extension.</p> <p>Perfect!</p> <p>UPDATE: I've now also included "USB Tray2.stl" which is the same model without the J1772 adapter spot.</p> <p>UPDATE2: I've now added "Negative Mold for Liners.stl" so you can pour your own urethane rubber liners.</p> <h3>Print instructions</h3><p>I printed the tray itself in PETG so that it could survive hot sunny days in the car. I used 0.2mm layers. There is some ~15mm bridging, but they came out super clean on my MK3S =).</p> <p>For my tray, I used Overture Black PETG. Looks great in the car, but shiny black plastic is hard to photograph =/</p> <p>The Negative Mold for Liners was printed in PLA using 0.07mm layers. Once printed, lightly sand to remove any burrs or whatever, then spray with Mold Release, mix up a small batch of 2-part urethane rubber mold mix (I made about 50ml, but you technically only need 20ml to exactly fill the negative mold). I also added 3 drops of So Strong Black Tint for that black liner look.</p>
With this file you will be able to print Tesla Model 3 Console Tray with integrated USB Hub + J1772 Slot with your 3D printer. Click on the button and save the file on your computer to work, edit or customize your design. You can also find more 3D designs for printers on Tesla Model 3 Console Tray with integrated USB Hub + J1772 Slot.