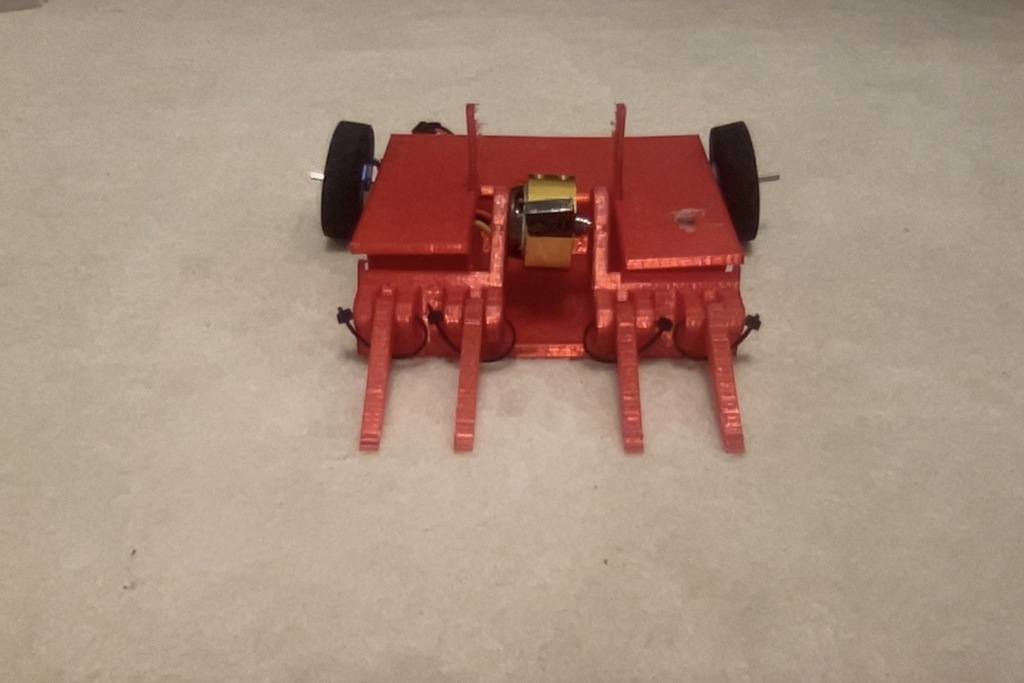
Terminator-A Well Documented Antweight Combat Robot
prusaprinters
<p>This is Terminator, a drum spinning destruction bot.</p><p>*All use is at your own risk I will not be liable for and damage and/or injury.</p><p>Here is the scoop version: <a href="https://www.printables.com/model/299306-terminator-scoop-version">https://www.printables.com/model/299306-terminator-scoop-version</a> </p><h3>Print Settings</h3><p><strong>Printer Brand:</strong></p><p>Creality</p><p><strong>Printer: </strong></p><p>Ender 3 Pro</p><p><strong>Rafts:</strong></p><p>No</p><p><strong>Supports: </strong></p><p>No</p><p><strong>Infill:</strong></p><p>100%</p><p><strong>Filament:</strong></p><p>N/A Nylon</p><p>N/A</p><p><br> </p><p><strong>Notes:</strong></p><p> </p><p>Made to be the boss of the arena.... Articulated forks made to always scrap the ground.</p><p>Post-Printing:</p><p><strong>Step 1: Installing Drive Motors-1</strong></p><p>Drill holes in where the screws go for fingertech motor mount.</p><p><strong>Step 2: Installing Drive Motors-2</strong></p><p>Install fingertech silver spark 30:1 of 50:1 motors. Connect to fingertech tiny esc's and FlySky FS-IA6B receiver.</p><p><strong>Step 3: Power Light</strong></p><p>Drill hole in top plate for LED power light. Use hot glue underneath the top plate.</p><p><strong>Step 4: Weapon Part-1</strong></p><p>Drill in fingertech 4mm shaft motor and connect to BL-Heli 20A Brushless Speed Controller and receiver.</p><p><strong>Step 5: Weapon Part-2 (optional but recommended)</strong></p><p>Hot glue 4mm flanged ball bearing into opposite side of motor for shaft to rest in.</p><p><strong>Step 6: Weapon Part-3</strong></p><p>Attach clamping drum assembly to motor.</p><p><strong>Step 7: Wheels</strong></p><p>Attach 3mm bore .5 inch fingertech twist hub pair to both motors. Then put on 2.00x.5in wheels.</p><p><strong>Step 8: Articulated Jaws</strong></p><p>Attach 4 articulated jaws so that they can always scrape the ground. I used small zip-ties tightened just enough and pointed down</p><p><img src="https://cdn.thingiverse.com/assets/ea/7e/48/a2/3e/7f00a377-641c-4802-a14a-9dffafcd4dcb.jpg"></p><p><strong>Zip-tie photo</strong></p><p><strong>Step 9: Wiring</strong></p><p>Connect all the wires as shown using fingertech terminal block red wires in red block, black wires in black block. For motors plug in miniQD ends that can come on tiny esc's. For receiver drive esc's go into slots 1 and 2 and weapon goes into slot 3. If certain one does not work just flip the way it faces.</p><p><strong>Step 10: Set remote settings to those shown below.</strong></p><p>Remember the FlySky FS-I6X has a weird quirk were you need to hold cancel to save settings NOT press ok. To get to Mixes and Reverse hold ok, press up, press ok, and scroll up or down until you find them. In the case of reverse it is right on top.</p><p><img src="https://cdn.thingiverse.com/assets/e7/99/e1/c8/6e/48db0a51-98f3-4992-a3c1-7964da42ffee.jpg"></p><p><strong>Mix #1</strong></p><p><img src="https://cdn.thingiverse.com/assets/ac/fe/b9/da/20/d660cf07-476d-4477-bb7d-185a8f7e99bd.jpg"></p><p><strong>Mix #2</strong></p><p><img src="https://cdn.thingiverse.com/assets/91/c6/4f/df/c2/63ab5e61-fa07-4744-81e3-f9852ed3ce9f.jpg"></p><p><strong>Reverse</strong></p><p><strong>Step 11: Go, Go, Go</strong></p><p>Plug in a 3s 450mah batter from fingertech website. Drive it and have fun.</p><p><strong>Step 12: (1/4 of the time this is not applicable)</strong></p><p>If motor goes wrong way switch witch way the miniQD connectors going into it.</p><p> </p><p> </p><p>Category: R/C Vehicles</p>
With this file you will be able to print Terminator-A Well Documented Antweight Combat Robot with your 3D printer. Click on the button and save the file on your computer to work, edit or customize your design. You can also find more 3D designs for printers on Terminator-A Well Documented Antweight Combat Robot.
