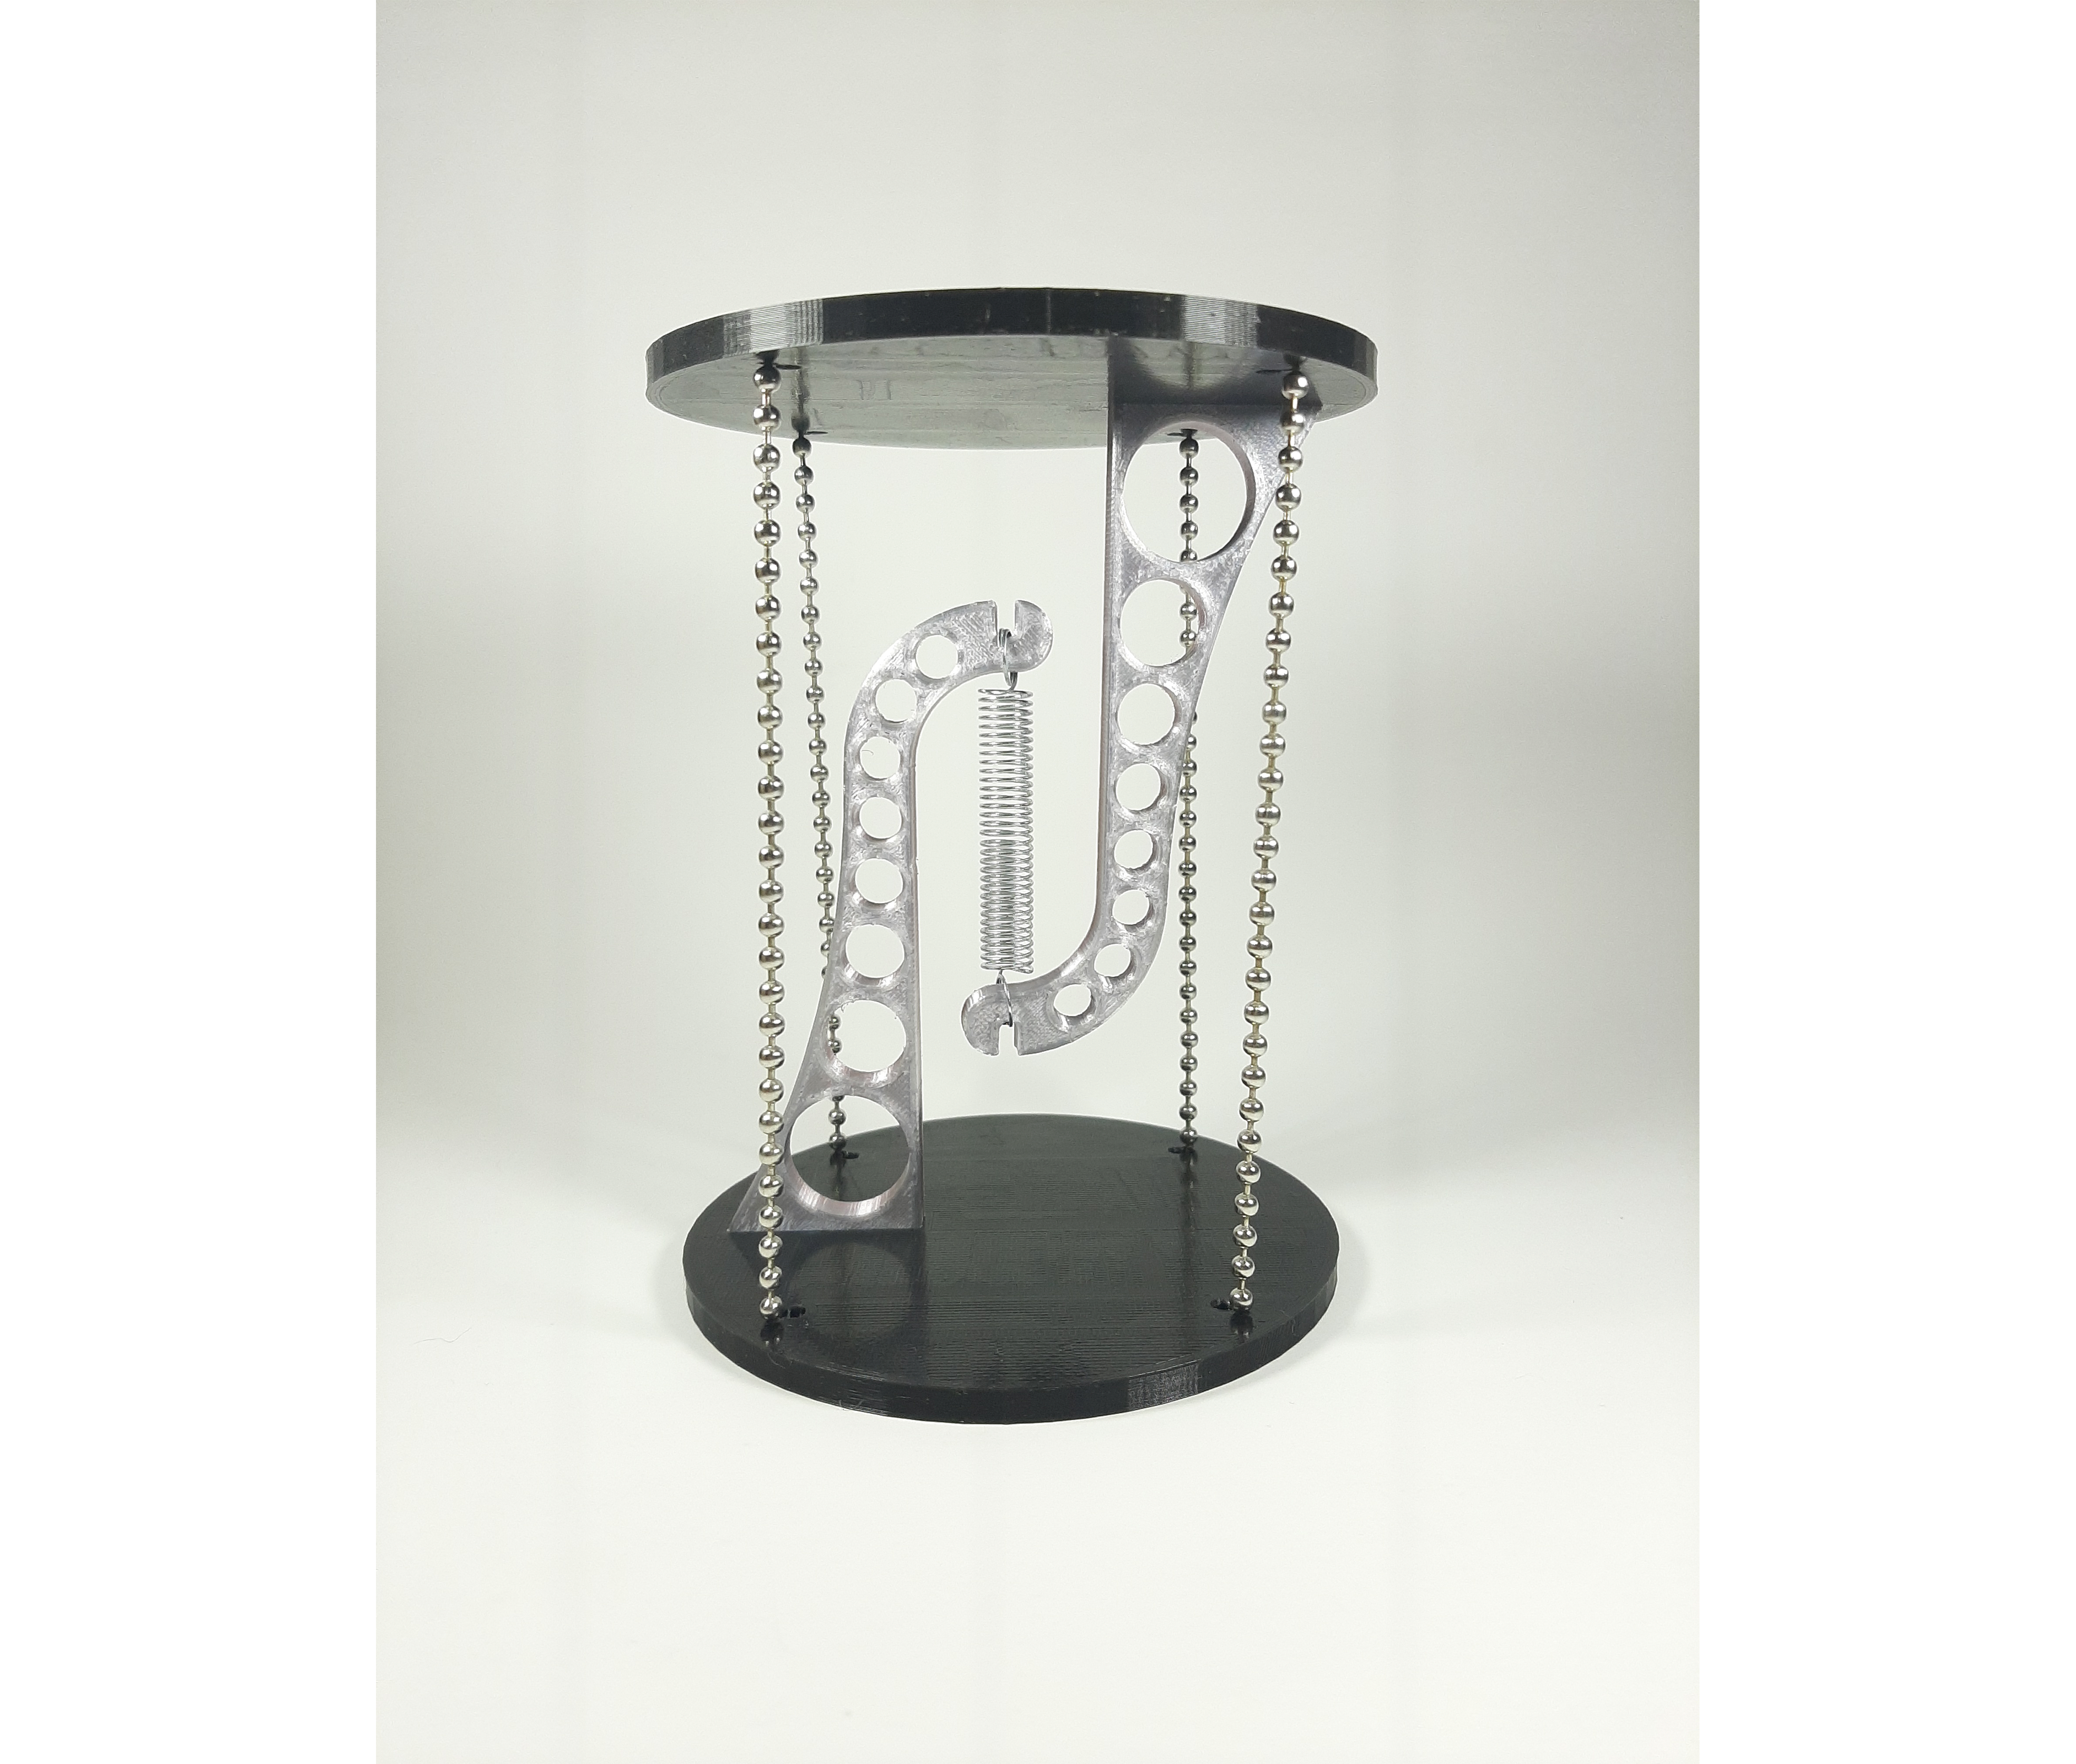
Tensegrity Structure
prusaprinters
<p>The design concept is pretty simple and straight forward. It consists of the following piece types and quantities:</p><ul><li>x2 compression pieces.</li><li>x2 base.</li></ul><p>For a complete set, you will need to print all <strong>4 pieces</strong>, have a <strong>string</strong> or a <strong>ball chain</strong> (with <strong>3mm diameter balls</strong>) and a <strong>rubber band</strong> or <strong>traction spring</strong>.</p><p>Regarding the issue of why there are so many different models, it is due to the way they are meant to be assembled. The three types of bases are intended for three distinct “traction” piece types.</p><p>The following list explains each base type:</p><ul><li>The <strong>“loop base”</strong> is intended to be assembled by making 4 equal loops with the string. With this method, the structure is completely dismountable.</li><li>The <strong>“knot base”</strong> is intended to be assembled by cutting 4 equal string lengths and adding a knot in each extreme of the string (once inserted into the bases, trapping everything in place). With this method, the structure can only be disassembled by removing the rubber band or spring.</li><li>The <strong>“ball chain base”</strong>, as its name indicates, is intended to be assembled using 4 equal lengths of 3mm diameter ball chains. This method is the easiest to set up and, in my opinion, the one that works best.</li></ul><p>It's important to state, that <strong>not all models are compatible with each other</strong>. The compatible ones are listed here referring to their file names:</p><ul><li>“thin compression piece” ⇄ “loop base” & “knot base”</li><li>"thick compression piece" ⇄ “ball chain base”</li></ul><p>This is mainly due to the thickness of the compression piece, this being 3mm & 5mm for the thin & thick ones respectively.</p><h3>Print Settings</h3><p>Printed in PLA, without rafts, at 0.2mm resolution and 100% infill for the compression pieces and %15 for the bases.</p><p>The use of supports is not really required is your printed is properly calibrated. If you want to be safe, and use supports, I will suggest to put the fit hole, the one where the compression model fits, always in the up side.</p><h3>Assembly</h3><p>The assembly of this one is a bit tricky, and for each base type is a little different, although the first part is the same: insert the compression piece and glue into the base of your choice. Just as seen on the following three .GIFs:</p><p><i>“Loop base” type compression piece assembly (you will need to do this twice):</i></p><figure class="image image-style-align-center image_resized" style="width:75%;"><img src="https://media.printables.com/media/prints/306880/rich_content/8e0c510d-0240-403b-a727-26087b85e9be/tensegrity-structure-cuerda-lazo-editado-fancy.gif#%7B%22uuid%22%3A%2252b677c0-c828-422e-adbb-891f829c0877%22%2C%22w%22%3A800%2C%22h%22%3A800%7D"></figure><p><i>“Knot base” type compression piece assembly (you will need to do this twice):</i></p><figure class="image image-style-align-center image_resized" style="width:75%;"><img src="https://media.printables.com/media/prints/306880/rich_content/3be67bd3-5f0a-45b7-86de-6ef71fabb82c/tensegrity-structure-cuerdas-nudos-editado-fancy.gif#%7B%22uuid%22%3A%222c7bb957-c4c4-43e9-85ee-4fff38a9e2e5%22%2C%22w%22%3A800%2C%22h%22%3A800%7D"></figure><p><i>“B</i>all chain base<i>” type compression piece assembly (you will need to do this twice):</i></p><figure class="image image-style-align-center image_resized" style="width:75%;"><img src="https://media.printables.com/media/prints/306880/rich_content/39c5b3cf-eac1-44e0-99ee-fd31b9fdfd28/tensegrity-structure-cadena-bolas-editado-fancy.gif#%7B%22uuid%22%3A%227833e340-436e-4ec1-93f8-f8ed1cbe1691%22%2C%22w%22%3A800%2C%22h%22%3A800%7D"></figure><p>As briefly mention earlier, each vase type is assembled differently:</p><ul><li>For the <strong>“loop base”</strong> make 4 equal loops with the string. Then, as seen in the pictures, the loops fit into the little arcs of the vase.</li><li>For the <strong>“knot base”</strong> cut 4 equal string lengths (around 13cm) and add a knot in each extreme of the string (once inserted into the bases, trapping everything in place). Having already assembled a few, I would recommend marking the lengths (with a marker or something) of where do you want the knots once the “bottom” ones are already in place. This helps to make all 4 of the strings sit around the same high.</li><li>The <strong>“ball chain base” </strong>uses 4 equal lengths of 3mm diameter ball chains. I counted around 33 balls for each side, measuring around 13cm. With this type of vase, the insertion part is a bit tricky, as is illustrated with the following .GIF:</li></ul><figure class="image image-style-align-center image_resized" style="width:75%;"><img src="https://media.printables.com/media/prints/306880/rich_content/85e1335a-a90e-4ef8-93b3-0832bfc40492/tensegrity-structure-cadenas-detalle-bolas-con-edicion-fancy.gif#%7B%22uuid%22%3A%22270459aa-bde0-4310-b6e2-70221487e061%22%2C%22w%22%3A800%2C%22h%22%3A800%7D"></figure><p>For all the 3 cases, the traction part should measure around 13cm being basically the total high of the contraption once assembled.</p><p>Finally, once the compression part is glued and the traction part of choice is cut and put into place, you will need a central traction part. You can use a traction spring (see the annex for the one that I have used) or you can simply put a rubber band! just as seen in the following .GIF:</p><figure class="image"><img src="https://media.printables.com/media/prints/306880/rich_content/317a1fca-29a2-4186-8923-2745b3ebb985/20221111_182609.gif#%7B%22uuid%22%3A%22eb81ae72-2f6a-4bd5-ac45-296b6f7b0008%22%2C%22w%22%3A600%2C%22h%22%3A841%7D"></figure><h3>Annex</h3><p>The dimmensions of the ball chain that I have used:</p><figure class="image"><img src="https://media.printables.com/media/prints/306880/rich_content/8a93f456-e8d5-4fe1-ae6d-83cb53b69700/cadena-bolas-captura.jpg#%7B%22uuid%22%3A%22cb15948f-c4cc-4ce1-a9c7-d6153a6f5f01%22%2C%22w%22%3A737%2C%22h%22%3A737%7D"></figure><p>A 360º .GIF of the ball chain base type assembled:</p><figure class="image image_resized" style="width:75%;"><img src="https://media.printables.com/media/prints/306880/rich_content/a979216a-9488-429d-b5c1-8e8ff31a6d09/video-rotacion-recortado.gif#%7B%22uuid%22%3A%22b3794afd-24b4-42aa-aa70-11bb2205efc9%22%2C%22w%22%3A800%2C%22h%22%3A800%7D"></figure><p>The strigs that I used were this ones from Amazon:</p><p><a href="https://www.amazon.es/Compresion-Extensi%C3%B3n-Resortes-Tracci%C3%B3n-Almacenamiento/dp/B08SKBBG2T/ref=sr_1_6?__mk_es_ES=%C3%85M%C3%85%C5%BD%C3%95%C3%91&crid=12BQDW4FQZLVY&keywords=muelles&qid=1668111146&qu=eyJxc2MiOiI2Ljc3IiwicXNhIjoiNi4wOSIsInFzcCI6IjUuMTIifQ%3D%3D&sprefix=muelles%2Caps%2C160&sr=8-6">https://www.amazon.es/Compresion-Extensi%C3%B3n-Resortes-Tracci%C3%B3n-Almacenamiento/dp/B08SKBBG2T/ref=sr_1_6?__mk_es_ES=%C3%85M%C3%85%C5%BD%C3%95%C3%91&crid=12BQDW4FQZLVY&keywords=muelles&qid=1668111146&qu=eyJxc2MiOiI2Ljc3IiwicXNhIjoiNi4wOSIsInFzcCI6IjUuMTIifQ%3D%3D&sprefix=muelles%2Caps%2C160&sr=8-6</a></p>
With this file you will be able to print Tensegrity Structure with your 3D printer. Click on the button and save the file on your computer to work, edit or customize your design. You can also find more 3D designs for printers on Tensegrity Structure.
