Teensy 3.2/4.0/LC soldering jig
thingiverse
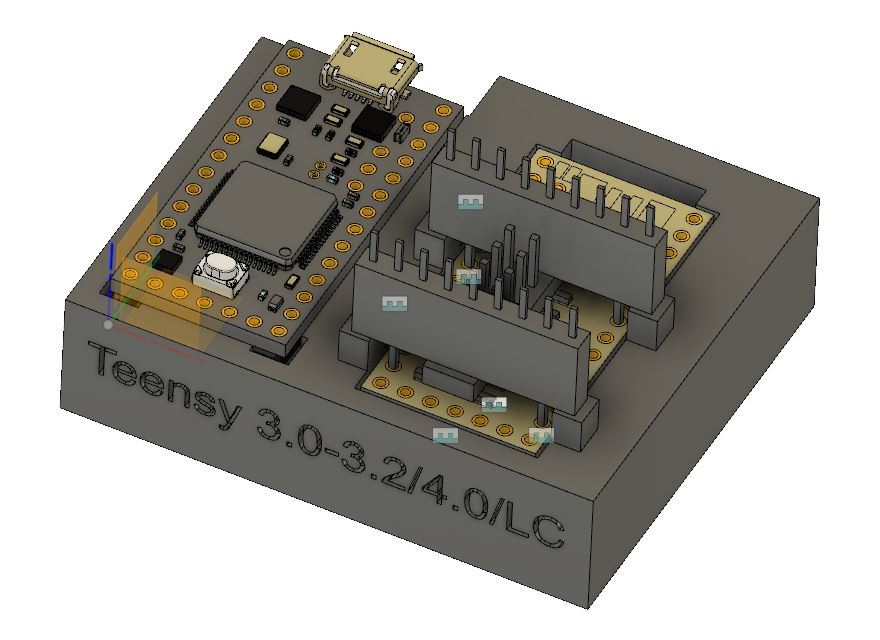
I adore PRJC's Teensy 3.2 modules, but soldering them and ensuring their pins are perfectly aligned is a tricky task, especially when dealing with the bottom SMD connector. It's a challenge I've faced firsthand, and it's one that I'm eager to overcome. To make installation of pin headers and the bottom SMD connector easier, I've designed this jig to help me avoid the risk of melting my solderless breadboards. I found positioning and aligning the bottom connector to be the most difficult part, and 3D printing alignment pins or holes didn't work out for me (they were too small, and I didn't want to bother with a nozzle change for something so minor). Instead, I used standard 2.54mm/0.1" pin headers and female receptacles to handle positioning for me, along with some support pegs on the jig to keep everything level. Once the bottom connector is installed, it's just a matter of cutting pin header strips of the correct length to drop into the channels in the jig and soldering them from the top-side - easy peasy! The model shows a Teensy 3.2, but it should work with the slightly different footprint Teensy 4.0 by choosing different pins to align the bottom connector (just follow the instructions below). I'd love to hear more about how to make this jig better; it still requires a bit of effort to attach the bottom connector, so if you have any ideas on how to improve it or anything else, please let me know!
With this file you will be able to print Teensy 3.2/4.0/LC soldering jig with your 3D printer. Click on the button and save the file on your computer to work, edit or customize your design. You can also find more 3D designs for printers on Teensy 3.2/4.0/LC soldering jig.