TEDDY BEAR PLANTER POT
pinshape
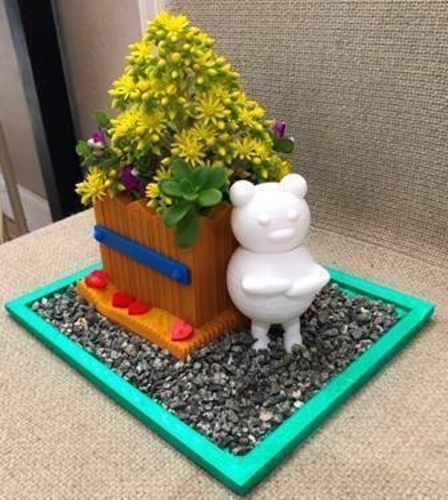
Want to design your planter pot by yourself? Are you good at designing with 3D Software? With this tutorial, I concentrate on how to design planter pot by myself using Tinkercad and bring the design to life by printing them. for more tutorial diy, click: https://3dprintingcenter.diy4pro.com/2020/12/teddy-bear-planter-pot.html 3D PRINTING SETTINGS For final result, we need to print all the previous design one by one. It is up to you to choose the color. For teddy bear, I choose white color for all part. Because the base pot is too large, I divide it into 2 parts. After finishing all the designs, save and export it to .stl files. Select parts you want to print and export it. Open the 3D Digilab Dremel Slicer and open the file that you want to print. Select the print option. For my printing, I used recommended option: Profile: Medium Speed Infill: 20% Generate Support: Yes (for parts with overhang and bridge) Built Plate Adhesion: Yes Click ready to slice and print it.
With this file you will be able to print TEDDY BEAR PLANTER POT with your 3D printer. Click on the button and save the file on your computer to work, edit or customize your design. You can also find more 3D designs for printers on TEDDY BEAR PLANTER POT.