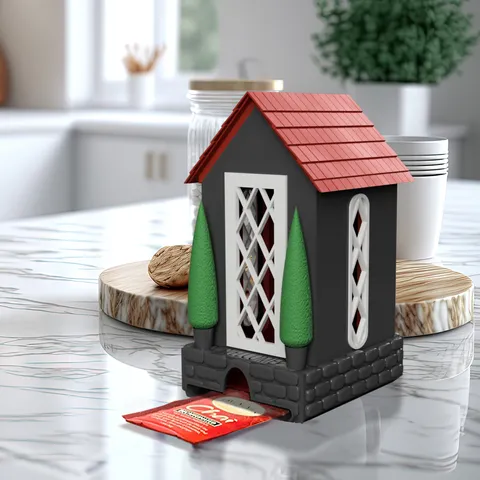
Tea House
prusaprinters
Hi-dy-ho neighborinos, welcome back to another episode of Julie learns to 3D print. In this episode we'll print a tea house: About:My inspiration was this tea house on Amazon: https://www.amazon.com/OTOTO-Organizer-High-quality-Housewarming-Organizer/dp/B079P8XDJW?ref_=ast_sto_dp&th=1&psc=1 While it's adorably cute, I wanted something a little more … teahouse-y. I also wanted to fit a wider range of tea bag sizes.The Model:There are three parts:house (inner diameter 78mm)doors and windows (snap-in, friction fit, but epoxy might be a good idea)roof (to use with stand-alone tea house) or insert with roof (slides into tea house)I've included the original, plain house model version that you see in my pictures (in Reference folder). However, after I printed and tested that model I made a few upgrades including:taller opening for the tea bags and for your finger decorative brickwork around the base, flower pots on either side of the door, and arborvitae that fit inside the pots (including a 2 mm hole in both so you can pin the tree (or whatever other decoration you create) in place. an insert that better hugs Twinings/Tazo tea bags that you can epoxy to the roof, which also allows you to easily add and remove tea bags by lifting the whole insert. The tea house works without the insert, but Tazo-Twinings tea bags can get sloppy. Square 75mm bags fit like a champ. Printing:Printed with Hatchbox purple PLA pro at 190C on my Anycubic Vyper at 80mm/s, 20% infill, 60C heated bed. The roof should be printed with a raft (see picture) and supports.I printed the house with supports, which are recommended for the door and windows; no bed adhesion. The supports were challenging to remove from the lower tea bag slot, which slopes on the interior and should not need supports, so, I'd recommend using support blockers for everything 0-33mm except the tea bag slot, but for the love of your sanity, DO NOT let the slicer put supports on the bricks. Don't … unless you like the dilapidated look and plan to leave them there.Finishing:You'll need to remove the supports from the door and windows, which should be pretty easy. In order for the door and windows to snap-fit, you may need to do some light sanding with a 220 grit sanding stick or rotary tool.Also, if you're using the insert for the Twinings/Tazo tea bags, you'll need to epoxy the roof to the insert (there will be a slight depression on the inside of the roof). I used UV-light-curing Bondic and it worked great. I'd love to see if anyone makes any other plants for the flower pots!Have fun!
With this file you will be able to print Tea House with your 3D printer. Click on the button and save the file on your computer to work, edit or customize your design. You can also find more 3D designs for printers on Tea House.
