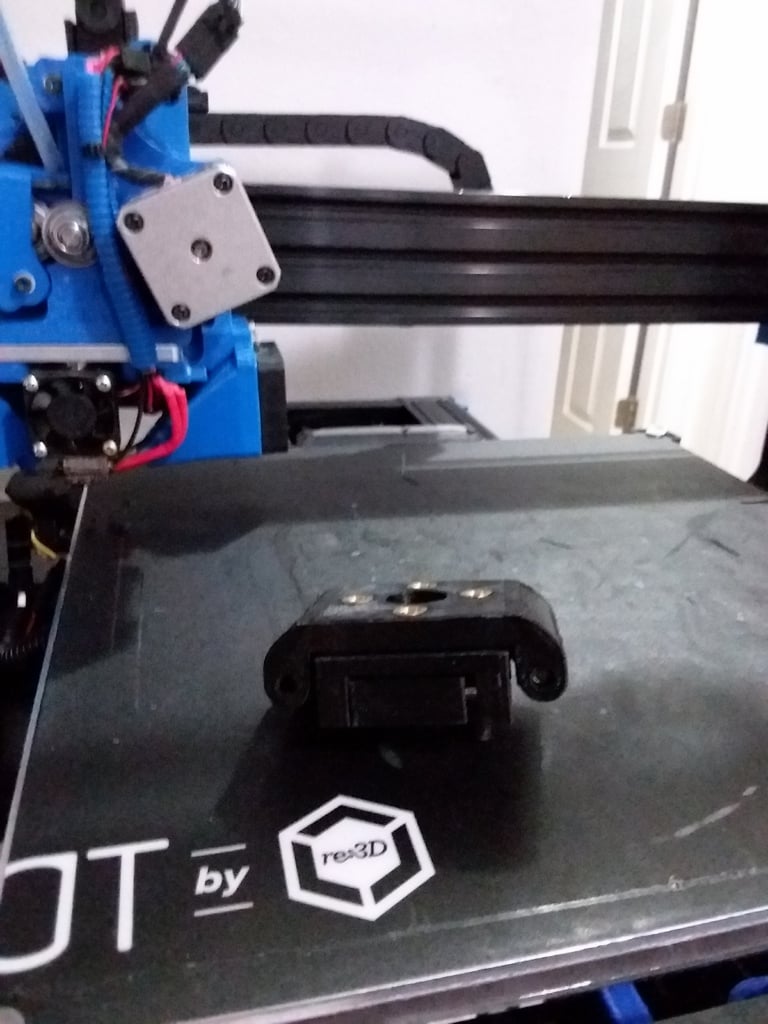
Taz 6 Anti Wobble
thingiverse
This is a Taz 6 specific variant of my existing Taz 5 Antiwobble design (https://www.thingiverse.com/thing:1089626). It uses the same steel pin and igus bearing design, just doubled up and eliminating the upper plate pins. It seems to work fine so far. This is the retrofit variant. A taz 6 x axis openbuilds specific variant built into the taz 6 openbuilds x motor and idler is also on the way. Development thread here: https://forum.lulzbot.com/viewtopic.php?f=16&t=6820&p=37920#p37920 You will need the following parts: 8 M5 heat set inserts http://www.mcmaster.com/#94180a361/=zhts4o 4 3/16" 1 and 3/4" long steel shafts (locally sourced from Ace Hardware) 4 3/16" 2" long steel shafts (locally sourced from Ace Hardware) 16 Igus 2MTRI MYI-03-03 Flanged Bearing, 3/16" ID x 3/16" L (ebay) The stock M5 bolts 4 additional m5 bolts (probably 10mm long?) Instructions: 1. Insert the M5 heat set nuts into the 4 holes in the upper mount. 2. Insert the Igus bearings in the grooves. You will likely need to clearance the holes for good fit. 3. Bolt the lower piece onto the stock leadscrew mounting point in place of the leadscrew nut. Remove the green ring at that time. 4. Push the pins into place to lock the middle section over the lower section, I find it's easiest to drill out one side and partially into another to make one side of the pin insertion point a friction fit. 5. Now install the upper section. 6. Bolt the leadscrew nut to the new wobble mount. Notes: 1. This is experimental and untested. I don't have a Taz 6 frame to fit it to. It should fit, but it may not. If it does fit, someone please let me know. 2. You will need to repeat steps on both sides of the printer to ensure proper alignment. 3. Ensure that the distance from the top of the leadscrew nut to the bottom of the upper leadscrew bearing bottom surface is the same on both sides of the printer. Test procedure: 1. Proceed with a test print. You should now see much less visible Z offset. 2. If you encounter any layer separation or odd layer squish patterns that were not there before, ensure that the anti-wobble is not allowing any movement in the Z axis direction and adjust accordingly to make sure the pins cannot move up or down. Important note: This design may require some fine-tuning to achieve optimal results. Be prepared to experiment with different settings and adjustments as needed.
With this file you will be able to print Taz 6 Anti Wobble with your 3D printer. Click on the button and save the file on your computer to work, edit or customize your design. You can also find more 3D designs for printers on Taz 6 Anti Wobble.
