TAZ 5 Toolhead with Bondtech QR Universal Extruder
prusaprinters
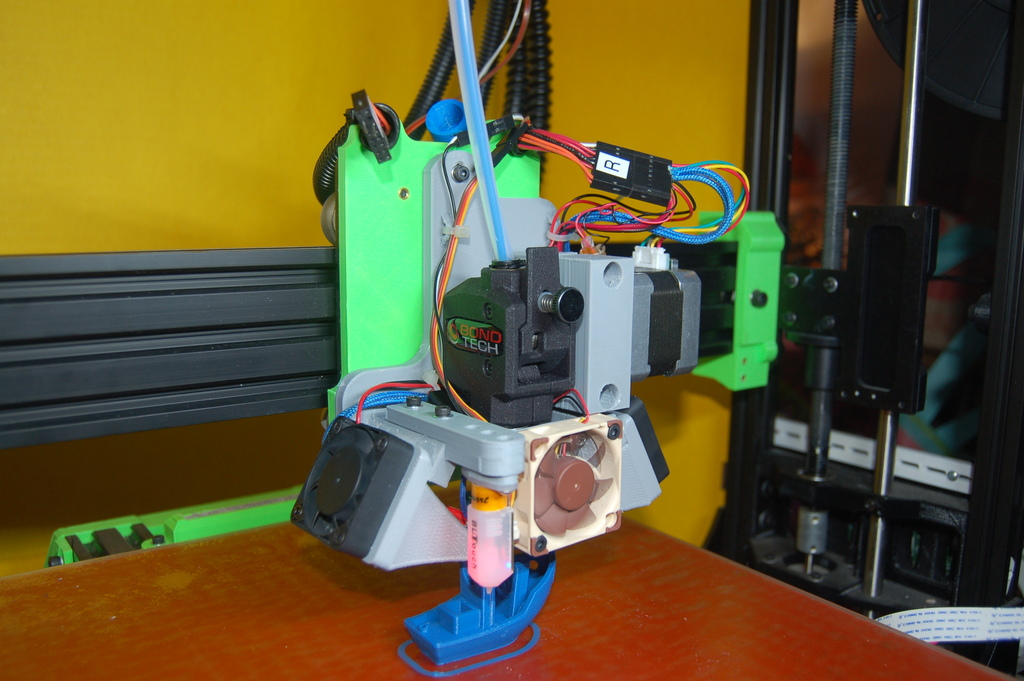
<p>These are components for constructing a toolhead for the TAZ 5 3D Printer using the BondTech QR Universal extruder. The mounting plate is derived from the Lulzbot design to fit into the standard TAZ 5 X axis carriage.</p> <p>The design includes the mounting plate and clamp, a left-side fan duct, A BLTouch mount, a 1 mm shim for the BLTouch, and an adapter to mount a 40 mm fan to the 30 mm extruder fan shroud of an E3D v6 hotend.</p> <h3>Print Settings</h3> <p><strong>Printer:</strong></p> <p>Modified TAZ 5</p> <p class="detail-setting rafts"><strong>Rafts: </strong> <div><p>No</p></div> <p><strong>Supports:</strong></p> <p>Yes</p> <p class="detail-setting resolution"><strong>Resolution: </strong> <div><p>0.3 mm</p></div> <p><strong>Infill:</strong></p> <p>85%</p> <p><strong>Filament:</strong></p> Amazon Basics PETG <p>Grey</p> <p><br/> <p class="detail-setting notes"><strong>Notes: </strong></p> </p><div><p>The mounting plate and clamp were printed at 85% infill. </p></div> Post-Printing ============= <p>The holes are sized for M3 screws and threaded brass inserts. The inserts I used are <a href="https://www.mcmaster.com/catalog/94180A331">M3-0.5x3.8</a> and <a href="https://www.mcmaster.com/catalog/94180A333">M3-0.5x6.4</a>.</p> <p>You will need two <a href="https://www.mcmaster.com/catalog/126/3290">M3-0.4x50</a> screws to secure the clamp to the mounting plate.</p> <p>You will need to shim the BLTouch on the mounting arm to achieve the correct position. Once you determine the shim thickness needed, print the shim while scaling the z-axis to the desired thickness.</p> <p>The files include only a left side fan duct, for the right side I just mirrored this part in the slicer software.</p> <p>A note of caution: The stepper motor protrudes to the slightly side farther than the original hardware. It's possible for the motor to collide with the z-axis mounts. I edited the following line in Conditions_LulzBot.h of the Marlin firmware to prevent this.</p> <h3>define LULZBOT_STANDARD_X_MAX_POS 285</h3> <h3>How I Designed This</h3> <p>Key details of the mounting plate were extracted from the <a href="http://download.lulzbot.com/TAZ/6.03/production_parts/printed_parts/extruder_mount_taz6/extruder_mount_taz6_v0.8.FCStd">TAZ6 extruder mount</a>.</p> <p>I attempted to place the nozzle tip in the same location as the original configuration. It is close, but it is probably off by a few mm.</p> <p>The fan duct was modified from the <a href="http://download.lulzbot.com/TAZ/6.03/production_parts/printed_parts/fan_duct_left/fan_duct_0.7.4.FCStd">TAZ6 fan duct</a>.</p> <p>The duct was modified so that the mounting holes line up with the holes in the fan. The mounting screws can then secure the top edge of the fan and the duct at the same time.</p> </p></p> Category: 3D Printer Extruders
With this file you will be able to print TAZ 5 Toolhead with Bondtech QR Universal Extruder with your 3D printer. Click on the button and save the file on your computer to work, edit or customize your design. You can also find more 3D designs for printers on TAZ 5 Toolhead with Bondtech QR Universal Extruder.