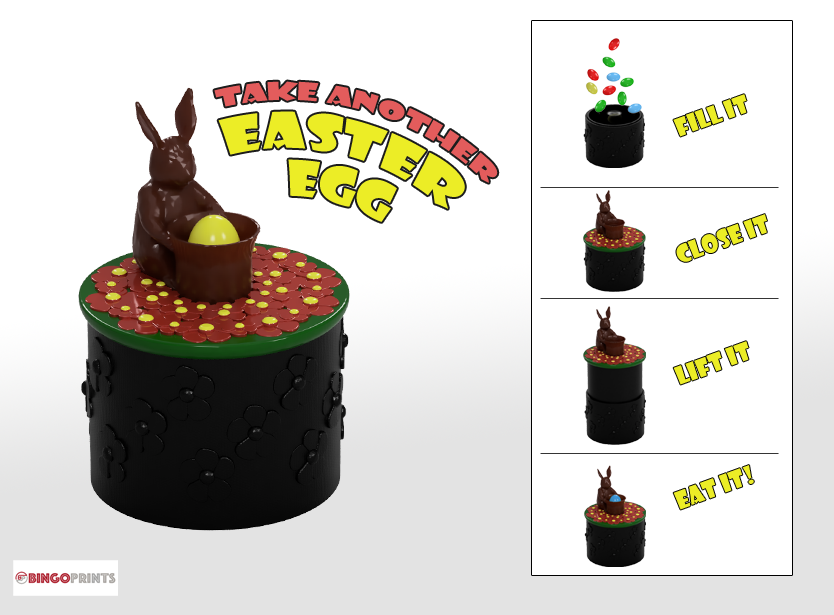
Take another easter egg!
prusaprinters
<p>Treat yourself to an easter egg!</p> <p>While you lift the bunny, an easter egg is placed in the middle of the basket.</p> <p>Enjoy it, and take another one! What colour do you think is next?</p> <p>Please post your make. To see your print makes me happy!</p> <p>Please check also my other similar dispensers: <a href="https://www.prusaprinters.org/prints/28150-take-another-chocolate-button">https://www.prusaprinters.org/prints/28150-take-another-chocolate-button</a><br/> <a href="https://www.prusaprinters.org/prints/27516-dispenser-for-candies-pearls-pills">https://www.prusaprinters.org/prints/27516-dispenser-for-candies-pearls-pills</a></p> <p>Credits to MaxFunkner who designed the bunny:<br/> <a href="https://www.thingiverse.com/thing:2814268">https://www.thingiverse.com/thing:2814268</a></p> <h3>Print instructions</h3><p><strong>Printing advices</strong><br/> The box will be printed in an inner and an outer shell in one piece. The support structure for the inner shell bottom is already designed in the file, so you don't need to add support. But you must <strong>activate the option "Detect thin walls"</strong> in expert mode of prusaslicer. Otherwise, the support structure will not be printed. Also turn the <strong>"Bridging angle" to 90°</strong> for best results.</p> <p><strong>You can print this model in different colors without Palette or MMU!</strong> Just print each part in a different color.<br/> If you want to print the file "Eastern Deco.stl" in two separate colors, just make a color change on the upper layers.</p> <p><strong>Very important after printing</strong><br/> To separate the inner shell from the outer shell, you must break the hidden support structure by hand! Just press every wall of the inner shell with your fingers against the walls of the outer shell. You will need a bit of power for that. If you have heard the clicking noise of the hidden support structure, try to lift the inner shell. That will break all the support structure. As last step, glue the decoration and the bunny on the lid.</p> <p>Now fill the inner shell with small easter eggs made of sugar and put the lid on the top of the inner shell.</p> <p>Enjoy!</p>
With this file you will be able to print Take another easter egg! with your 3D printer. Click on the button and save the file on your computer to work, edit or customize your design. You can also find more 3D designs for printers on Take another easter egg!.
