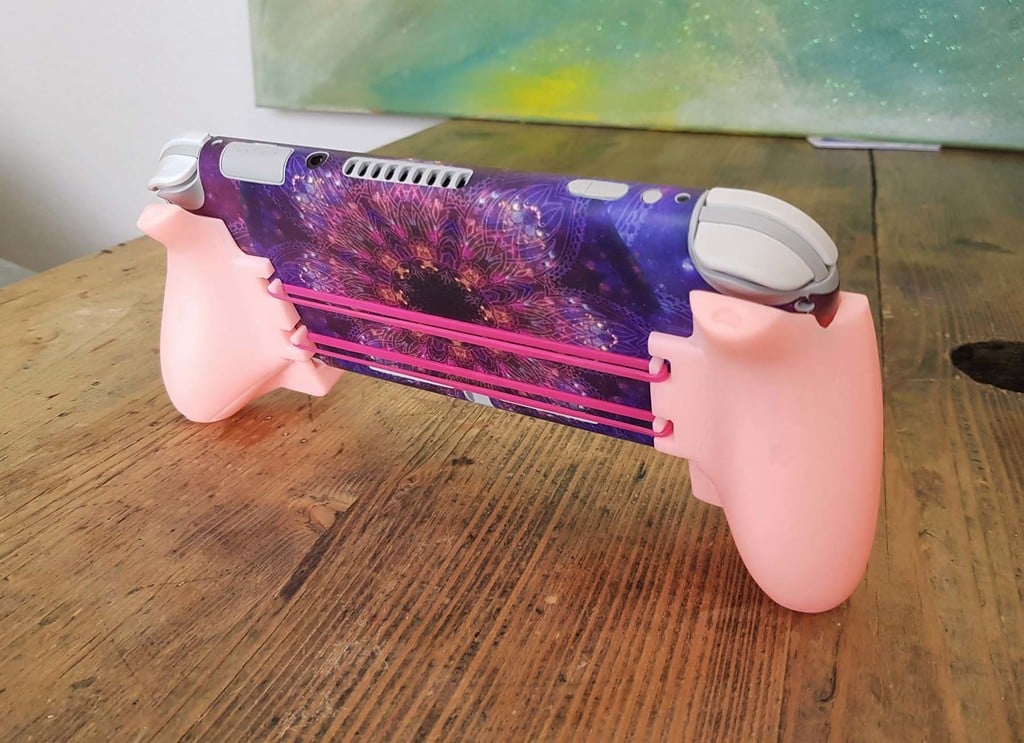
Switch Lite Grip - PRE-SUPPORTED RESIN EDITION!
thingiverse
Hello :) I customized the Switch Lite grip from icefox1983 to fit my AnyCubic Photon S print bed size in one single print without Gluing! ### Things I Modified: 1 - Split both halves apart 2 - Added Notches for rubber bands as the middle piece to hold both halves together 3 - Smoothened the Grips surface 4 - Embossed little Hearts on the top trigger supports :3 5 - Adjusted Sizes and dimensions to my Switch Lite (due to resin post curing shrinkage etc...) 6 - Pre-supported them and arranged them on the build plate (very tight fit!) This way, you can print both of them in one go, and use them as is with no gluing! Also this design saves on resin, and weight in your backpack! ### Printing! You can basically just use the pre-supported pre-sliced .photons file IF you have a Photon S. In that case, adjust the exposure settings to your resin directly during printing (start the print, then the cogwheeel button let you do that). The Print settings/parameters I used (and baked in the sliced file): Bottom layers exposure time: 80 s Bottom layers number: 6 Normal exposure time: 5 s Layer thickness: 0.02 mm Real Printing Time: around 14 Hours (estimated to 12h in the slicer) Resin consumption: around 60-65 mL Resin I used: Anycubic plant-based ECO pink Temperature during my print: 25-28 celsius ### Post Printing! The usual: 1 - Wash 2 - Remove supports 3 - Dry 4 - Cure under lukewarm water 5 - Sand supports knobs Then you just need two average sized rubberbands and a Nintendo Switch Lite! (Place the rubberbands like you can see in the picture up there)
With this file you will be able to print Switch Lite Grip - PRE-SUPPORTED RESIN EDITION! with your 3D printer. Click on the button and save the file on your computer to work, edit or customize your design. You can also find more 3D designs for printers on Switch Lite Grip - PRE-SUPPORTED RESIN EDITION!.
