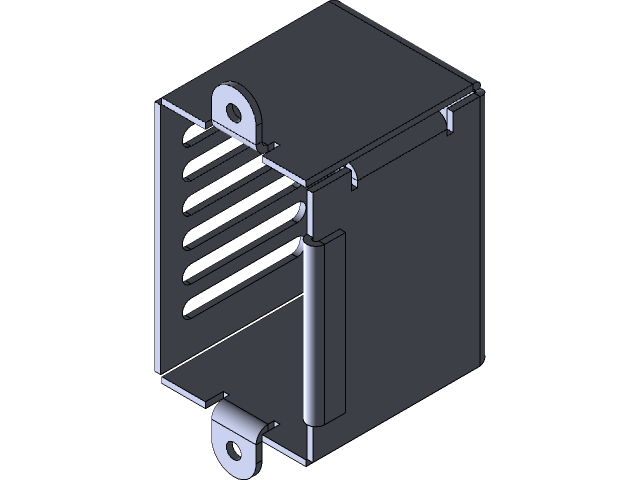
Switch Box
grabcad
SolidWorks 2018 Sheet Metal Tutorial - Building a Custom Switch Box In this tutorial, we'll be creating a custom switch box using SolidWorks 2018's sheet metal tools. Our goal is to design and manufacture a functional switch box with ease. We will cover the entire process from start to finish. To begin, launch SolidWorks 2018 and open a new part file. Select "Sheet Metal" as the default manufacturing method. Name your part file and click "OK". In the sheet metal toolbar, select the "Switch Box" feature. This will create the basic shape of our switch box. We can customize this shape by adjusting the parameters in the Property Manager. Next, let's add a mounting hole to our switch box. To do this, we'll use the "Hole Wizard." Select the "Hole Wizard" tool and choose the type of hole we want to create - in this case, a circular hole. To ensure that our switch box is functional, we need to add some internal features. We can do this by using the "Boss-Extrude" feature. This will create a solid body within our switch box. Now that we have our basic switch box design, let's add some external features. We'll use the "Shell" feature to remove material from the outside of our switch box, creating a hollow shell. With our switch box design complete, it's time to move on to manufacturing. In this tutorial, we'll cover how to create a 2D drawing and prepare it for machining. In the next section, we'll take a closer look at how to machine our switch box using SolidWorks' CAM tools. We'll also explore how to add some finishing touches to our design. By following along with this tutorial, you'll learn how to create a custom switch box using SolidWorks 2018's sheet metal tools. You'll gain hands-on experience designing and manufacturing a functional switch box from start to finish.
With this file you will be able to print Switch Box with your 3D printer. Click on the button and save the file on your computer to work, edit or customize your design. You can also find more 3D designs for printers on Switch Box.