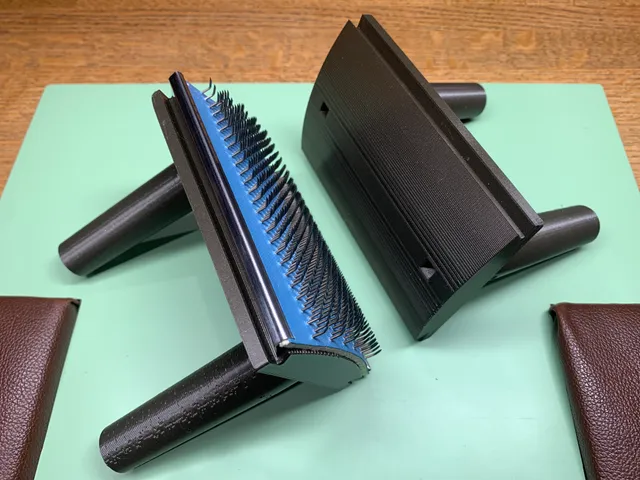
Swiss-style Polishing Wheel Buff Rake/Comb
prusaprinters
This tool acts as a mount for Bergeon item BG7118 “Reload for comb”. It is essentially a replacement for BG7116 “Comb to card” with some modifications for ease of assembly, printing, and usability. Once assembled, you will be able to use this rake/comb to dress cotton buffing/polishing wheels when refinishing cases and bracelets. A quick video of the tool in action:To build this, you will need to print:1x Buff rake base 2x Buff rake handlesPrints have been tested at both 0.15mm (0.4mm nozzle, 10 hours 2 minutes) and 0.40mm layer heights (0.8mm nozzle, 3 hours 17 minutes). Variable layer heights may also be used if desired. Printed with both the Prusa MK3S+ MMU2S on single filament mode and the Mini+.The examples in the photos are printed using Prusament Recycled PLA. Both 0.15mm and 0.40 layer height examples are shown. If you want to avoid stringiness around the handles, I recommend printing them individually.For assembly, you will need this hardware:4x Flat M3x0.5 square nuts (M3nS, should be less than 2mm thick)2x Socket-head M3x0.5 screws (minimum length M3x18, has been tested up to M3x40)Also for assembly, you will need these tools:1x M3 hex key (2.5mm size)1x M2 hex key (1.5mm size)Assembly is straight forward. First, deburr the inside screw hole of the handles by inserting a hex key and loosening any overhang material or filament stringing. Optionally, you may take a smaller M2 hex key and do the same to the square nut opening on the side.Insert 1 square nut into the opening on the side of the handle. You can use the smaller hex key or a screwdriver to assist in pushing it all the way into the center of the handle. The screw hole of the square nut should align with the hole in the handle. Repeat for the other handle. If alignment is off or you simply want to remove the square nut, insert the smaller hex key through the access point on the opposite side and push the nut out. For the buff rake base, take a screw and thread a square nut all the way to the head of the screw. Insert the screw and nut into the square opening on the base. Thread on one of the handles until it is flush with the underside of the buff rake base. Make sure the handle is tight against the base. Ideally, the head of the screw should stay down as far as possible into the base. Repeat for the other handle. Once those are assembled, the replacement comb BG7118 can be installed by sliding it onto the base from the side. The metal guides on the underside of BG7118 may need to be opened up to facilitate easy installation/removal. Voilà! You're done!For a good overview of how to use the rake/comb to dress polishing wheels, refer to this video from the Lititz Watch Technicum watchmaking school:
With this file you will be able to print Swiss-style Polishing Wheel Buff Rake/Comb with your 3D printer. Click on the button and save the file on your computer to work, edit or customize your design. You can also find more 3D designs for printers on Swiss-style Polishing Wheel Buff Rake/Comb.
