Sushi Go Party! Insert
prusaprinters
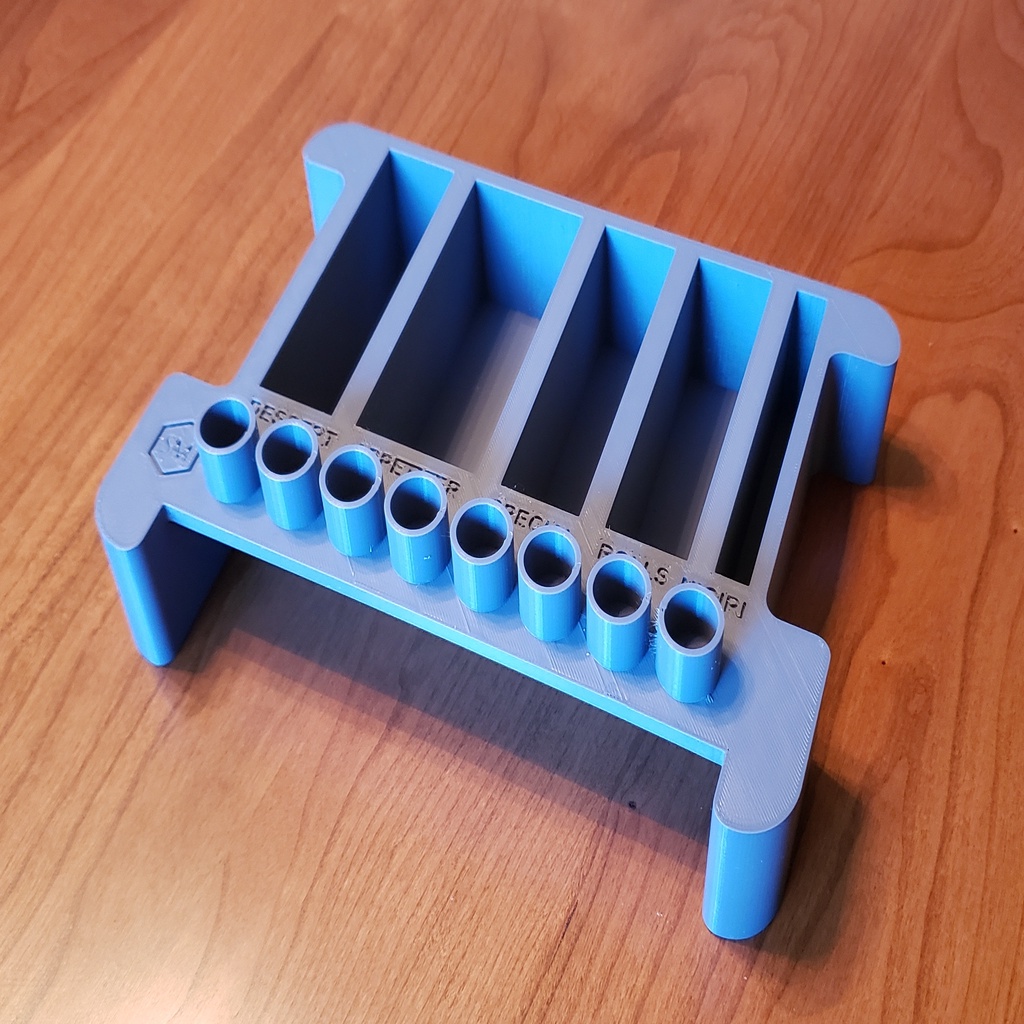
<p>Update 10/12/2020</p> <p>I've updated the design to accommodate the new promos that were released this year.</p> <p>The sleeved version will fit all 4 promos for Sushi Go Party! that are available as of 9/1/2020 (Inari promo, Pickled Ginger promo, Sukoeroku promo, and Sake promo). Additionally, the is still room for 1 additional appetizer promo, and room for 4 additional Special promos, as a way of future proofing the insert.</p> <p>The unsleeved version will also fit all all 4 promos that are available as of 9/1/2020 (Inari promo, Pickled Ginger promo, Sukoeroku promo, and Sake promo).</p> <p>Unsleeved and sleeved will fit into game tins that measure 76mm tall on the inside and allow for the board and manual on top. I was made aware of some tins that measure 68mm on the inside, which allows for the cards to fit correctly, but the board and manual won't fit on top of the 68mm tins.</p> <hr/> <p>Update: 1/2/2020</p> <p>After printing 30 of these for my Etsy store, I found that the file needed some improvements:</p> <ol> <li>The Saki bottles were not held in place. This was addressed by adding a new boss to let them sit higher in the box, just under the manual and board when the box is closed. Thanks to brettinman for the inspiration on these.</li> <li>There is a lot of wasted space in the current design, causing extra filament to be used. I changed some of the outer cuts, and added some new ones. In all my slicer is estimating about 30-40 grams less material, about a 20% decrease from the previous version. It also has the effect of reducing the print from a 10 hour print to an 8 hour print.</li> </ol> <p>This all should make it quicker to print and use less filament, while improving the functionality of the insert.</p> <p>All the files have been updated to reflect these changes.</p> <p>I hope you enjoy! Any feedback would be greatly appreciated as well for further revisions.</p> <hr/> <p>Update: 10/24/2018</p> <p>After receiving feedback from several people about getting the insert into their tins, I've shrunk the overall dimensions by 5mm in both the length and width. This should make the insert slide into the tin, where before some of them didn't quite fit.</p> <h3>All file have been updated to reflect these changes.</h3> <p>Update: 10/9/2018</p> <p>A large update:</p> <ol> <li>The existing design has been relabeled as "unsleeved_promos". After checking, there is enough room to store the promos currently available in the insert. If you downloaded the file already, it will work as is for the promos and unsleeved cards.</li> <li>There is now a split version of the unsleeved insert available for printer with smaller build platforms. Print LH and RH and you can adhere them as you see fit, or leave them loose in the box.</li> <li>After consulting BoardGameGeek about the sleeves that fit Sushi Go cards, there is now a sleeved card version that also supports the promos. It should accommodate sleeves up to 62 mm by 93 mm. Look for the "sleeved_promos" file.</li> <li>Lastly, a split version of the "sleeved_promos" insert for smaller printers. Print LH and RH and you can adhere them as you see fit, or leave them loose in the box.</li> </ol> <hr/> <p>After purchasing Sushi Go Party!, we started taking it places to play with people. I quickly found the stock insert lacking, as it didn't keep the cards in their slots. I'd have to sort everything out once we got someplace.</p> <p>I decided to model up a new insert that would keep all the cards in place during transport, so I wouldn't have to sort them. I also wanted someplace to put the pawns during transport.</p> <p>Modeled up in Inventor, the design went quick. I even included labels for where the cards go. I printed a sample print to test the fit with cards and pawns. A few tweaks needed from the prototype:</p> <ol> <li>Making the pawn spots larger</li> <li>Adding handles to lift the insert out</li> <li>Lowering the card slots to make room for the board and manual</li> <li>Widening the slots so the cards angle a little more.</li> <li>Adding a cutout on the bottom to reduce material needed.</li> </ol> <p>After those were all done, the final design went onto the printer.</p> <p>I'm very happy with how it turned out. It fits well, the cards no longer come out of the slots, and I no longer have to sort them. I may make an improvement to the way the pawns are secured, but that's for another day. Time to go play some Sushi Go Party!</p> <h3>Print Settings</h3> <p><strong>Printer Brand:</strong></p> <p>Prusa</p> <p><strong>Printer:</strong></p> <p>i3 MK2S</p> <p><strong>Rafts:</strong></p> <p>No</p> <p><strong>Supports:</strong></p> <p>No</p> <p><strong>Resolution:</strong></p> <p>0.25mm</p> <p><strong>Infill:</strong></p> <p>8%</p> Category: Toy & Game Accessories
With this file you will be able to print Sushi Go Party! Insert with your 3D printer. Click on the button and save the file on your computer to work, edit or customize your design. You can also find more 3D designs for printers on Sushi Go Party! Insert.
