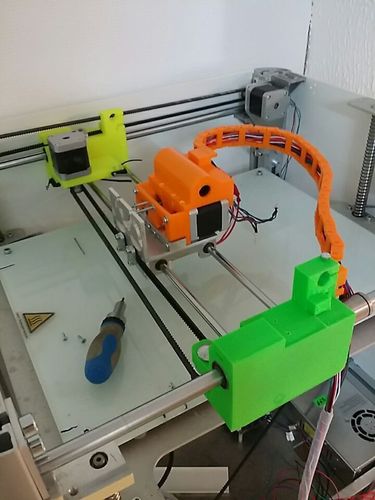
Super uppgrades for Creatr and Creatr XLprinters
pinshape
Summary Update 24-11-2015 I've updated the bearing blocks at https://youtu.be/QRKUzB4lhs4. The top rail is no longer necessary, but due to the original Creatr design, motor shafts still fail from metal fatigue. The new blocks have reinforcements where needed and allow you to remove the two nuts on the Y-axis bearing and move the motor sprocket inwards so the motor shaft won't fail. This design has run over 800 hours without incident. The bearing holes are also enlarged for better bearing function, just epoxy the slide bearings in place. I knew I'd eventually get fed up with my Creatr's shortcomings, so I made parts to fix it permanently. The power chain is in the way, the extruder carriage is wobbly and weak. Here's a video illustrating the problem at https://www.youtube.com/watch?v=s5jMjxTiCow. I'm making major changes: fixing the X-axis, Y-axis, extruders, and cable chain. It works perfectly with superb accuracy since I've installed new IGUS slide bearings on my X-axis – it's tight as hell with zero drift and no vibrations at all, see https://youtu.be/2J2w01iNqAI. Now my printer makes perfect parts every time, and I can use the entire build volume. Each improvement is available in standalone versions, but this is the combination version with slightly different parts. Don't try to replicate this unless you have patience and know what you're doing. PS: You don't actually need the top rail anymore; it's stiff as hell and works wonderfully without it. Instructions will be posted on http://www.kundesalg.no as I develop the solution.
With this file you will be able to print Super uppgrades for Creatr and Creatr XLprinters with your 3D printer. Click on the button and save the file on your computer to work, edit or customize your design. You can also find more 3D designs for printers on Super uppgrades for Creatr and Creatr XLprinters.
