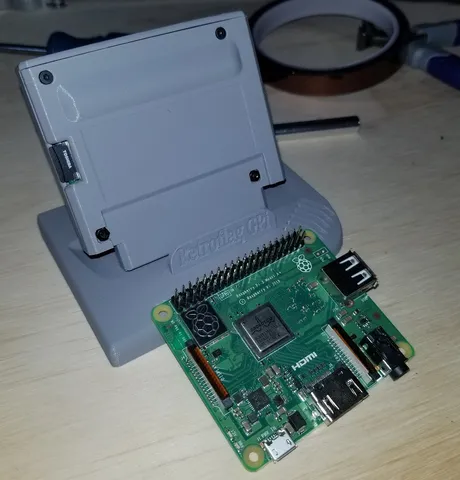
Super GPi Cart - Pi3 A+ for a GPi Case
prusaprinters
Finally ready for release, here is the "final" version of my full Super GPi Cart. I've created an instructables article for full details so I will be somewhat sparse on instructions and info here. If you want a full walk-through go to this link and follow the steps listed there. I my make tweaks over time to the design and upload here but this can probably safely be considered my "final" design. https://www.instructables.com/id/Super-GPi-Cart-Pi3-A-in-a-RetroFlag-GPi-Case/ Go to the link above for all the details you'll need to do this mod. If you want to see my custom shoulder button designs click on my picture and look at my other things. If you end up selling this design or a remix of it, please don't forget about little old me lol, I can't make you pay me but no one else has decided to do this yet so I'm the only one that's cared enough to do it so far, the least you can do is reference back to this source material. If you want to use this for yourself by all means please do, that's why I'm putting it up here, I've benefited from many other people's efforts in the Pi space so it's only natural to want to give back in what limited ways that I can. That being said, I've bought things for multiple Pi based projects that are the labors of someone else's work. We're all a community here, lets try not to screw each-other for a quick buck. Print Settings Printer Brand: Prusa Printer: I3 MK3S Resolution: At least .15, .10 if you can do it well Infill: 50 Filament: Hatchbox PLA Grey Notes: I've designed these to print vertically because there is no other way I can think of that will reduce supports and print cleanly, if you can do it better than me then go ahead, but the cart front has feet modeled into it to help print stable in this orientation. If you're doing this for a final print that you are going to be using I would STRONGLY suggest using PETG or something that has a higher temp tolerance than PLA does as the Pi will get to 60 C or higher and PLA is only good for test and design like I do. I use 3 wall perimeter settings, 50% infill, and strongly suggest turning down your print speeds, I use 80-85% because at my normal speeds on such a thin and precise piece I was getting some layer shift. USE A BRIM! This set needs all the stability you can give it. I use a 5 mm brim. Clean your build plate too because I've designed parts of this to counter elephant's foot and this can peel if you aren't ontop of your layer adhesion. Category: Video Games
With this file you will be able to print Super GPi Cart - Pi3 A+ for a GPi Case with your 3D printer. Click on the button and save the file on your computer to work, edit or customize your design. You can also find more 3D designs for printers on Super GPi Cart - Pi3 A+ for a GPi Case.
