Sunhokey Prusa I3 Auto Bed Level
thingiverse
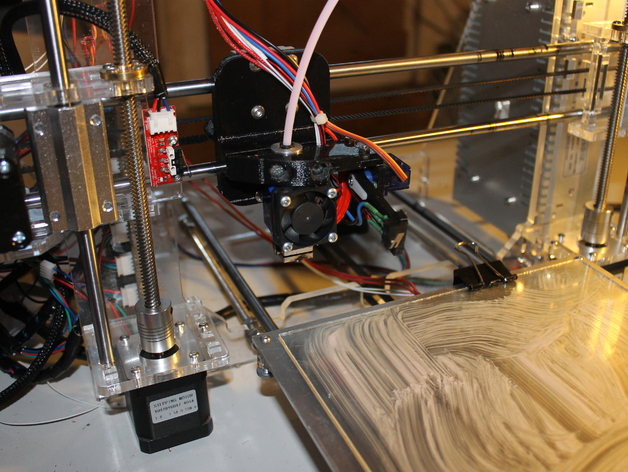
Here's another look at my project, now with updated instructions for setting up auto bed leveling: 8-13-15 added a picture of the modified X carriage pin layout on control board Update: First print after adjusting the level upgrade was done without any issues Everything is working smoothly. If you take a peek above at the LCD mount pictures, it's obvious how impressed I am with how this printer turned out Now to start using this as my go-to printing machine Thanks go to Stefano Vannucci for creating that excellent LCD case (thingiverse.com/770954/#files) While trying this out I figured one more thing would help you guys even more, which is: find a 3D STL of your printer's hot end and use it to create holes so the wires can squeeze in After just purchasing Sunhokey Prusa I3 Printer Kit about 4 weeks ago I must say that this cheap printer still works amazingly for its price. One area where you might experience trouble when using this with larger prints, however is bed leveling. It was decided that it was best to create an automatic level and at the time started working on a new x-cradle. Instead, however, we went and looked at some designs on Thingiverse so it seemed only reasonable that I change things up to allow for more advanced bed levelling using an auto bed leveling. A big kudos to the original designer: http://www.thingiverse.com/13DjjC13/about Also here are links: X-carriage:http://www.thingiverse.com/thing:742947 This hot end (the V6 E3D one) works perfect in my Prusa, so this mounting setup also does well to keep that good temperature as long as we do the required calibration. Since I had a very easy time installing it all but was about 15mm from getting everything ready with that x-rod, some things are bound to change on my part, like moving to a modified carriage. Also going for modifying that switch end stop by adding in a couple more pieces will have our printer running and doing its job right. After you get that leveler put on it's really no biggie to add a bit of hardware, just make sure to have enough clearance so your wires stay within the holder. We will not use them with this one so the new X carriage has some modifications too. A bit about calibration For a 3 point bed level with our setup all I need to do is open Slic3r then go down into my Custom G-code for setting printer. After adding this command, it really takes only an additional minute before printing. It took some experimenting around but using Repetier-Host, and RepRap Firmware the changes we had were just like changing how to install new windows software with the level of easy. Video that explains this better - Auto-Bed-Leveling. (link included) Auto Bed Level: A Step-by-step Instructional Video In auto leveling, there are no issues here at all as long as we adjust endstop correctly which gives us good print quality right away. As many might notice I also noticed during some testing with hot ends they tend to run really hot in short period so our auto bed level is very useful. First try: https://www.youtube.com/watch?v=OUchLdaAznI These are my personal suggestions if this project could possibly assist the beginner when you get the chance - then check for good online instructions and don't hesitate if there's one place which doesn't understand anything to help solve the puzzle for a lot faster work out
With this file you will be able to print Sunhokey Prusa I3 Auto Bed Level with your 3D printer. Click on the button and save the file on your computer to work, edit or customize your design. You can also find more 3D designs for printers on Sunhokey Prusa I3 Auto Bed Level.
