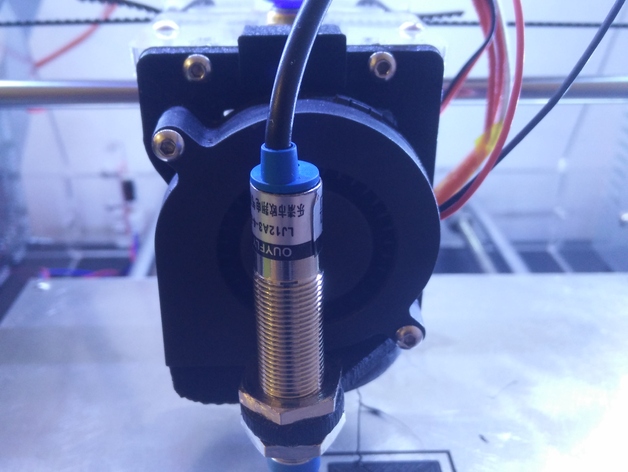
Sunhokey Prusa I3 2015 Fan duct & Proximity sensor mount
thingiverse
Click here for Version 2: http://www.thingiverse.com/thing:1614553 As the 2015 version of the Sunhokey didn't come equipped with a fan to cool prints, I designed this mount to attach directly to the printer without any modifications. Simply remove the 3D printed fan mount from the E3D clone on the X-carriage and replace it with this one. I used two cable ties to secure the E3D fan directly to the heatsink as shown in the pictures. Attach the blower fan to the motherboard via the FAN output, taking care to ensure the correct polarity. What's needed: 1x Blower Fan 50x15mm 1x Proximity sensor (Model: LJ12A3-4-Z/BX) 2x M3 screws, approximately 20mm 2x Cable ties Some wire and connectors... Instructions: Print all files with 100% infill, ensuring the orientation of each part is correct. Glue the "optional_mount.stl" to the "mount.stl" between the two mounting holes. This step is optional, but I recommend it to prevent the mount from sliding down. Mount the fan using the two M3 screws (no nuts are needed as they will thread fine into the plastic mount). Mount the "mount.stl" to the printer as displayed in the images above, utilizing the existing M3 screws that hold your E3D cooling fan in place. Secure the 40mm E3D fan directly to the E3D heatsink using two cable ties. Press fit the fan duct into the hole of the blower fan. If desired, you can secure it with a drop of glue (some sanding may be necessary for a good fit depending on the quality of your print). Add a connector to the proximity sensor and connect it to the Z-endstop, unplugging the old micro switch. Brown = 5v Black = Signal Blue = GND Note that these colors might differ depending on the sensor you have, so be sure to check the specifications for your sensor. On my MKS Z GEN 1.1 motherboard, the order is from left to right: Signal | GND | 5v. When the board is facing upwards (12V, Bed, Fan, and extruder outputs), make sure to connect the sensor in the correct order according to your board's specification. Mount the proximity sensor to the holder so that it's approximately 1mm above the bed when the nozzle just touches the bed. Ensure the LED indicates that the sensor is triggered; otherwise, move it closer. Follow Tom's guide to set up Marlin: https://youtu.be/EcGFLwj0pnA?t=277 The offsets for X & Y for this mount are: X = 0 Y = -48 Note that in Tom's guide, he mentions modifying the sensor with 10k and 15k resistors. However, I found this to be unnecessary for my sensor as it runs fine on 5v, and the default micro switch also runs on 5v. So, I only had to add connectors to the cable. Good luck printing with your upgraded Sunhokey Prusa I3! Print Settings Printer: Sunhokey Prusa I3 Resolution: 0.2 Infill: 100% Notes: I printed everything without support except fanduct.stl. fanduct.stl was printed with Support type: Touching buildplate
With this file you will be able to print Sunhokey Prusa I3 2015 Fan duct & Proximity sensor mount with your 3D printer. Click on the button and save the file on your computer to work, edit or customize your design. You can also find more 3D designs for printers on Sunhokey Prusa I3 2015 Fan duct & Proximity sensor mount.
