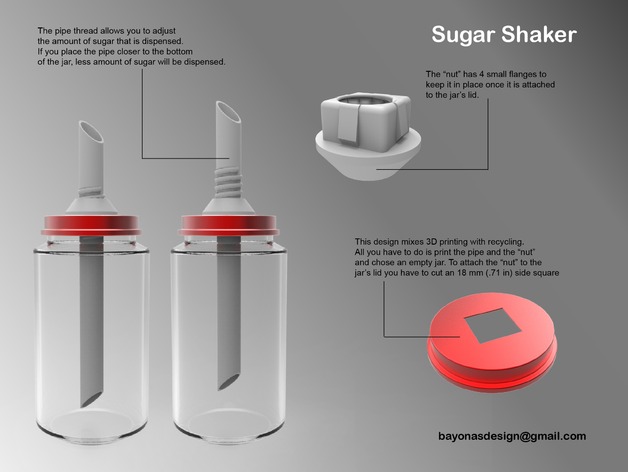
Sugar Shaker
thingiverse
Now you have the freedom to craft your own Sugar Shaker, thanks to a unique combination of 3D printing and recycling techniques. For further information on how to create this fantastic gadget, please check out the Instructions tab. https://youtu.be/xj1CZx2-xPw Instructions First off, you will need to print one copy each of the three files: “Pipe,” “Pipe nut” and “Stencil.” Once you've completed the printing process (which should take no more than a couple of hours) you're ready to begin assembling your Sugar Shaker. Your next step is to find a discarded jar (I chose a baby's food jar, but feel free to pick any you like) that stands about 10 cm tall. Using the printed stencil, carefully draw a square on the jar and then cut it off using a sharp knife or a cutter. It's time now to give your Sugar Shaker some visual appeal. I simply spray painted the lid - it's quick, easy and effective. When the paint is fully dry, attach the nut through the hole in the lid and screw the pipe onto it. Next up, grab your favorite drink and adjust the height of the pipe until you've reached the perfect sweetness level! Do you like your new Sugar Shaker? Have you had a chance to build one for yourself yet? If so, have any ideas on how to improve this design? All feedback is greatly appreciated - just head over to the comments section!
With this file you will be able to print Sugar Shaker with your 3D printer. Click on the button and save the file on your computer to work, edit or customize your design. You can also find more 3D designs for printers on Sugar Shaker.
