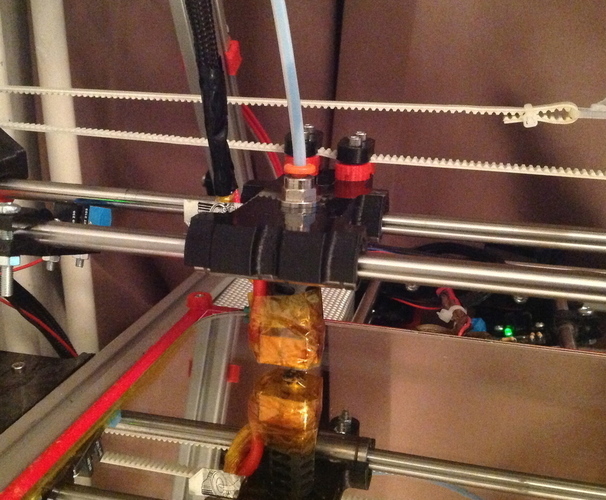
Sturdy X-Carriage for J-Head with Bowden
pinshape
What you need: * 4x LM8UU linear bearing (or similar) * 6x M3x25 or M3x30 screw (longer works too) * 4x M3 nut * 1x M10 or 1/8" pneumatic fitting for the bowden tube * 4x Belt attaching clip (from previous carriage) There aren't many lightweight bowden carriages for J-Head on Prusa and the ones I tried weren't as sturdy as I needed. So, I decided to design my own carriage and share it here. I've now printed almost 1kg of material with this setup and I'm loving it! This uses four LM8UU bearings that snap in place. You may use zip ties if needed; I didn't need them. The hot end is fastened with two horizontal M3 screws through the groove, and depending on the hotend, the pneumatic fitting is either screwed to the hotend or the carriage. The result is a rock-solid high-performance carriage. Belt attaching holes are spaced 10x20mm, like used in most carriages. If you need a different type of belt mount, just let me know and I'll design it for you. Update! I received my authentic J-Heads (they beat all the clones btw) and found out they use M8 hollow screws instead of M10 like the ones on ebay. Pneumatic fittings with M8 thread are hard to find so I altered the design, making the M10 fitting threaded to the carriage rather than the hotend. I also added M3 nut traps for the belt. Instructions 1. Check which version you need: * V6 for all hotends that don't take pneumatic fittings directly (authentic J-Heads) * V5 for clones with M10 hollow screw that is replaced with the fitting 2. Print, preferably in ABS; PLA may soften in use. I used 0.2mm layer height, 50% infill, and 3 perimeters. If your print needs cleaning don't drill the two horizontal holes to 3mm, use 2.5mm or don't drill them at all. 3. You need the belt attaching clips that are visible in the photo. I didn't upload them since most of you already have them, and Thingiverse has plenty of them too. TIP: With V6 soften the hole with acetone or heat if the fitting is too hard to install. 4. This is explained in the description. Fix the hotend in place with two M3 screws (and pneumatic fitting with V5). Snap bearings in place and attach belt. 5. Go print hella-fast!
With this file you will be able to print Sturdy X-Carriage for J-Head with Bowden with your 3D printer. Click on the button and save the file on your computer to work, edit or customize your design. You can also find more 3D designs for printers on Sturdy X-Carriage for J-Head with Bowden.
