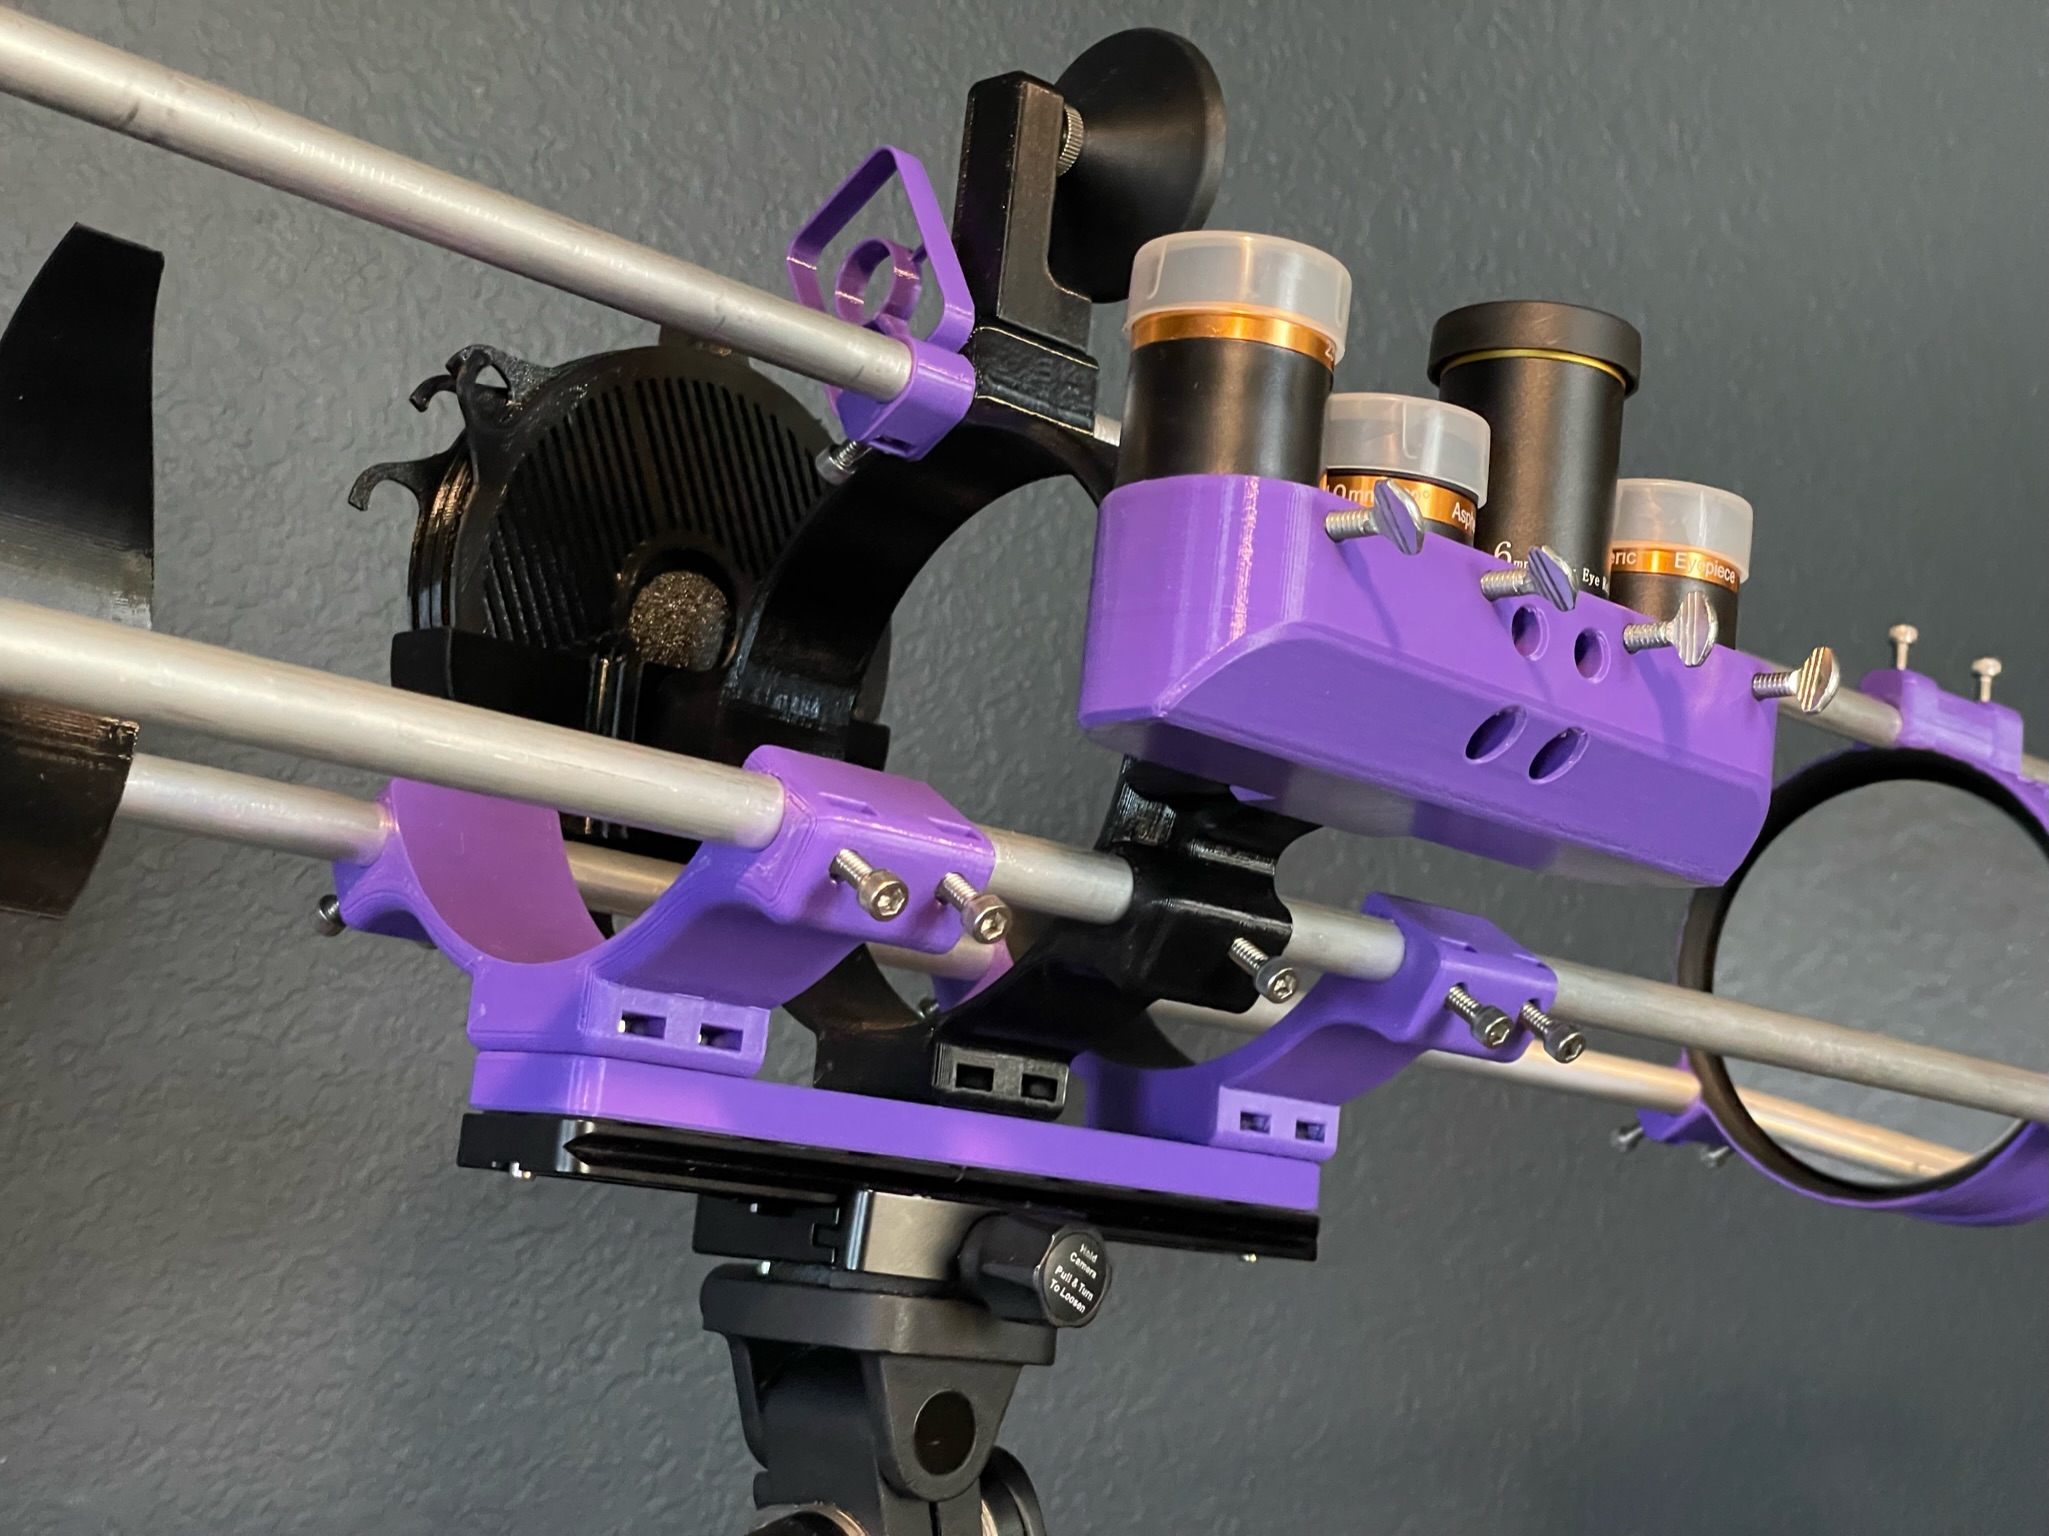
Sturdy Tripod Mounting System for Hadley Telescope
prusaprinters
<p>Designed a system of parts to create a means of mounting the Hadley to a tripod in a very sturdy manner as well as adding several mounting points for add-ons like an <a href="https://www.printables.com/model/275768-hadley-eyepiece-holder">eye piece holder</a>, a <a href="https://www.printables.com/model/287892-hadley-telescope-lens-cover-holder">holder for all the Hadley's lens covers</a>, and an <a href="https://www.printables.com/model/287831-hadley-iphone-magsafe-mount">iPhone mount</a>.</p><p>Using the <a href="https://www.printables.com/model/238016-hadley-tripod-adapter">tripod mount adapter </a>from <a href="https://www.printables.com/social/298239-gyoenastaader">Gyoenastaader</a> created a single point of contact with the Hadley and made for a very shaky mount. So what I've done here is to create a center mounting point that grabs onto all 3 of the Hadley's frame bars and then use 2 of the <a href="https://www.printables.com/model/238016-hadley-tripod-adapter">tripod mount adapters </a>from <a href="https://www.printables.com/social/298239-gyoenastaader">Gyoenastaader</a> on either side of the central mount for something very sturdy with 3 points of contact along the telescope's frame.</p><p>All the screws and nuts i still had on hand from initially building the Hadley. The Arca-Swiss slide plate I happen to already have and designed the mounting system around it. </p><h4>Print</h4><p><strong>1x</strong> Tripod Mounting Interface<br><strong>1x</strong> Long Plate<br><strong>2x </strong>Hadley Tripod Adapter by <a href="https://www.printables.com/social/298239-gyoenastaader">Gyoenastaader</a>:<br><a href="https://www.printables.com/model/238016-hadley-tripod-adapter">https://www.printables.com/model/238016-hadley-tripod-adapter</a></p><h4>Assembly</h4><p>After printing all parts, you're better off assembling on the Hadley's frame as you go, rather than putting everything together off the telescope and trying to slide it onto the telescope as one piece.</p><ol><li>First, insert the ¼"-20 threaded inserts into the longPlate. Try to get them flush with the plate and trim any plastic that raises above the inserts in the process.<img class="image_resized" style="width:41.43%;" src="https://media.printables.com/media/prints/287836/rich_content/9f15d159-123b-49e5-b121-183b4d9dffee/01dbe3e2ba0d8285b5e0c210c4232cebb94fdc8e9b.jpg#%7B%22uuid%22%3A%224ef26593-4b7e-4f80-9dc8-bb9e3e0cf605%22%2C%22w%22%3A2049%2C%22h%22%3A1536%7D"> </li><li>Work out which 2 of the Hadley's frame rods will be the base of the telescope, then slide one of the 2 Hadley tripod adapters onto those rods (do not secure to frame, will need adjusting later). </li><li>Next, slide the Tripod Mounting Interface onto all 3 rods of the frame. Space it roughly 2 inches (5cm) apart from the first tripod adapter. This part should be as close to center along the telescope's frame as you can get. You can secure this part to the frame using 3x screws and 3x nuts. </li><li>Then slide on the 2nd tripod adapter, again separating it from the mounting interface by roughly 2 inches (5cm). (again, do not secure to the frame, will need adjusting later)</li><li>Start inserting the hex nuts into their slots in the base of each part (4x nuts each). You can do this as you go to avoid constantly having them fall out, or just make sure the telescope is level and do them all at once.</li><li>Align the Long plate with Mounting interface and secure using 4x screws. Note that one side of the long plate has recesses so the screws mount flush, this side should face away from the telescope.</li><li>Slide the 2 tripod adapters out to align with the corresponding holes in the Long Plate, insert the 4 hex nuts and secure with 4 screws per adapter. </li><li>Go ahead and secure the Tripod adapters to the frame using 4 hex nuts and 4 screws each. <br>Assembled, it should look like this:<img class="image_resized" style="width:71.94%;" src="https://media.printables.com/media/prints/287836/rich_content/811d3663-c016-480a-b7cb-89cef700fdb9/010ea9cf07501db82751ab552d67cf7ca9442a6e73.jpg#%7B%22uuid%22%3A%22051e8a86-84fb-44e1-a2f0-30c191b82ec1%22%2C%22w%22%3A1536%2C%22h%22%3A2049%7D"></li><li>Next, attach the Arca-Swiss slide plate using the attached ¼-20 threads, screwing them into the headed inserts on either end of the Long Plate. (The center one is there if you ever decide to add a center screw to the plate for strength)<img class="image_resized" style="width:42.71%;" src="https://media.printables.com/media/prints/287836/rich_content/ee1fc5c6-6aa9-400a-84ce-65b345bc0d77/01f0bad0d32bfc89c1dc3ecc4cd04fef7d277f1a56.jpg#%7B%22uuid%22%3A%22fa3ea26d-ea4a-4c05-91e7-1afff4d0e819%22%2C%22w%22%3A2049%2C%22h%22%3A1536%7D"><img class="image_resized" style="width:42.54%;" src="https://media.printables.com/media/prints/287836/rich_content/af226a5b-dd8f-4160-a998-3f366fa49634/015d7892fd72ce45dbadedc4d1034748b5ec28c158.jpg#%7B%22uuid%22%3A%22eeb76da9-d8db-4f4b-b596-c55d9561b6d2%22%2C%22w%22%3A2049%2C%22h%22%3A1536%7D"></li></ol><p> </p><h4><strong>Hardware:</strong></h4><p><strong>23x</strong> - #10-24 socket head cap screws<br><a href="https://www.amazon.com/dp/B081CK132L">https://www.amazon.com/dp/B081CK132L</a></p><p><strong>23x</strong> - #10-24 hex nuts<br><a href="https://www.amazon.com/dp/B07VBSLDCW">https://www.amazon.com/dp/B07VBSLDCW</a></p><p><strong>3x</strong> - ¼"- 20 threaded inserts<br><a href="https://www.amazon.com/gp/product/B08PVQX853">https://www.amazon.com/gp/product/B08PVQX853</a></p><p><strong>1x</strong> 200mm Arca Swiss slide plate:<br><a href="https://www.amazon.com/gp/product/B07D4CGK7R">https://www.amazon.com/gp/product/B07D4CGK7R</a></p><p><br> </p><p> </p>
With this file you will be able to print Sturdy Tripod Mounting System for Hadley Telescope with your 3D printer. Click on the button and save the file on your computer to work, edit or customize your design. You can also find more 3D designs for printers on Sturdy Tripod Mounting System for Hadley Telescope.
