STUDIO 360
cults3d
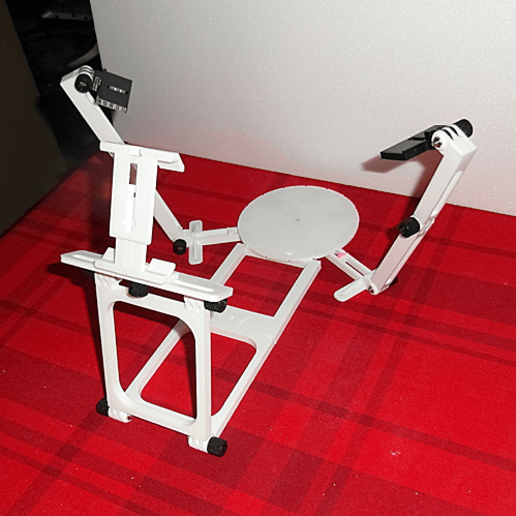
A Portable Studio for Photographing Small Objects with a Smartphone or Camera Create a device that enables you to capture high-quality images of 3D creations and small objects with your smartphone or camera. The objective is to produce an animated GIF of this object, showcasing its features in a visually appealing manner. To achieve this, follow these steps: 1. Construct the base unit, which consists of six faces and an axis for attachment from below. 2. Design the disc where you will place the object to be photographed. This disc contains 16 reference points that allow you to take 16 photos over a 360-degree range. By jumping one reference point between each shot, you can capture eight pictures; by skipping two notches, you'll get four. Each lighting arm consists of: 1. A base plate with a triangular pin, which is attached to the base's six sides. 2. A right arm measuring 138 mm 3. A bent arm measuring 138 mm 4. A support base to fix the LED box, secured with a standard 1/4" photo screw. The hardware includes: * Screws and nuts M5 * Three screws with a standard 1/4" photo pitch for securing the camera and LED lights To acquire these components, visit the following links: * M5 screws and nuts: https://www.amazon.com/ * 1/4" photo screw: https://www.amazon.com/ * LEDs (also available on Amazon): https://www.banggood.com/ The articulated arms for lighting can be found at the following URLs: * Thingiverse: https://www.thingiverse.com/thing:2194278 * MyMiniFactory: https://www.myminifactory.com/object/3d-print-34864 Creating an Animated GIF with GIMP Before starting your GIF animation project in Gimp, consider the following: * GIFs support up to 256 different colors and are ideal for images without gradients or a large number of colors. * Resize photos to prevent oversized files that may be difficult to broadcast via smartphone or upload to the internet. To create an animated GIF with GIMP, follow these steps: 1. Launch Gimp and click on File > Open to select the first photo in your series. 2. In the new window containing the first image, click on File and then Open as layers. Repeat this process for all photos. By default, the time between each image is 100 milliseconds. Preview the final result by starting animation playback: * Click on Filters > Animation > Replay animation. * A new window opens with buttons to start and stop playback and scroll through images one after another. Adjust the speed of your animation: * Click on the drop-down menu at the bottom left of the window and select a transition speed set to 1x by default. You can also adjust the number of frames per second during playback to see the effects instantly. Once your animation is ready, optimize it to reduce file size: * Click successively on Filters > Animation > Optimize (for GIF). Record your animation: * Click on File > Export as * In the window that opens, type the name of the file to be created in the Name field. * Select GIF Image format from the drop-down menu and click Export. In the next window: * Check the option as an animation. * Specify 1500ms (for example) in delay between images. * Leave the default option in Image Arrangement. * Check Use delay box above. * Tick Use the arrangement entered. * Finally, click on Export to finalize the creation of your animated GIF.
With this file you will be able to print STUDIO 360 with your 3D printer. Click on the button and save the file on your computer to work, edit or customize your design. You can also find more 3D designs for printers on STUDIO 360.