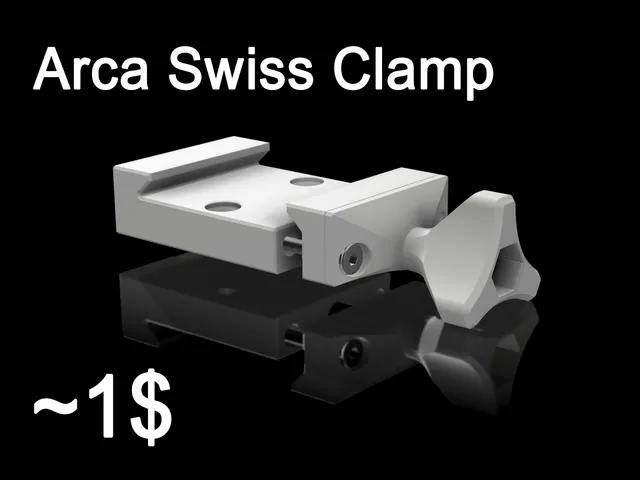
Strong Arca Swiss Clamp
prusaprinters
Those clamps can get quite expensive. Once you get yourself a tripod, steadycam, gimbal, and other things you want to mount your camera to quickly. Not to mention some may need proprietary mounting screws, release plates or other hardware...Introducing: Quick, cheap, and Strong Arca Swiss Clamp!When I started with photography I quickly realised the cost of the gear can quickly become overwhelming. Some time ago I build a couple of those to mount them onto all of my camera equipment. Since then I updated the model to be even stronger and to make assembly much simpler. As to this day none of those broke on me and I have complete faith in them.Please see sections bellow on how to increase clearance of the Tightening Knob or grab one of the adapters for different tripods. Tested cameras(Will be adding more based on comunity's feedback)CameraBolt LengthSpacersSony A640080mm0Canon 700D80 mm0I tested it with my Sony A6400 and Canon 700D - both with either Peak Design Standart Plate or a larger no-name Arca Swiss style plate. Those do not need any additional spacers and a bolt is the recommended M80mm. For larger cameras, or if you need the tightening handle to be on the right side you may need a longer bolt and additional spacers (Please see the section below). Idea why it's so strong:For this model to be as strong as possible we need to exploit the layer orientation so there's no possible delamination. Printing everyting in correct orrientation makes this clamp surprisingly strong. To this day none of them failed me. Here's my unscientific representation of the idea: The Jaws have layer lines pependicular to the stress they gonna experience when tightened. Washer there is to distribute the load from the tightening Knob so the Moving Jaw is fully supported across it's length thus minimizing the chance of critical failure. (Even when the Jaw breaks across it's layer line, it will stay supported and SHOULD keep on holding onto the camera plate). Next thing is when you mount this Clamp onto your gear using both M4 bolts, you technically keep the Main Body together, so even after delamination it would still keep its shape and thus your camera. As I said, I did not experience any breaks or delamination in years using those clamps, but please beware, if you see any cracks, replace the broken part. Printing setup:Material: PETGLayer height: 0.2mmPerimeters: 8Infill: 50%Supports: noPrinting orientation: see the image below or open “Complete 80mm” file Hardware you'll need:1x - M6x80 bolt with a hexagonal head and smooth shaft (or longer - will explain later)1x - M6 hexagonal nut2x - 3.5x50 wood screw with a smooth shaft1x - spring from a pen Price CZKPrice USDHardware4,600.19Filament15,90 - 25,300.66 - 1.05Total20,50 - 29,900.85 - 1.24 Tools:Flat file OR a piece of sandpaperMetal saw OR cutters Preparation: Cut the screws to be 30mm long. You may need to sharpen the cut ends so they can be screwed into the main body - use the file or sandpaper for that. Stretch the spring so it's cca 60mm long and cut it into 4 same pieces. (We only need 2, so we can use the remaining 2 for the next clamp). File those 3 surfaces so they are nice and even Assembly (<5 minutes): Push the M6 bolt through the Main BodyPush an M6 nut into the Knob Triangle M61. Put screws through Washer and Moving Jaw. Verify the assembly can move freely over the smooth part of the screws. (In the rare event it does not: enlarge a hole a little). 2. Put Springs onto the scres3. Put new assembly together with the Main Body (Again, please make sure it can move over the main bolt freely). Tighten the screws so the gap between the jaws is 39-40mm Enjoy your new clamp! Longer boltsIf the 80mm bolt is not long enough you can use 90mm, 100mm, 120mm, etc… In that case, print spacers 20mm or 10mm to compensate for the extended length. 80mm bolt does not require any spacer so if you use for example 100mm bolt you would need a 20mm spacer. Attaching the Clamp and Adaptersthe clamp can be attached to other mounting systems using two sinking M4 bolts. Those are spaced 28mm apart if you want to make custom part for mounting. Many gear does not need more than washers and nuts for thic clamp, but some tripods may need additional 3D printing. I'll try to keep here a table with those. One I've created is for Marell tripod here: https://www.printables.com/cs/model/253306-marell-tripod-plate-for-strong-arca-swiss-clamp WarningAlthough I've used those clamps successfully for many years, and I consider them perfectly adequate for my needs, I obviously can not take responsibility for your expensive gear. Please use it with caution, ALWAYS check if your camera is tightly secured and neither of the parts is developing a crack.
With this file you will be able to print Strong Arca Swiss Clamp with your 3D printer. Click on the button and save the file on your computer to work, edit or customize your design. You can also find more 3D designs for printers on Strong Arca Swiss Clamp.
