Streichmass / marking gauge
prusaprinters
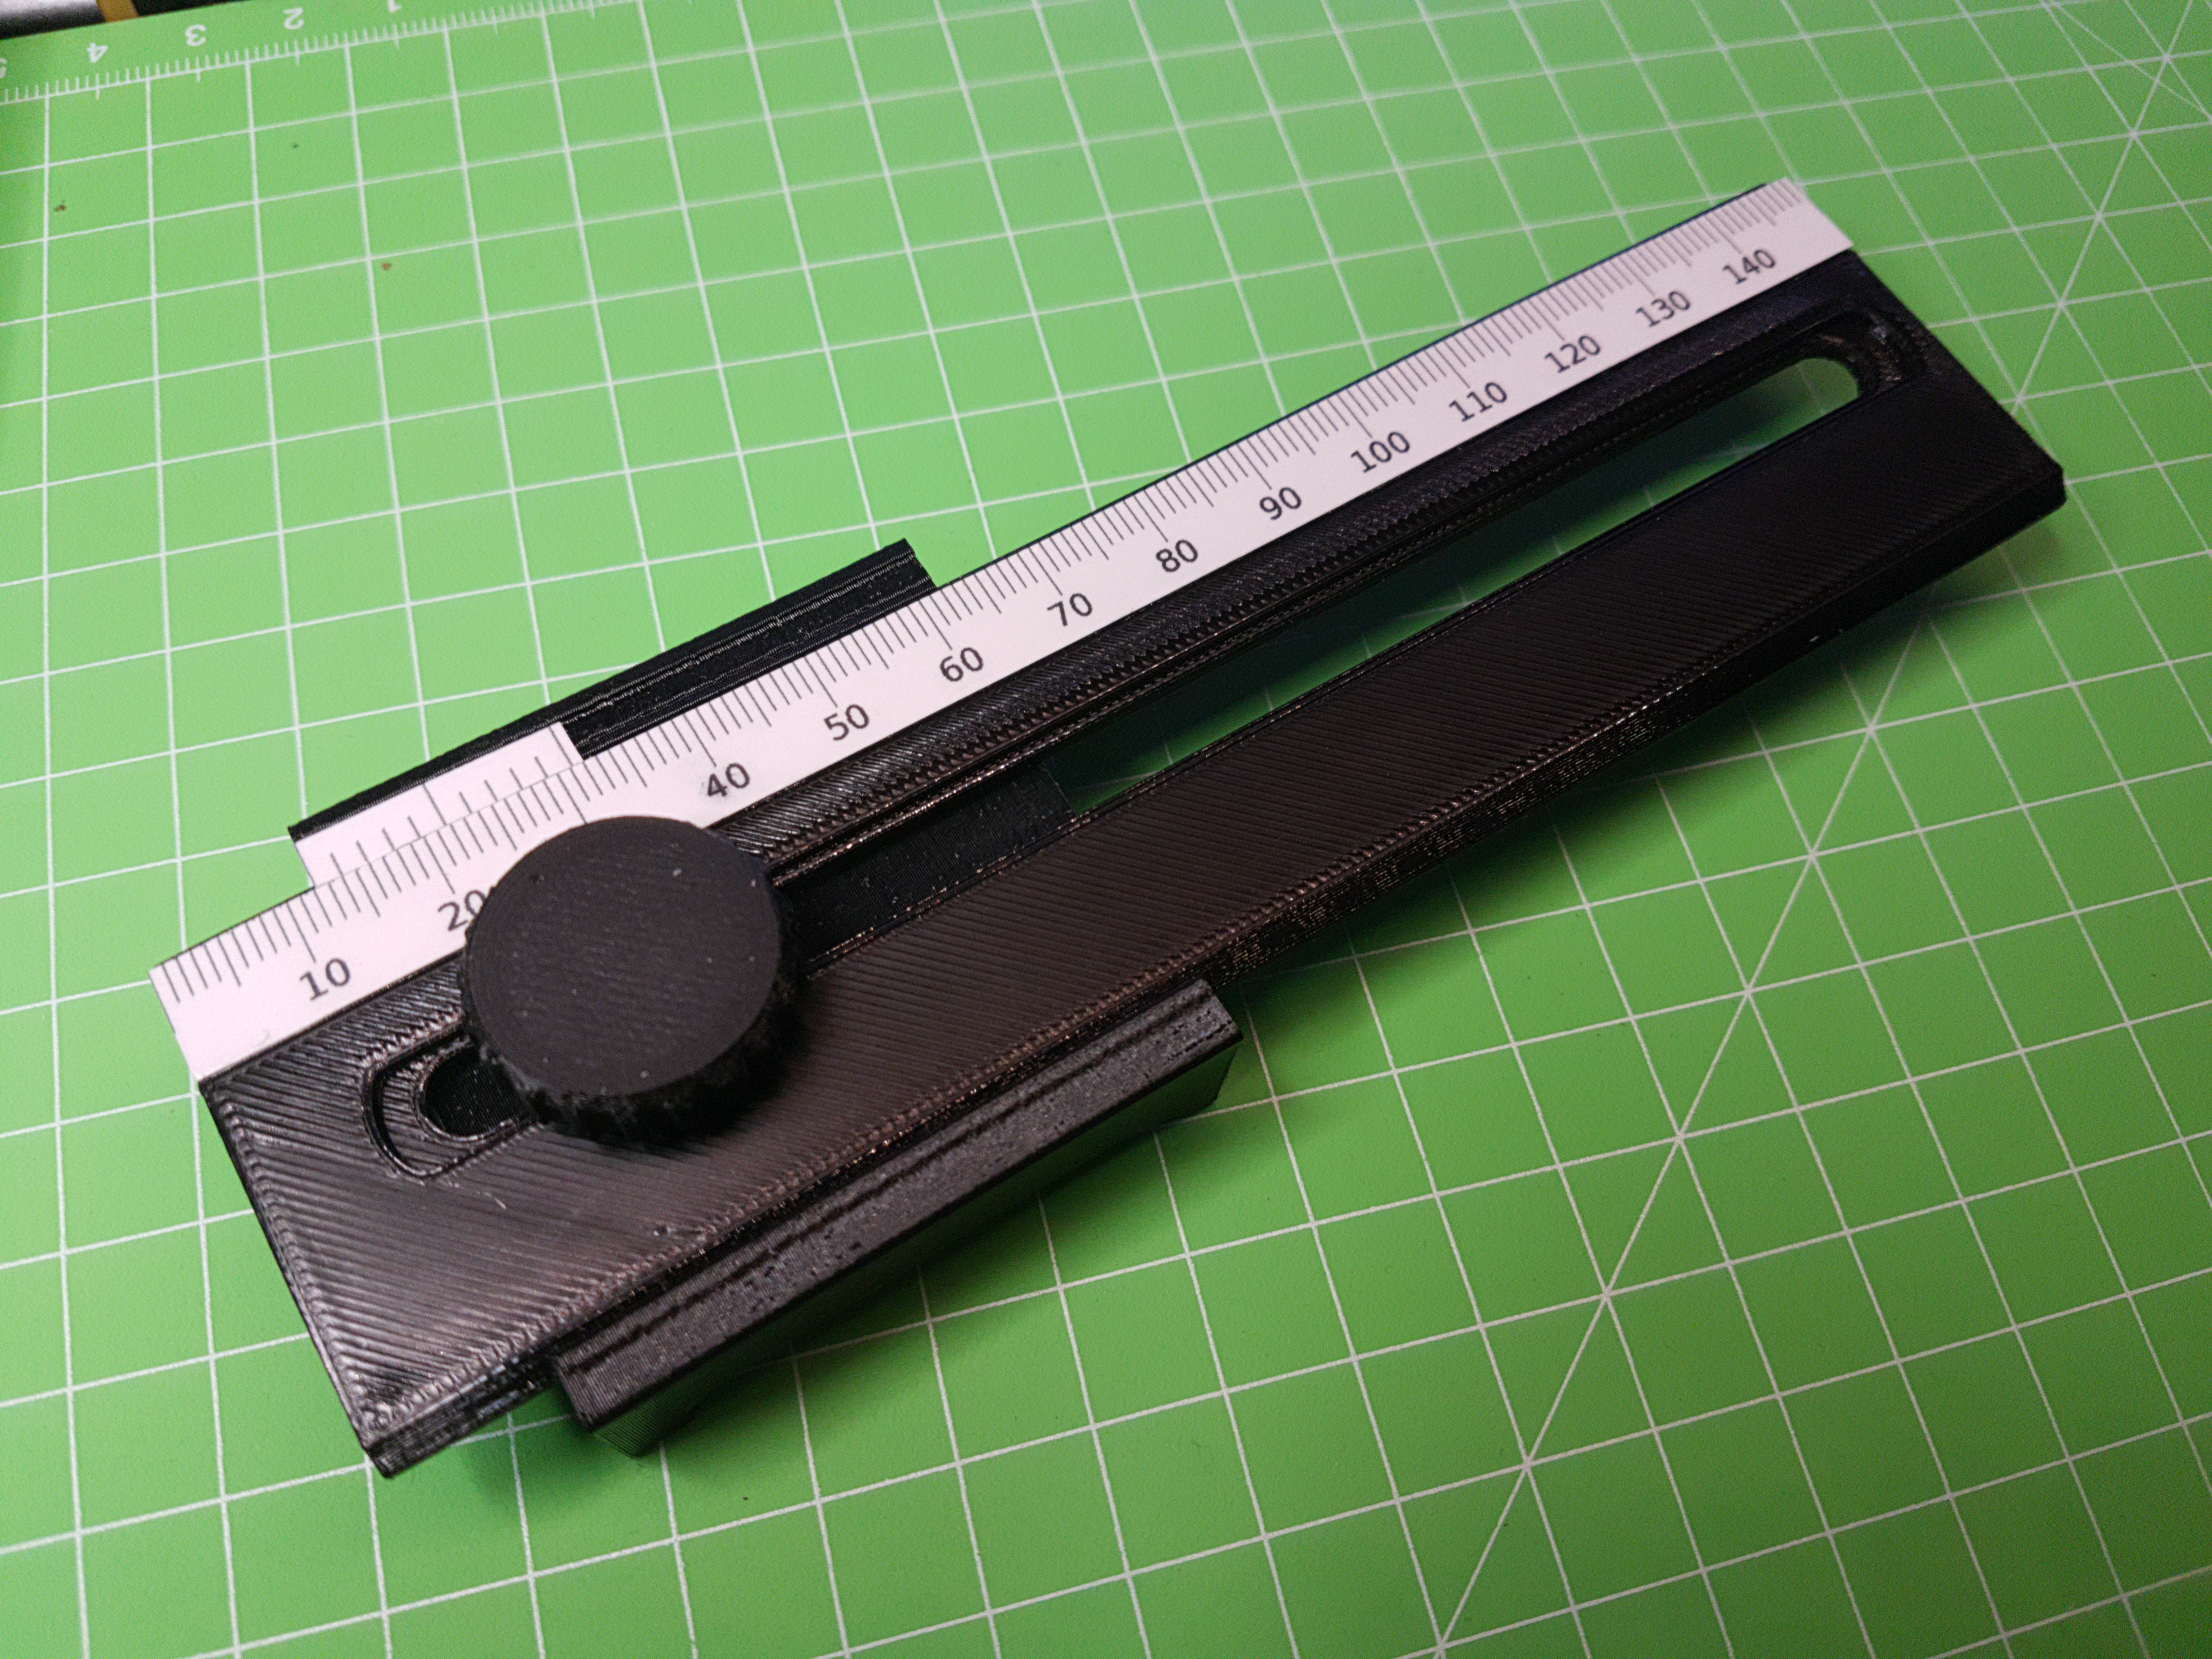
<p>A tool to precisely scribe a set dimension away from an edge.</p><p>Except for your printer, you will need one hex head M5x15 bolt, a hotmelt M5 insert, an M5 washer and some suitable glue. For the scale you will need an inkjet or laser printer, some clear adhesive tape, a cutter, a ruler and a suitable glue or nail varnish.</p><p>Print all the parts, install a hotmelt insert using your preferred method. Install it from the top because the upper location of the thread is important and its more likely that you'll install it offset if you do it from the bottom. You don't need a very strong bond either, don't worry about it.</p><p>Put a drop of a suitable glue into the hex hole in the knob, then press the M5 bolt in. This is an interference or press fit, so you will need a hammer. If you print it in PETG, hammering stuff in should be fine. With PLA, it may shatter. Install a nut on the end of the thread so that it protrudes over the bolt slightly, to protect the threads. Don't hit it too hard, use only as much force as needed to tap it in gently. Take appropriate precautions against glue squirting out of it. When the bolt head is flush (or close), you can stop. It does not need to be flush, it's just a sign that it's inserted fully. </p><p>Install the ruler into the body - you may need a bit of force for this, especially if your printer is not particularly dimensionally accurate or if it overhangs the edges. mind the orientation - there are recesses for the scale on the body and the ruler that need to match up. If the lower edges are sharp, use a tool to smooth them. If there are overhangs or outliers, use a tool to get it in shape. You will probably need to work the ruler to and fro for a while to get it to slide smoothly. The tight fit is necessary to make sure that the forward edge of the tool always stays parallel with the front surface of the stop.</p><p>Put the washer on the bolt, then the slider (you may need to drill it out with a 5mm drill to make it fit), and screw the assembly into the thread through the slit in the ruler. Make sure that the square protrusion fits in the wider top part of the slit. Again, you will probably need to move the parts a bit until they move easily and smoothly.</p><p>Open the scale .svg file (e.g. with inkscape) and print it out. stick some clear adhesive tape that is wide enough to cover everything over the scale for protection. Don't make wrinkles. Then cut the scale out using the cut marks. Do it as exact as possible, particularly the bottom and top of the mm scale are important. Do not cut the vernier scale off yet.</p><p>Now make sure that the front edge of the ruler is flush with the body. Push both straight down onto a table and tighten the knob. If there are some irregularities on the surface, you can use a bit of sandpaper on a flat surface to plane it. Do not overdo it, and don't round the edges.</p><p>Put glue or nail varnish on the surfaces of the tool that should receive the scale (make sure you don't put any into the slot and glue your tool solid), align the front end of the scale with the front edge, and the lower edge against the edge of the recess in the ruler. Push on to make sure it sticks evenly, but don't push it out of position. Let it set a bit, just so you're sure it's not gonna move, and then use a ruler and a cutter to cut the vernier scale from the ruler scale. Make sure you cut straight with the top of the millimetre scale. Done.</p><p>If you do not know how vernier scales work, briefly: if the first line on the scale aligns with a millimetre marking, that's your value. If it does not, you look for the lines that align best with one of the millimetre markings. So if the first line is beyond 5 and the 6th line of the vernier scale aligns best, you have 5mm and add 0.6mm, which makes 5.6mm. If you want to set a sub-mm-value, align the appropriate line.</p><p>On the cover photo, the gauge is set to something above 12.1mm. You can also read sub-values here - if neither the 1st line nor the 2nd line align properly but are equally distant either side their respective near-match, you have a 0.05mm. However, expecting this level of precision from a plastic tool would be quite ridiculous.</p>
With this file you will be able to print Streichmass / marking gauge with your 3D printer. Click on the button and save the file on your computer to work, edit or customize your design. You can also find more 3D designs for printers on Streichmass / marking gauge.