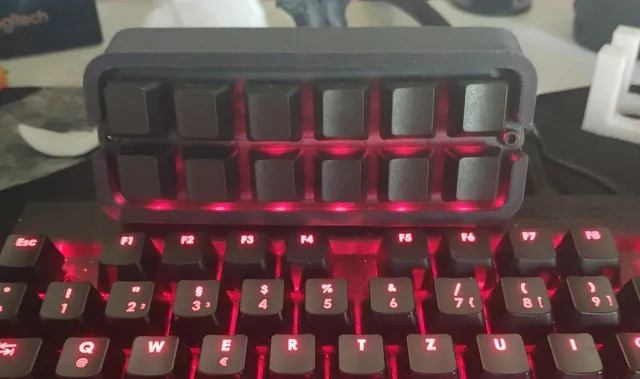
Streamdeck Cheap 12 Buttons
prusaprinters
This is a Remix of DaveM's Stream Cheap Mini Macro Keyboard. I made it bigger and Clampable to my Keyboard. I modified the Code a Bit and it Uses now the Keys F13-F24. 1.Print out both parts and tap the bolt holes in the base to fit an M3 bolt. 2.Insert the switches into the faceplate and wire them up. One post of each switch needs a signal wire, and all of the other posts are connected to ground. 3.Solder everything to the Arduino. The ground connection goes to "GND" and the signal wires go to pins 2 - 9 and 10, 14, 15, 16 . I numbered my buttons from left to right and top to bottom, but you can wire them in any order that you like. If you have the connectors, use those rather than making direct connections. 4.Bolt on the faceplate to the body. 5.Upload the firmware and enjoy! Here is a more detailed Plan on DaveM's Webside: https://www.partsnotincluded.com/electronics/diy-stream-deck-mini-macro-keyboard/ Required: 5V Arduino Pro Micro 12 Cherry MX Switches (I used Cherry MX Blue, I got them from Ebay) 12 Keycaps (dont have them yet, waiting for them from China :D ) 2 M3-10 Bolts 2 M3-35 Bolts (Leght can varie on the thickness of your Keyboard) 2 M3 Nuts You will also need a USB to micro USB cable, solder,Rubber so the Keyboard doesnt slide around and a piece of double-sided tape. Optional: 10 Pin Female Connector 4 Pin Female Connector 2X 12 Pin Male Connector, Right-Angle Print Settings Printer: TronXY X5s Rafts: No Supports: No Resolution: 0.4mm Infill: 5mm Filament: Pantona PLA + Carbon Category: 3D Printing
With this file you will be able to print Streamdeck Cheap 12 Buttons with your 3D printer. Click on the button and save the file on your computer to work, edit or customize your design. You can also find more 3D designs for printers on Streamdeck Cheap 12 Buttons.
