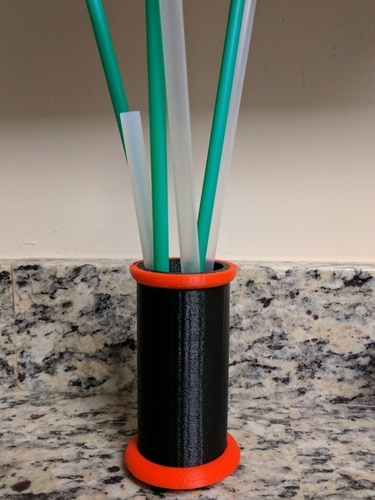
Straw Cup
pinshape
Newest Update: I had to wrestle those feet into submission. Essentially, I had to place each foot on a flat surface, line up the hole in the base while holding it parallel to the flat surface, lay the flat of my scraper across the top of it, place the palm of my hand onto the top of the scraper, and start applying pressure until it snapped into place. I went back and reviewed my file, thinking I needed to increase the tolerance for the feet, but, as it turned out, I had put zero tolerance into the redesign. I have revised the STL and uploaded it. Update 2: I fixed the issues with the feet. I haven't printed them yet, but I'll post pictures once I've got them. Probably tomorrow. Update 1: There's a slight problem with the feet for this design. Upon printing in a different material, the fit was so tight that one of the feet broke off. I am currently working on fixing this by creating wider legs that are less affected by the jerk of the extruder assembly. Just a small straw holder with feet and holes in the bottom for airflow (in case you wash straws, like the Tervis reusable straws). Fit: I had a failed cylinder, but I was able to use it to test the fit. The cylinder fits well, although, because of the failure, I had trim aberrations on the top of the cylinder to get the top rim to fit. Tolerances are .15 mm, so everything is snug. Inner diameter is 41 inches. Feet: I recommend printing the feet one at a time. It's only a few minutes, but it allows for a cleaner print on the small rod. I had to use a 2 mm allen wrench in the holes at the bottom of the base because of aberrations. Just stuck it in and rotated it. From there, I had to slowly twist the feet into the holes (also due to aberrations). It worked, but it was slow going. STL Files: I oriented the objects into the best orientation for printing. Print Size: 62 x 62 x 103 mm (based on largest sizes of any of the four parts) Questions? Let me know if you think I should make any changes. Specifically, I don't know if I like the airflow holes in the base. Not sure if I need a different design, maybe larger holes. Print Settings Printer: Anet A8 Rafts: No Supports: No Notes: Layer Height: 0.1 mm Wall Thickness / Top / Bottom: 0.8 mm Infill: 0% Print Speed: 60 mm/s Travel Speed: 120 mm/s You can probably get away with 0.2 mm Layer Height on everything but the feet.
With this file you will be able to print Straw Cup with your 3D printer. Click on the button and save the file on your computer to work, edit or customize your design. You can also find more 3D designs for printers on Straw Cup.
