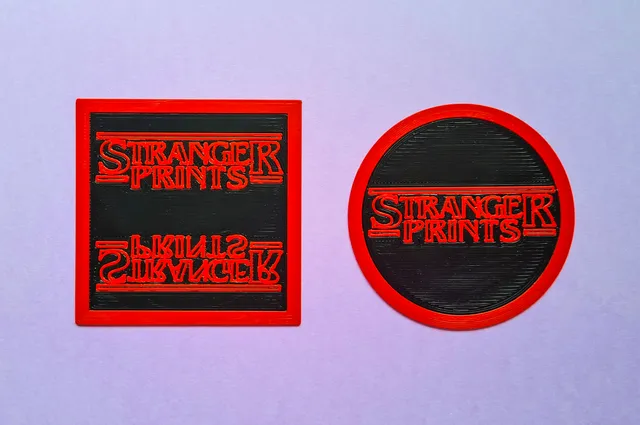
Stranger Prints coasters - no-MMU and customizable
prusaprinters
This is a product of my OpenSCAD name tag generator that also serves to show some more advanced tricks in action. All the required files are provided, and there's also a text file with the OpenSCAD preset settings, in case you want to modify it. To "load" the preset into your preset file, follow the instructions in the bundled "Using OpenSCAD customizer" PDF.Coasters have to be flush and flat, so without an MMU we need to use the Print-on-print technique, printing them Upside Down, which gives us... Stranger Prints. But they are pretty cool, and that's why we print!This will also show a workaround to one limitation of the name tag generator. If you're not interested in the techniques, just jump to the How to print section below.The limitation is this: the raised text allows creating text outlines by "adding" a negative (engraved) text with an offset which is less than the offset of the "main text". The difference in offsets is the thickness of the outline stroke. But this cannot be done with print-on-print texts, as they are solid and there is no way to do an "engraved print-on-print". It's like the frame, that cannot be used as print-on-print. Or... can they?How it is madeThe trick is to use some bit of PrusaSlicer magic (which works in other slicers, too) combined with two features of the OpenSCAD file: the offset parameter, and the different types of objects (modifiers, inserts…) that it can generate.The fastest and neatest way probably would be working in Inkscape a file with all that we want, export it as SVG and having it all in one go. But that would be a bit like "cheating", isn't it? Maybe we want to use specifically the text elements. Also, retouching would be slow, and importing holes and outlines from SVG to OpenSCAD is a bit tricky, as they need to be done in a continuous stroke, not by difference. Indeed, this technique here will work too for SVG import outlines, so here we go.We'll use as example the round coaster, a circle of 80 mm diameter total, with a 5mm thick margin that will be print-on-print, too. So, the main area will be 70x70, will all corners rounded with a radius of 35mm, and a frame of 5mm per side, with all corners rounded with a radius of 40mm. First, we need to make several models like this:First, we'll make our parody-homage "Stranger Things" logo in full solid and raised text for better display (we'll change it to POP before rendering the object). The Stranger Things logo has some quirks, which we won't reproduce fully (for instance, it cuts a side of the Gs). We'll do a "weird little trick" to make the capitals S and R, which are bigger than the rest of "Stranger". We make one text field with "trange", and another with "S R"; that is, the initial S and final R, with spaces for "trange" in between. Now we adjust the spacing of "trange" so it's similar to that very close kerning in the logo, and adjust the scale, spacing and Y position of the "SR" text so it's flush with the above.Now we add and adjust the "PRINTS" text. We'll be ignoring that the first letter in the original logo seems to be a capital, slightly taller -the effect is so minimal that is not worth the effort to keep.Last texts will be the lines. Another neat trick is to use the m-dash or long dash — (Alt+0151 in the numpad if you're using Windows); several together for the top line, and two spaced apart for the two inferior lines. We adjust y-scale, x-scale, sizing, spacing and positions until we like the result.Now we set all texts to print-on-print, instead of raised, and save the preset. We can export now the STL with all the texts, and the STL with the main tag, too (in the "Main Parameters" panel, combo box "Object type", select "All inserts for print-on-print" and "Name tag", respectively; remember to hit F6 for render, then export the STL).Pause for a brief reminder. I do the print-on-print inserts 0.4mm tall, and the negatives having a 0.2mm x/y clearance, and 0.1mm z clearance. 0.4mm makes for 2/3 layers at usual layer heights, which is usually enough to bring up the filament color, and not enough to cause problems with the default value for z-hop. The 0.2mm clearance in X/Y helps avoid smearing, and allows for clean borders; and the 0.1mm z clearance ensures that the top is well fixed to the next layer, whilst makes less possible a collision with the nozzle and the little bits left after retractions and finishing extrusions; and a collision could potentially lead to the insert being dragged apart from the bed, which is something to definitely avoid.So, armed with this knowledge and the saved preset, we modify the offsets of all texts and subtract of them the stroke width we want for the outline (preferably an integer number of extrusions). So, if we have a 0.000 offset for all texts and want a stroke width of 0.6 (as in a 0.6 nozzle, a thin extrusion), we'll set all them to -0.600. And so on. Now we render "All inserts for print-on-print", and save the STL as something like "SP inserts negative volume.stl".Now, the outlined inserts will have also something "inside" them, an insert-in-an-insert. (If not, they wouldn't be "outlines", would they?). We could leave these alone, and let the bridging from the main piece fill in the blanks, but that may not look good enough. So we will make these other inserts. Just decrease the offsets of all texts by 0.2, the XY clearance we talked about; so if they were -0.6, leave them at -0.8. Render "All inserts for print-on-print" and save as "SP inserts inside.stl".Time to work on the frame. Now, reset the preset and leave it as normal. We'll start by decreasing the main area width and depth by 0.4 (again, the XY clearance, this time doubled because affects all four sides, the two opposite pairs), and the main area radii by 0.2 (clearance for one side only). Increase all sides and corners of the frame by 0.2, and leave its height to 0.5 (this for the Z clearance). Render the "Frame modifier" setting the "modifier type" parameter to "Full element height modifier" or "Full height from base modifier" (in the case of the frame, these two are identical). Render and save as "SP frame negative volume.stl".Last piece is the frame insert. Reset the preset to undo all these changes. Now set the height of the frame to 0.4 (insert height) and render again the "Frame modifier" as "Full element height modifier", and save as "SP frame insert.stl".Now we have all the STL files we need. Next step is preparing to print in the slicer and, as you may already have guessed, we'll be using negative volume modifiers to make the cuts that aren't automatically generated: the ones for the text outline and the print-on-print frame.So, we load into the slicer the main tag, the outlined text inserts, the frame insert and the text insert insides, and leave for now the two negative volumes (frame and text insert). We make sure that they are all in the same coordinates (the inserts have “centering fillets” so all centers match). Now we select the main tag, and load the frame negative modifier, making sure it's at 0, 0 and dropped to bed. We do the same with the outline text inserts and the negative text modifiers (and now they will be really outlined!). Now we have all elements loaded, and ready to slice and print.How to printIf you've read all of the above, you'll already know that there is a bit of modifying to do (and possibly done it). If not, don't worry, as the .3mf files have all the modifiers set and objects ready.We'll have to be a bit careful to avoid the Print Flayer messing with our coasters and turning them to spaghetti. But the print-on-print technique allows us to easily make different settings for each part or set of parts, which works to our advantage. We will select each printing batch using the “Printable” button in PrusaSlicer (the “eye” icon in the list of objects), and we can save a 3mf with the settings for each batch for later use.First, the outline texts and frame should be printed in red. The outline texts will likely require a bit of tweaking in the print settings, like changing the extrusion width for first layers and all perimeters, or maybe just detecting thin walls; check out the preview and see how it works. Pay special attention to the first layer, as the Elephant foot correction might leave the first layer unusable (all outlines should be seen in the preview!); if that happens, either increase the first layer extrusion width or change the Elephant foot correction. The frame, printing-wise, is quite robust and usually will take any parameters that work for the outline texts. Slice, print and remove skirt and purge line, and cut any stringing residue left.Next, surely the text insides will need to be printed separately, too; this time, in black. These are much like the outline texts (thin and tricky) so the tricks you've used for the outlines will likely work for these. Take the same precautions as with the outlines (first layer, etc.)The main tag is the easiest part to print. There are only two things that might cause issues. First is the skirt; double-check that it's not printed in the space reserved for the frame, that is, that the skirt extends beyond the maximum size of the tag (you must be able to see it from above). The second possible troublemaker is the space between letters; check that there are no holes, and adjust fill angle, or extrusion widths, or detect thin walls, etc., to fix any; don't rely much on bridging, as it will be too high to show in the first layer (which will be the “up” side).You can get results good enough with a 0.6 nozzle (those in the pictures are using a 0.6), but if you're using a 0.4 or thinner you'll surely get better results than mine!Last but not least, the coasters are deliberately thin; you can increase their thickness easily in PrusaSlicer by choosing “Add Part” to the tag and use either a box or a cylinder (depending on the coaster you're making) adjusted to the known size and desired thickness.Happy printing… and don't let Vecnozzle get you!
With this file you will be able to print Stranger Prints coasters - no-MMU and customizable with your 3D printer. Click on the button and save the file on your computer to work, edit or customize your design. You can also find more 3D designs for printers on Stranger Prints coasters - no-MMU and customizable.