Stereo photography
thingiverse
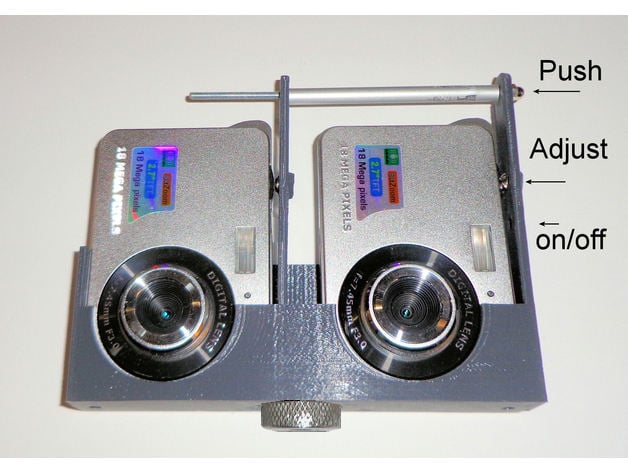
Stereo Photography Make low-cost stereo picture pairs by combining two digital compact cameras with a lens distance of about 6.5 cm, roughly the average human eye distance. To use two compact cameras, space them at least 6.5 cm apart, though a larger gap enhances three-dimensional effect. Two shutters are synchronized simultaneously using adjustable M3 screws. For tripod use, attach a nut with camera thread; you can find one at your local photo shop. The viewing angles of the cameras cannot be adjusted for stability and shutter synchronization in close-up shots, resulting in smaller effective image sizes. Connect the shutter release strips to enable on/off switching without removing cameras from their holder. A small opening allows switching while keeping the cameras inside. Remove the spacer to access menu settings; simply slip them back into place when ready to shoot. Watching Stereo Pictures Use an iPhone with VR glasses for a more immersive experience. Print stereo pictures side by side, left and right images on each respective side, then view through a stereo viewer. Alternatively, print the left image on the right side and vice versa, cross your eyes to focus on the middle image (refer to attached 3D photograph of a rabbit). If you fail to see the 3D effect, slowly move one ear towards your shoulder. This setup is designed for two low-cost digital cameras, but even with poor quality images, an interesting three-dimensional effect remains present (printed animals). Since OpenSCAD design files are included, this Thing can be adapted to fit different compact camera models.
With this file you will be able to print Stereo photography with your 3D printer. Click on the button and save the file on your computer to work, edit or customize your design. You can also find more 3D designs for printers on Stereo photography.
