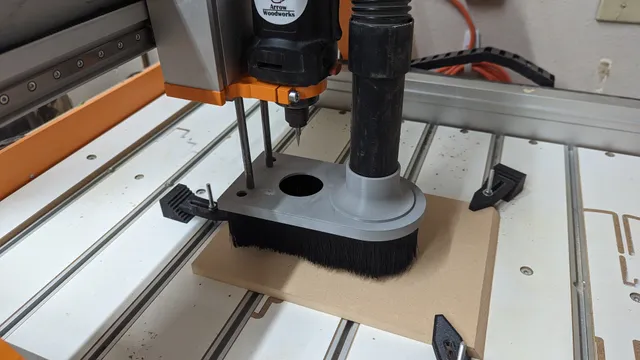
Stepcraft M Series Magnetic Retractable Dust Boot
prusaprinters
Stepcraft has stopped selling their dust boot... so I made my own.Same magnetic lock and retraction features as the stock model. Sorry in advance for the mix of metric and imperial units but I am an American so buying metric is hard sometimes.Additional BOM:2 - 8mm x 30cm rods, machined and tapped to an M6 thread on one end2 - M6 nuts.5 - 1/16" deep x 3/16" dia. magnetseither a bit of scrap iron/steel or another large magnet to glue to the dust boot itself.2ft - 1/8" x 2" brushRough Assembly Steps:Remove the Z axis using the 4 mounting bolts.Unscrew the two pan head screws closest to the spindle.Glue the smaller magnets into the magnet mount and attach it to the Z axis frame using the pan head screws.Fit the brush into the slot on the bottom of the dust boot.Insert the threaded rod into the 6mm holes of the dust boot. And tighten with the M6 nuts.Glue magnet or scrap metal to the top of dust boot to line up with the magnet mount.Attach the dust boot to the Z axis by sliding the rods into to corresponding 8mm holes.Re-attach the Z axis to the machine.Glue on the Hose connection. – Note: this was designed for my hose, your mileage may vary.Mcmaster Carr Linkshttps://www.mcmaster.com/catalog/128/1475 – Brusheshttps://www.mcmaster.com/catalog/128/4104 – Rodhttps://www.mcmaster.com/catalog/128/3833 - Magnets Other Notes: If you have any questions regarding how to assemble or need the 8mm rod machined/tapped, feel free to message me on Instagram @arrowmakes
With this file you will be able to print Stepcraft M Series Magnetic Retractable Dust Boot with your 3D printer. Click on the button and save the file on your computer to work, edit or customize your design. You can also find more 3D designs for printers on Stepcraft M Series Magnetic Retractable Dust Boot.
